Author: furqan569021@gmail.com

  • Gig Economy Guide: Maximize Earnings from Uber, Door Dash & More

    Gig Economy Guide: Maximize Earnings from Uber, Door Dash & More

    Table of Contents

    1. Introduction
    2. What is the Gig Economy?
    3. The Gig Economy Landscape in 2025
    4. How Much Can You Really Make?
    5. Rideshare Platforms: Uber & Lyft
    6. Food Delivery: DoorDash, Uber Eats, Grubhub
    7. Grocery Delivery: Instacart & Shipt
    8. Package Delivery: Amazon Flex & Others
    9. Task-Based Gigs: TaskRabbit & Handy
    10. The Multi-App Strategy
    11. Maximizing Your Hourly Rate
    12. Tax Strategies for Gig Workers
    13. Vehicle Maintenance & Expenses
    14. Staying Safe in the Gig Economy
    15. Avoiding Common Gig Worker Mistakes
    16. Success Stories & Earnings Breakdowns
    17. Is the Gig Economy Right for You?
    18. Frequently Asked Questions
    19. Conclusion

    Introduction {#introduction}

    The gig economy promised freedom: work when you want, be your own boss, make good money on your schedule. For millions of Americans, it’s delivered—but not without knowing the strategies that separate those making minimum wage from those earning $25-40/hour.

    The reality of gig work in 2025:

    • 36% of U.S. workers participate in the gig economy (Pew Research)
    • Median gig worker earnings: $500-$2,000/month part-time
    • Top earners: $4,000-$8,000/month working smart, not just hard
    • The difference between struggling and thriving: strategy

    Here’s what most new gig workers get wrong:

    • Running one app only (leaving money on the table)
    • Not tracking mileage and expenses (paying too much tax)
    • Accepting every order (killing their hourly rate)
    • Ignoring peak times (working when earnings are lowest)
    • Poor vehicle maintenance (expensive breakdowns)

    The brutal truth: If you just turn on DoorDash and accept whatever comes, you’ll make $12-15/hour. But if you implement the strategies in this guide, you can consistently make $25-40/hour doing the same work.

    In this comprehensive guide, you’ll learn:

    How to choose the right gig platforms for your situation, maximize earnings through multi-apping, identify the most profitable hours and zones, minimize expenses and taxes, protect yourself and your vehicle, and build sustainable gig income.

    Whether you’re supplementing income with 10 hours/week or going full-time at 40+ hours, this guide gives you the blueprint to maximize every hour you work.

    Let’s turn your gig work into serious income.


    What is the Gig Economy? {#what-is}

    The gig economy refers to a labor market characterized by short-term contracts, freelance work, and temporary positions rather than permanent jobs. In the context of app-based work, it means earning money through on-demand platforms that connect workers with customers.

    Key Characteristics

    1. Flexibility
    Work when you want, where you want, for as long or short as you want.

    2. Independent Contractor Status
    You’re self-employed, not an employee (important tax implications).

    3. App-Based
    All work comes through smartphone applications.

    4. Immediate Payment
    Many platforms offer instant or daily cash-out options.

    5. No Boss
    You accept or decline work at your discretion.

    Gig Work vs. Traditional Employment

    Aspect Traditional Job Gig Work
    Schedule Fixed by employer You choose
    Income Predictable salary/hourly Variable by effort
    Benefits Health, 401k, PTO None (you provide)
    Taxes W-2, withheld 1099, quarterly estimated
    Job Security Can be laid off Always available work
    Equipment Employer provides You provide (car, phone)
    Boss Yes No
    Location Usually fixed You choose

    Types of Gig Work

    Transportation
    Moving people from point A to point B

    Delivery
    Moving items from businesses to customers

    Tasks/Services
    Completing specific jobs or projects

    Specialized
    Using professional skills on-demand


    The Gig Economy Landscape in 2025 {#landscape}

    Understanding the current market helps you choose the right platforms and strategies.

    Market Size & Growth

    By the numbers:

    • 78 million Americans have done gig work
    • 36% of workers participate in gig economy currently
    • Gig economy generated $455 billion in 2024
    • Expected to reach $600 billion by 2027
    • 16% annual growth rate

    Post-pandemic shifts:

    • Delivery surged 300% during 2020-2021
    • Stabilized but remains 140% above pre-pandemic levels
    • Hybrid model common (gig + traditional job)

    Major Platform Categories

    Rideshare (People)

    • Uber
    • Lyft

    Food Delivery

    • DoorDash (market leader, 59% market share)
    • Uber Eats (24% market share)
    • Grubhub (11% market share)
    • Postmates (owned by Uber Eats)

    Grocery Delivery

    • Instacart
    • Shipt
    • Amazon Fresh

    Package Delivery

    • Amazon Flex
    • Roadie
    • GoShare

    Task Services

    • TaskRabbit
    • Handy
    • Thumbtack

    Platform Market Share (2025)

    Food delivery:

    1. DoorDash: 59%
    2. Uber Eats: 24%
    3. Grubhub: 11%
    4. Other: 6%

    Rideshare:

    1. Uber: 74%
    2. Lyft: 26%

    This matters: More market share = more orders = less waiting

    Current Trends

    What’s hot:

    Grocery delivery demand

    • Aging population wants delivery
    • Busy professionals value time
    • Higher tips than food delivery
    • Less competitive than food delivery currently

    Multi-aping becoming standard

    • Running 2-3 apps simultaneously
    • Accept best offer
    • Maximize earnings per hour

    Electric vehicles

    • Gas savings significant
    • Lower maintenance
    • Some platforms offer EV incentives

    Specialized delivery

    • Medical supplies
    • Cannabis (legal states)
    • Alcohol delivery
    • Premium earnings

    What’s declining:

    Pure rideshare without delivery

    • Insurance costs rising
    • Wear and tear high
    • Most drivers also do delivery now

    Low-tip acceptance

    • Customers who don’t tip wait longer
    • Drivers selective about orders
    • Platforms adjusting algorithms

    Economic Factors Affecting Gig Work

    Positive for gig workers:

    Inflation

    • Delivery fees increased (higher earnings)
    • People still ordering (demand steady)
    • Less price-sensitive on convenience

    Labor shortage

    • Fewer drivers = more demand
    • Higher per-order pay
    • Better promotions/bonuses

    Gas price stabilization

    • Not as volatile as 2022
    • Predictable expense planning

    Challenges for gig workers:

    Increased competition

    • More people need extra income
    • More drivers on platforms
    • Have to be strategic about when/where

    Platform fee changes

    • Some platforms increasing fees
    • Cuts into earnings
    • Need to be selective

    Vehicle costs

    • Cars expensive (new and used)
    • Maintenance costs up
    • Makes vehicle choice critical

    Regulatory Environment

    Independent contractor status:

    • Ongoing legal battles (Prop 22 in California)
    • Some states considering employee classification
    • Would change gig economy dramatically

    Current status (most states):

    • Gig workers are independent contractors
    • No minimum wage guarantee
    • No benefits required
    • Flexibility maintained

    What this means for you:

    • Understand you’re self-employed
    • Plan for taxes, insurance, retirement yourself
    • Flexibility is trade-off for benefits

    How Much Can You Really Make? {#earnings}

    Let’s cut through the marketing hype and look at real earnings data.

    Average Earnings by Platform (2025)

    Per-hour estimates (before expenses):

    Rideshare:

    • Uber: $18-35/hour
    • Lyft: $17-32/hour
    • Varies dramatically by market and time

    Food Delivery:

    • DoorDash: $15-28/hour
    • Uber Eats: $14-26/hour
    • Grubhub: $13-25/hour

    Grocery Delivery:

    • Instacart: $15-30/hour
    • Shipt: $14-28/hour

    Package Delivery:

    • Amazon Flex: $18-25/hour (fixed rate blocks)

    Task Services:

    • TaskRabbit: $20-50/hour (skill-dependent)
    • Handy: $15-35/hour

    Important: These are BEFORE expenses (gas, maintenance, taxes)

    The Real Hourly Rate Formula

    What platforms show you: Gross earnings per hour

    What actually matters: Net earnings after expenses

    True hourly rate calculation:

    Gross earnings – Gas – Maintenance – Depreciation – Taxes = Net hourly rate

    Example: Door Dash

    Gross: $25/hour × 4 hours = $100
    Gas: (60 miles × $0.15/mile) = -$9
    Maintenance: ($0.10/mile × 60) = -$6
    Depreciation: ($0.15/mile × 60) = -$9
    Total expenses: -$24
    Net before tax: $76 ($19/hour)
    Taxes (25%): -$19
    Net after tax: $57 ($14.25/hour)

    Your true rate is often 40-50% less than gross.

    Earnings by Experience Level

    New gig worker (Month 1-3):

    • Learning routes, apps, strategies
    • Accepting too many low offers
    • Poor time/zone choices
    • Average: $12-18/hour net

    Intermediate (Month 4-12):

    • Understanding peak times
    • More selective on orders
    • Better navigation
    • Average: $16-24/hour net

    Experienced (Year 2+):

    • Multi-apping mastered
    • Zone optimization
    • Expense minimization
    • Average: $20-35/hour net

    The difference between beginner and expert: strategy, not just time.

    Part-Time vs. Full-Time Earnings

    Part-time (10-15 hours/week):

    • Focus on peak hours only
    • Can be more selective
    • Higher per-hour rate
    • $800-1,800/month typical

    Full-time (40+ hours/week):

    • Must work some slower periods
    • More total income but lower per-hour
    • Expenses higher
    • $3,000-6,000/month typical

    Market Variation

    Earnings vary dramatically by location:

    High-earning markets:

    • New York City: $25-40/hour possible
    • San Francisco: $25-38/hour
    • Los Angeles: $22-35/hour
    • Chicago: $20-32/hour
    • Miami: $20-30/hour

    Medium markets:

    • Denver: $18-28/hour
    • Austin: $18-26/hour
    • Seattle: $20-30/hour
    • Phoenix: $16-25/hour

    Lower markets:

    • Small cities/rural: $12-20/hour
    • Less density = more driving
    • Fewer orders
    • Lower tips

    Your zip code matters more than platform choice.

    Peak vs. Off-Peak Earnings

    Peak times (2-3x normal rate):

    • Lunch: 11:30am-1:30pm
    • Dinner: 5:30pm-8:30pm
    • Weekend nights: 6pm-11pm
    • Special events (sports, concerts)
    • Bad weather (rain, snow)

    Off-peak (50-70% normal rate):

    • Mid-morning: 9am-11am
    • Mid-afternoon: 2pm-5pm
    • Late night after 10pm
    • Monday-Tuesday generally slower

    Example earnings difference:

    Tuesday 10am-12pm (off-peak):

    • 4 deliveries × $6 average = $24
    • $12/hour

    Friday 6pm-8pm (peak):

    • 7 deliveries × $9 average = $63
    • $31.50/hour

    Smart workers focus on peak hours only if part-time.

    Realistic Monthly Earnings Scenarios

    Scenario 1: College student, part-time

    • 12 hours/week (peak hours only)
    • $24/hour average (gross)
    • 48 hours/month × $24 = $1,152
    • After expenses (~30%): $806/month

    Scenario 2: Side hustle, evenings/weekends

    • 20 hours/week (mostly peak)
    • $22/hour average
    • 80 hours/month × $22 = $1,760
    • After expenses: $1,232/month

    Scenario 3: Full-time gig worker

    • 40 hours/week (mix of peak and slow)
    • $20/hour average
    • 160 hours/month × $20 = $3,200
    • After expenses: $2,240/month

    Scenario 4: Full-time multi-apper (optimized)

    • 45 hours/week (strategic)
    • $28/hour average (multi-app strategy)
    • 180 hours/month × $28 = $5,040
    • After expenses: $3,528/month

    Income Consistency

    The feast or famine reality:

    • Great week: $1,200
    • Average week: $800
    • Slow week: $500
    • Must budget for variability

    Factors affecting weekly income:

    • Weather (rain = more orders, snow = fewer)
    • Events in your city
    • Holidays (Christmas busy, July 4 slow)
    • Competition (school breaks = more drivers)
    • Platform promotions and bonuses

    Smart gig workers:

    • Track income daily
    • Identify patterns
    • Plan for slow periods
    • Build financial buffer

    Rideshare Platforms: Uber & Lyft {#rideshare}

    Detailed breakdown of maximizing rideshare earnings.

    Platform Overview

    Uber

    • Market leader (74% market share)
    • More ride requests
    • Better surge pricing
    • Uber Comfort, Uber XL, Uber Black options

    Lyft

    • 26% market share
    • Generally friendlier brand image
    • Power zones (similar to surge)
    • Lyft Lux, Lyft XL options

    Most drivers run both simultaneously

    Requirements

    Vehicle requirements:

    • 15 years old or newer (varies by market)
    • 4-door sedan, SUV, or minivan
    • Pass vehicle inspection
    • Insurance and registration current

    Driver requirements:

    • 21+ years old (most markets)
    • Valid driver’s license (1+ years)
    • Clean driving record
    • Pass background check
    • No DUIs, felonies

    Insurance:

    • Personal auto insurance
    • Rideshare endorsement recommended
    • Platforms provide coverage during rides

    How Rideshare Pay Works

    Base components:

    1. Base fare: $1-3 (varies by market)
    2. Time rate: $0.15-0.40 per minute
    3. Distance rate: $0.70-1.50 per mile
    4. Surge/Prime time: 1.2x to 5x multiplier during high demand
    5. Tips: Customer discretion (20-30% tip)

    Example ride:

    • 12-minute ride
    • 6 miles
    • Normal pricing
    • Base: $2.00
    • Time: 12 min × $0.25 = $3.00
    • Distance: 6 mi × $1.00 = $6.00
    • Total: $11.00
    • Customer tips $3
    • Total payout: $14.00

    Uber/Lyft take 25-30% commission

    Surge Pricing Strategy

    What causes surge:

    • High demand, low driver supply
    • Events ending (concerts, sports)
    • Airport rushes
    • Bad weather
    • Weekend nights
    • Holiday periods

    How to maximize surge:

    1. Position strategically

    • Near event venues 30 min before end
    • Downtown on weekend nights
    • Airports during peak arrival times

    2. Wait for surge

    • Don’t accept ride just before surge hits
    • Turn off app, wait 5 minutes
    • Surge often develops

    3. Avoid surge traps

    • Surge at stadium = traffic nightmare
    • May not be worth time
    • Calculate actual earnings per hour

    4. Chase persistent surge, not temporary

    • Temporary (5 min): Usually dissipates before arrival
    • Persistent (30+ min): Worth positioning for

    Peak Times for Rideshare

    Best earning times:

    Weekend nights (highest earnings):

    • Friday 7pm-3am
    • Saturday 7pm-4am
    • Surge common, longer rides, tips

    Weekday commutes:

    • Morning: 6:30am-9:30am
    • Evening: 4:30pm-7:30pm
    • Predictable, shorter rides

    Airport runs:

    • Morning flights: 4am-8am
    • Afternoon arrivals: 2pm-6pm
    • Long rides, good fares

    Special events:

    • Concerts (arrive 30 min before end)
    • Sports games (position strategically)
    • Festivals
    • Conference centers

    Avoid:

    • Tuesday-Wednesday mid-day (dead)
    • Sunday daytime (slow)
    • 2am-5am except weekend nights (too slow)

    Vehicle Optimization

    Best vehicles for rideshare:

    Fuel efficiency (priority):

    • Toyota Prius (50 mpg) – most popular
    • Honda Civic (35 mpg)
    • Toyota Camry Hybrid (50 mpg)
    • Nissan Leaf (electric, no gas costs)

    Higher-tier (Uber Comfort, XL):

    • Toyota Highlander
    • Honda Pilot
    • Tesla Model 3 (electric + premium)

    The math:

    • Gas costs are largest expense
    • 40 mpg vs. 25 mpg = $200-400/month savings
    • Over 1 year = $2,400-4,800 savings

    Vehicle cleanliness critical:

    • Clean interior = better ratings
    • Better ratings = more ride requests
    • Vacuum daily
    • No smoking
    • Air freshener
    • Wipe surfaces

    Maximizing Tips

    Strategies that work:

    1. Great first impression

    • Greeting: “Hi [name], heading to [destination]?”
    • Confirm route preference
    • Offer water/gum

    2. Temperature and music

    • Ask preference
    • “Temperature okay? Music okay or would you prefer quiet?”

    3. Phone chargers

    • Provide Lightning and USB-C cables
    • Passengers appreciate this

    4. Conversation calibration

    • Read passenger cues
    • Some want to chat, some want silence
    • Don’t force conversation

    5. Smooth driving

    • No hard braking
    • Take turns gently
    • Avoid potholes

    6. Route communication

    • “I’ll take [route], should get us there in [time]”
    • Use GPS but know area

    Tip rate impact:

    • Poor service: 10-15% tip rate
    • Good service: 25-35% tip rate
    • Excellent service: 40-50% tip rate

    On 30 rides/day, 10% tip rate difference = $15-30 extra daily

    Safety Tips

    Passenger safety:

    • Verify passenger name before starting trip
    • End trip only after passenger exits safely
    • Trust your instincts (cancel if uncomfortable)
    • Keep doors locked until passenger verified

    Personal safety:

    • Don’t share personal information
    • Dashcam recommended (front and interior)
    • Keep pepper spray accessible
    • Drive in well-lit areas when possible
    • Report inappropriate behavior immediately

    Platform safety features:

    • Share ride status with trusted contacts
    • Emergency button in app
    • Two-way ratings (you rate passengers too)

    Realistic Earnings

    Part-time (15 hours/week, peak times only):

    • $23/hour average (including surge and tips)
    • 60 hours/month × $23 = $1,380
    • Expenses (gas, maintenance): -$345 (25%)
    • Net: $1,035/month

    Full-time (40 hours/week, strategic hours):

    • $21/hour average (mix of peak and normal)
    • 160 hours/month × $21 = $3,360
    • Expenses: -$1,008 (30%)
    • Net: $2,352/month

    Full-time optimized (45 hours/week, peak focused + multi-app):

    • $26/hour average
    • 180 hours/month × $26 = $4,680
    • Expenses: -$1,404 (30%)
    • Net: $3,276/month

    Pros & Cons

    Pros:

    • Highest per-ride earnings (vs. delivery)
    • Tips often generous
    • Meet interesting people
    • Can be social/fun
    • Good for extroverts

    Cons:

    • Wear and tear on vehicle highest
    • Passengers occasionally difficult
    • Late night = drunk passengers
    • Insurance costs high
    • Safety concerns
    • Cleaning maintenance constant

    When to Choose Rideshare

    Good fit:

    • You enjoy people interaction
    • You have fuel-efficient vehicle
    • You’re comfortable driving at night
    • Your market has good demand
    • You can handle occasional difficult passengers

    Not ideal:

    • You’re introverted (delivery better)
    • You have gas-guzzler vehicle
    • You’re uncomfortable with strangers in car
    • You want completely solo work

    Food Delivery: DoorDash, Uber Eats, Grubhub {#food-delivery}

    The most popular gig work category. Detailed optimization strategies.

    Platform Comparison

    DoorDash (59% market share)

    Strengths:

    • Most orders (largest customer base)
    • Best zone coverage
    • Top Dasher program (priority access)
    • Transparent pay model

    Weaknesses:

    • Oversaturated in some markets
    • Lower base pay recently
    • Acceptance rate pressure

    Pay structure:

    • Base pay: $2-10 (distance/desirability)
    • Tips: Customer sets (shown upfront)
    • Peak pay: +$1-5 during busy times
    • Average: $6-9 per delivery

    Uber Eats (24% market share)

    Strengths:

    • Can combine with Uber rideshare
    • Good in urban markets
    • Upfront pricing shown
    • Premium customers (higher tips)

    Weaknesses:

    • Fewer orders than DoorDash in most markets
    • Takes 25% of tip (included in total shown)
    • Less peak pay

    Pay structure:

    • Base + trip supplement + tip
    • Average: $5-8 per delivery
    • Less transparent than DoorDash

    Grubhub (11% market share)

    Strengths:

    • Used to pay best (declining now)
    • Still good in some markets
    • Scheduled blocks (guaranteed hourly minimum in some areas)
    • Partnership with Amazon (trying to increase market share)

    Weaknesses:

    • Fewest orders
    • Market share declining
    • Not available everywhere

    Pay structure:

    • Base + mileage + time + tip
    • Average: $5-8 per delivery
    • Varies widely by market

    The Order Acceptance Strategy

    The most critical decision: which orders to accept

    Never accept blindly. Every order should meet minimum criteria.

    Minimum Acceptance Criteria

    The $1.50-2 per mile rule:

    • Order pays $6, distance 4 miles = $1.50/mile
    • Order pays $8, distance 4 miles = $2.00/mile

    Accept: Orders $2+/mile
    Decline: Orders under $1.50/mile (usually)

    Why:

    • You drive TO restaurant + TO customer
    • 4-mile delivery = 8 miles total (back to zone)
    • Must factor round-trip

    Example analysis:

    Bad order:

    • Pay: $6
    • Miles: 7
    • Per mile: $0.86
    • Time: 25 minutes with return
    • Hourly: $14.40 – DECLINE

    Good order:

    • Pay: $12
    • Miles: 4
    • Per mile: $3.00
    • Time: 18 minutes with return
    • Hourly: $40 – ACCEPT

    Peak Pay Strategy

    What is peak pay:

    • Extra $1-5 per delivery during high demand
    • Usually dinner rush, bad weather
    • DoorDash shows peak pay zones on map

    Peak pay appears:

    • Dinner rush: +$1-3
    • Late night weekend: +$2-4
    • Severe weather: +$3-6
    • Super Bowl Sunday: +$4-7

    Strategy:

    1. Don’t log on until peak pay starts
    2. Position in peak pay zone before it starts
    3. Stay online entire peak period
    4. Decline non-peak-pay orders to stay in zone

    Example:

    • Normal: $7 average per delivery
    • With $3 peak pay: $10 average per delivery
    • 5 deliveries/hour × $3 = $15 extra/hour
    • 4 hours peak = $60 extra

    Multi-Apping Food Delivery

    Running multiple apps simultaneously = highest earnings

    The strategy:

    1. Turn on DoorDash, Uber Eats, and Grubhub
    2. Accept best order from any platform
    3. Pause other apps while delivering
    4. Complete delivery
    5. Unpause all apps
    6. Accept next best order

    Benefits:

    • Cherry-pick best orders across all platforms
    • Less waiting between orders
    • Higher acceptance standard (can decline more)
    • 30-50% higher earnings than single app

    Example hourly comparison:

    DoorDash only:

    • Wait for orders: 15 minutes
    • 3 deliveries per hour
    • Average $7 each
    • $21/hour

    Multi-app (DD + UE + GH):

    • Minimal waiting (always an order available)
    • 4-5 deliveries per hour (accept only good ones)
    • Average $9 each (higher standard)
    • $36-45/hour

    The difference: $15-24/hour more

    Advanced Multi-App Tactics

    Stacking orders (careful):

    • Accept order from DoorDash
    • If Uber Eats offers order in same direction, accept
    • Deliver both
    • ONLY if: Same direction, both customers get hot food

    Zone positioning:

    • Identify overlap zones (all 3 apps busy)
    • Position there during peak
    • Maximum order flow

    Time-based app switching:

    • Lunch: DoorDash usually busiest
    • Dinner: Uber Eats picks up
    • Late night: Grubhub sometimes best
    • Learn your market patterns

    Restaurant Selection

    The hidden time-killer: restaurant wait time

    Fast restaurants (always ready):

    • Chipotle (usually ready)
    • Chick-fil-A (efficient)
    • McDonald’s (fast)
    • Chain restaurants with dedicated pickup areas

    Slow restaurants (avoid):

    • Local restaurants (inconsistent)
    • Fancy sit-down places (slow)
    • Restaurants always backed up
    • Any restaurant making you wait 10+ min regularly

    Build mental blacklist:

    • Track which restaurants waste your time
    • Decline their orders
    • Your time = your money

    The 5-minute rule:

    • If waiting longer than 5 minutes, unpause other apps
    • Accept another order if good one comes
    • Or unassign original order (impact acceptance rate)

    Hotspot Strategy

    What are hotspots:

    • Areas app shows high order demand
    • Red/busy zones on map

    Truth about hotspots:

    • Somewhat accurate
    • But also where app sends drivers to spread them out

    Better strategy:

    • Find your own hotspots through experience
    • Near cluster of popular restaurants
    • High-income neighborhoods (better tips)
    • Business districts during lunch

    Example personal hotspot:

    • 1-mile radius with 15 restaurants
    • Wealthy neighborhood nearby
    • Orders constantly available
    • Average $8-11 per delivery

    Peak Time Optimization

    Best food delivery times:

    Lunch rush (11am-1:30pm):

    • Office orders (weekdays)
    • Quick turnaround
    • $15-25/hour

    Dinner rush (5pm-9pm):

    • Highest volume
    • Best tips
    • Peak pay common
    • $25-40/hour possible

    Late night (9pm-12am, weekend):

    • Still decent demand
    • Peak pay often
    • Less traffic
    • $18-28/hour

    Avoid:

    • 2pm-5pm (dead zone)
    • After midnight (not worth it usually)
    • Sunday-Monday (slowest)

    Weather Opportunities

    Bad weather = high earnings:

    Rain:

    • Fewer drivers
    • More customers ordering
    • Peak pay +$1-3
    • Tips often higher

    Snow/ice:

    • Peak pay +$3-6
    • Far fewer drivers
    • Demand very high
    • Can make $40-60/hour
    • Safety risk – drive carefully or skip

    Heat waves:

    • More delivery orders
    • Moderate peak pay
    • Keep water, AC running

    Strategy:

    • Monitor weather forecast
    • Plan to work during bad weather
    • Have proper tires, wipers, safety gear

    Tips to Increase Tips

    Yes, you can influence tips:

    1. Communication

    • Text when grabbing order: “Got your order, heading your way!”
    • Text if delayed: “Restaurant running a bit behind, should be there in 10 min”
    • Updates = better tips

    2. Food protection

    • Hot bag usage (customers can tell)
    • Keep drinks upright
    • Careful driving (don’t shake food)

    3. Delivery instructions

    • Follow precisely
    • “Hand to me” = hand to them (don’t just leave)
    • “Leave at door” = photo, text confirmation

    4. Professionalism

    • Don’t smoke in car (food absorbs smell)
    • Don’t eat customer’s food (duh, but happens)
    • Dress decently (not pajamas)

    5. Extra touches

    • Include napkins/utensils if restaurant forgot
    • Knock gently (don’t bang)
    • Place bag neatly at door

    Tip difference:

    • Sloppy delivery: $0-2 tip
    • Professional delivery: $4-8 tip
    • On 30 deliveries/day = $120-180 extra per day

    Realistic Earnings

    Part-time (12 hours/week, peak times, multi-app):

    • $27/hour average
    • 48 hours/month × $27 = $1,296
    • Expenses (gas, maintenance): -$324 (25%)
    • Net: $972/month

    Full-time (40 hours/week, strategic, multi-app):

    • $24/hour average
    • 160 hours/month × $24 = $3,840
    • Expenses: -$1,152 (30%)
    • Net: $2,688/month

    Full-time optimized (45 hours/week, peak focused, multi-app master):

    • $30/hour average (cherry-picking)
    • 180 hours/month × $30 = $5,400
    • Expenses: -$1,620 (30%)
    • Net: $3,780/month

    Pros & Cons

    Pros:

    • No passengers (solo work)
    • Less vehicle wear than rideshare
    • Flexible schedule
    • Multi-app opportunities
    • Simple, straightforward work
    • Can listen to podcasts/music

    Cons:

    • Inconsistent pay
    • App dependency (algorithm changes)
    • Vehicle expenses
    • No benefits
    • Standing/walking to doors (physical)
    • Occasional app crashes
    • Customer scams (report food not delivered)

    When to Choose Food Delivery

    Good fit:

    • You prefer solo work
    • You want maximum flexibility
    • You’re comfortable with tech/apps
    • You can handle income variability
    • You enjoy driving/exploring

    Not ideal:

    • You need guaranteed income
    • You have gas-guzzler vehicle
    • You’re not comfortable with apps
    • You want human interaction

    Grocery Delivery: Instacart & Shipt {#grocery-delivery}

    Higher pay potential but more work per order.

    Platform Overview

    Instacart

    • Market leader in grocery delivery
    • Partnerships with most major chains
    • Two roles: Full-service shopper (shop + deliver) or In-store shopper (just shop)
    • Most gig workers do full-service

    Shipt

    • Target-owned platform
    • Partnerships with Target, CVS, Petco, others
    • Generally better tips than Instacart
    • Smaller market share

    How Grocery Delivery Works

    Full-service shopping process:

    1. Accept batch (order)
    2. Drive to store
    3. Shop items (find, scan, replace out-of-stock items)
    4. Checkout (use company card)
    5. Load car
    6. Drive to customer
    7. Deliver to door
    8. Receive payment and tip

    Time per order: 45-90 minutes typically

    Pay Structure

    Instacart:

    • Batch payment: $7-15 base (varies by items, distance, difficulty)
    • Heavy pay: Extra for heavy items (water, cat litter)
    • Mileage: Included in batch payment
    • Tips: Customer sets (can adjust after delivery)
    • Promotions: Bonus for completing X batches

    Shipt:

    • Similar structure
    • Generally slightly higher base pay
    • Tips usually better (Target customers more affluent)

    Average per batch: $15-35 including tip

    Batch Selection Strategy

    What makes a good batch:

    Items:

    • 20-40 items ideal
    • Under 20 = lower pay for time
    • Over 60 = too time-consuming

    Distance:

    • Store to customer under 5 miles
    • Long distance eats time
    • Calculate per-mile rate

    Tip amount:

    • Minimum 10% tip
    • Preferably 15-20%
    • Pre-tip visible (can increase/decrease after)

    Store familiarity:

    • Stores you know = faster shopping
    • Unknown store = wasted time finding items

    The $25/hour rule:

    • Calculate estimated time (shop + drive + deliver)
    • Batch must pay at least $25/hour equivalent

    Example:

    Bad batch:

    • Pay + tip: $18
    • 80 items (large)
    • 8 miles to customer
    • Estimated time: 90 minutes
    • Hourly: $12 – DECLINE

    Good batch:

    • Pay + tip: $32
    • 35 items
    • 3 miles to customer
    • Estimated time: 65 minutes
    • Hourly: $29.50 – ACCEPT

    Shopping Efficiency

    Speed = earnings in grocery delivery

    Tactics to shop faster:

    1. Learn store layouts

    • Shop same stores repeatedly
    • Memorize sections
    • Know shortcuts

    2. Organize app list

    • Rearrange items by aisle
    • Don’t shop in app order (zigzag wastes time)

    3. Substitution strategy

    • If item out of stock, suggest similar immediately
    • Message customer: “Out of X, can I get you Y instead?”
    • Don’t wait for response on small items (similar size/price)
    • Wait for approval on expensive items

    4. Checkout efficiency

    • Self-checkout often faster (if not huge order)
    • Bagging while scanning saves time
    • Group customer’s items separately if multi-order

    5. Avoid peak shopping times

    • Weekday mornings = empty stores
    • Weekend afternoons = packed (slower shopping)

    Shopping speed benchmarks:

    • Beginner: 100 seconds per item
    • Intermediate: 60 seconds per item
    • Expert: 40 seconds per item

    30 items:

    • Beginner: 50 minutes
    • Expert: 20 minutes
    • 30-minute difference = can do 2x orders

    Multi-Order Batches

    Double/triple batches:

    • Instacart combines 2-3 customer orders
    • Shop all at once
    • Deliver to multiple addresses

    Pros:

    • Higher total pay
    • More efficient than single orders

    Cons:

    • More complex (keep items separate)
    • More time
    • If one customer tips poorly, drags down average

    Strategy:

    • Accept doubles if both tips are good
    • Decline if one tip is $0-2
    • Triples rarely worth it (too complex)

    Heavy Order Pay

    Orders with heavy items get extra pay:

    • Water cases
    • Soda cases
    • Cat litter
    • Dog food
    • Large item orders

    Heavy pay bonus: $5-15 extra

    Strategy:

    • Heavy orders can be lucrative if close
    • But consider physical toll
    • Apartment stairs with 10 water cases = not worth $8 extra

    Peak Times

    Best grocery delivery times:

    Sunday morning (9am-12pm):

    • Biggest order day
    • Highest tips
    • Most batches available

    Weekday mornings (8am-11am):

    • Good batches
    • Empty stores (fast shopping)

    Late afternoon (4pm-6pm):

    • Dinner prep orders
    • Moderate volume

    Avoid:

    • Weekend evenings (fewer orders)
    • Late night (no batches)
    • Mid-week afternoons (slow)

    Customer Communication

    Communication increases tips:

    1. Greeting

    • “Hi [name], I’m [your name] and I’ll be shopping your order today!”
    • Sets professional tone

    2. Substitutions

    • “They’re out of X brand, would you like Y brand instead?”
    • Photo of options
    • Wait for response (don’t substitute without asking)

    3. Checkout

    • “Just checked out, heading your way!”

    4. Delivery

    • “Delivered to your front door, have a great day!”
    • Photo of delivery

    Over-communication better than under-communication

    Tip Adjustment Reality

    Customers can change tip after delivery:

    • Increase (rare but happens)
    • Decrease (if poor service)
    • Remove completely (if items missing/wrong)

    To protect tips:

    • Communicate about substitutions
    • Deliver on time
    • Follow delivery instructions
    • Handle items carefully
    • Don’t mix up multi-order deliveries

    Tip baiting:

    • Customer puts high tip to get quick shopper
    • Then reduces/removes tip after delivery
    • Unfortunately happens
    • Report to platform if egregious

    Realistic Earnings

    Part-time (12 hours/week, peak times):

    • 8-10 batches/week
    • Average $25 per batch
    • $200-250/week = $800-1,000/month
    • Expenses: -$200-250
    • Net: $600-750/month

    Full-time (40 hours/week, strategic):

    • 35-45 batches/week
    • Average $26 per batch
    • $910-1,170/week = $3,640-4,680/month
    • Expenses: -$1,092-1,404
    • Net: $2,548-3,276/month

    Pros & Cons

    Pros:

    • Higher pay per order than food delivery
    • Tips usually good (percentage of order total)
    • Less driving (more time at store)
    • Can be good exercise
    • Customers generally appreciative

    Cons:

    • Physically demanding (heavy items, stairs)
    • Time per order longer (less hourly if slow shopper)
    • Out-of-stock items frustrating
    • Shopping in crowded stores stressful
    • Perishable items (must deliver quickly)

    When to Choose Grocery Delivery

    Good fit:

    • You’re efficient at grocery shopping
    • You don’t mind physical work
    • You prefer fewer, higher-paying orders
    • You know local stores well
    • You’re organized

    Not ideal:

    • You’re slow at shopping
    • You have physical limitations
    • You want quick, simple deliveries
    • You’re impatient (dealing with substitutions)

    Package Delivery: Amazon Flex & Others {#package-delivery}

    Package delivery offers consistent pay and structured blocks.

    Amazon Flex Overview

    What it is:

    • Deliver Amazon packages in your own vehicle
    • Work in “blocks” (pre-scheduled shifts)
    • 2-4 hour blocks typical
    • Fixed pay per block

    Requirements:

    • 21+ years old
    • Mid-size sedan or larger
    • Smartphone (iPhone 6S or newer, Android equivalent)
    • Pass background check
    • Valid license and insurance

    How Amazon Flex Works

    Block system:

    1. Open app during “offering” times
    2. Available blocks appear
    3. Accept block (first-come, first-served)
    4. Show up at warehouse at block start time
    5. Pick up pre-sorted packages (20-50 typically)
    6. Deliver using app navigation
    7. Return undeliverable packages
    8. Block ends, paid for full block time

    Fixed pay regardless of speed:

    • Finish early = paid for full block
    • Run late = still paid same amount

    Pay Structure

    Base pay:

    • $18-25/hour (varies by market)
    • Fixed at time of accepting block
    • Not influenced by number of packages

    Surge blocks:

    • During high demand or bad weather
    • $25-40/hour
    • Sometimes 2x normal rate

    Example blocks:

    Standard 3-hour block:

    • Pay: $54 ($18/hour)
    • 30 packages
    • If you finish in 2 hours, still get $54

    Surge 4-hour block:

    • Pay: $120 ($30/hour)
    • 40 packages
    • Same work, higher pay (demand-based)

    Block Strategy

    When blocks are offered:

    • Varies by location
    • Usually 24-48 hours in advance
    • Same-day blocks if not filled

    Surge strategy:

    1. Don’t accept low-rate blocks
    2. Wait for surge pricing
    3. Check app frequently (blocks appear suddenly)
    4. Bad weather = surge blocks
    5. Holidays = surge blocks

    Bot controversy:

    • Some drivers use bots to auto-grab blocks
    • Against Amazon policy
    • Risk of deactivation
    • Manual grabbing still possible but need fast reflexes

    Route Optimization

    Amazon provides route but not always optimal:

    Tactics:

    1. Review full route at warehouse before leaving
    2. Reorganize packages by delivery order
    3. Use app’s built-in route or your own judgment
    4. Group nearby deliveries
    5. Deliver heavy packages first (free up space)

    Package organization:

    • Front seat: Next 5 deliveries
    • Back seat: Next 10
    • Trunk: Remaining packages
    • Reorganize at midpoint

    Speed matters:

    • Finish early = free time (paid already)
    • Build reputation for fast delivery = better standing

    Package Types

    Standard packages:

    • Boxes and envelopes
    • Front door/porch delivery
    • Photo proof required

    Amazon Fresh/Prime Now:

    • Groceries
    • 1-2 hour delivery windows
    • Higher pay
    • Temperature-sensitive

    Whole Foods:

    • Grocery delivery
    • Usually good tips
    • Similar to Instacart

    Delivery Tips

    Efficiency tactics:

    1. Apartment strategies

    • Call customer if can’t access building
    • Follow in behind resident (politely)
    • Take all packages for building in one trip

    2. Scanning as you go

    • Scan next package while driving to stop
    • Saves time at each stop

    3. Parking

    • Don’t overthink parking
    • Quick stops (hazards on if needed)
    • Most important: keep moving

    4. Navigation

    • Use Waze or Google Maps if Amazon nav poor
    • Learn your delivery areas
    • Develop mental map

    5. Photo proof

    • Take quickly
    • Don’t spend time framing perfect shot
    • Just clear evidence of delivery location

    Weather & Challenges

    Bad weather blocks:

    • Higher pay (surge)
    • Fewer drivers accepting
    • More difficult but more profitable

    Rural routes:

    • Longer distances between stops
    • Harder to finish early
    • May not be worth standard rate
    • Wait for surge on rural routes

    Urban routes:

    • More stops, less driving
    • Can finish very early
    • Parking challenges
    • Best for standard rate blocks

    Realistic Earnings

    Part-time (2 blocks/week):

    • 2 blocks × 3 hours = 6 hours
    • $20/hour average
    • $120/week = $480/month
    • Expenses: -$96 (20%)
    • Net: $384/month

    Part-time optimized (4 surge blocks/week):

    • 4 blocks × 3.5 hours = 14 hours
    • $28/hour average (surge focus)
    • $392/week = $1,568/month
    • Expenses: -$314
    • Net: $1,254/month

    Full-time (30-35 hours/week blocks):

    • Difficult to get this many blocks consistently
    • $22/hour average mix
    • $660-770/week = $2,640-3,080/month
    • Expenses: -$660-770
    • Net: $1,980-2,310/month

    Pros & Cons

    Pros:

    • Fixed pay (know what you’ll make)
    • Finish early = extra free time
    • No customer interaction (mostly)
    • No tipping uncertainty
    • Straightforward work
    • Consistent when you get blocks

    Cons:

    • Competitive to get blocks (bot problem)
    • Physical (carrying packages)
    • Apartment deliveries time-consuming
    • Can’t see route before accepting
    • Deactivation risk if too many packages not delivered
    • Inconsistent block availability

    When to Choose Amazon Flex

    Good fit:

    • You want predictable pay
    • You prefer structured blocks vs. on-demand
    • You’re efficient at deliveries
    • You don’t mind physical work
    • You can be flexible with scheduling (grab blocks when available)

    Not ideal:

    • You want consistent hours (blocks competitive)
    • You hate apartment deliveries
    • You’re not fast at deliveries
    • You prefer customer interaction

    Task-Based Gigs: TaskRabbit & Handy {#task-based}

    Different from delivery—using skills for various tasks.

    Platform Overview

    TaskRabbit

    • General task marketplace
    • Furniture assembly, moving, handyman, cleaning, etc.
    • Set your own rates
    • Get hired for specific tasks

    Handy

    • Home cleaning and handyman services
    • Fixed pricing (less control)
    • Scheduled jobs
    • Background checked professionals

    TaskRabbit Deep Dive

    Popular task categories:

    • Furniture assembly (IKEA, etc.) – most common
    • Moving help
    • Handyman services
    • Mounting (TV, shelves)
    • Cleaning
    • Yard work
    • General help

    How it works:

    1. Create profile, set skills and rates
    2. Set availability
    3. Clients post tasks or browse Taskers
    4. You’re notified of potential tasks
    5. Accept task
    6. Complete work
    7. Get paid

    Setting your rate:

    • You choose hourly rate
    • $20-80/hour depending on skill
    • Higher rates for specialized skills (electrical, plumbing)
    • Lower rates for general help (moving boxes)

    TaskRabbit takes 15% commission

    Rate Strategy

    Beginner rates:

    • Start competitive (lower end)
    • Build reviews
    • Raise rates after 10-20 positive reviews

    Experienced rates:

    • Furniture assembly: $40-60/hour
    • Handyman: $50-80/hour
    • Moving help: $30-50/hour
    • Cleaning: $30-50/hour

    Elite status:

    • Top Taskers in category
    • Can charge premium (20-30% above average)
    • Get priority placement

    Building Your Profile

    Critical elements:

    1. Professional photo

    • Headshot, smiling, approachable
    • Not selfie, not sunglasses

    2. Detailed skills list

    • List all relevant skills
    • More skills = more task notifications

    3. Description

    • Experience and expertise
    • Tools you have
    • Your approach to work

    4. Reviews

    • First 5 reviews critical
    • Ask satisfied clients to review
    • Respond professionally to all reviews

    Task Selection

    Good tasks:

    • Clear scope (detailed description)
    • Reasonable client expectations
    • In your skill zone
    • Payment makes sense for time

    Red flags:

    • Vague descriptions
    • Client wants quote before seeing job
    • Unrealistic expectations
    • Location too far

    Example good task:

    • “Assemble IKEA dresser, 6 drawers, have all tools”
    • Time estimate: 1.5 hours
    • Your rate: $50/hour
    • Payment: $75

    Example bad task:

    • “Help with some assembly, moving, and other stuff”
    • Unknown time
    • Scope creep likely
    • Decline or message for clarity first

    Tools & Equipment

    Basic toolkit required:

    • Power drill
    • Screwdriver set
    • Level
    • Tape measure
    • Allen wrenches
    • Hammer

    For assembly specialists:

    • Electric screwdriver
    • Rubber mallet
    • Various bits
    • Furniture dolly

    Investment: $100-500 for good toolkit

    Realistic Earnings

    Part-time (10 hours/week):

    • $45/hour average (furniture assembly)
    • 40 hours/month × $45 = $1,800
    • TaskRabbit fee (15%): -$270
    • Tools/gas: -$90
    • Net: $1,440/month

    Full-time (35 hours/week):

    • $50/hour average (experienced, multiple skills)
    • 140 hours/month × $50 = $7,000
    • TaskRabbit fee: -$1,050
    • Expenses: -$350
    • Net: $5,600/month

    Pros & Cons

    Pros:

    • High hourly rate potential
    • Use existing skills
    • Variety of work (not repetitive)
    • Build real skills
    • Meet clients (networking)
    • Flexible schedule

    Cons:

    • Physical work
    • Need tools/equipment
    • Inconsistent demand
    • Travel between jobs (unpaid time)
    • Difficult clients occasionally
    • Liability concerns (damage, injury)

    When to Choose Task-Based Gigs

    Good fit:

    • You’re handy/skilled
    • You enjoy variety
    • You want higher hourly rates
    • You’re comfortable with client interaction
    • You have basic tools

    Not ideal:

    • You lack handyman skills
    • You want simple, no-thought work
    • You can’t invest in tools
    • You prefer driving/delivery

    The Multi-App Strategy {#multi-app}

    The secret to maximizing earnings: never rely on just one platform.

    Why Multi-Apping Works

    Single app problems:

    • Waiting for orders (dead time)
    • Can’t be selective (need to maintain acceptance rate)
    • Platform down = no income
    • Algorithm changes hurt you

    Multi-app benefits:

    • Always have an order available
    • Choose best order from multiple options
    • Less downtime
    • Platform independence
    • 30-50% higher hourly earnings

    Best App Combinations

    For delivery:

    • Combo 1: DoorDash + Uber Eats + Grubhub
      • All food delivery, maximum order flow
      • Best for peak hours
    • Combo 2: DoorDash + Instacart
      • Mix food and grocery
      • Different peak times (complement each other)
    • Combo 3: Uber (rides + eats)
      • Seamless switching
      • Different income streams

    For tasks:

    • Combo: TaskRabbit + Handy
      • Different client pools
      • Fill schedule gaps

    Multi-App Rules

    The cardinal rules:

    1. Never accept overlapping jobs

    • Don’t accept delivery from App A while delivering for App B
    • Unless: Going exact same direction AND both get food on time

    2. Pause apps when active

    • Delivering for DoorDash? Pause Uber Eats
    • Prevents double-booking
    • Unpause after delivery

    3. Have minimum standards for ALL apps

    • Just because you’re multi-apping doesn’t mean accept bad orders
    • Maintain $1.50-2/mile minimum across all platforms

    4. Master one app first

    • Learn DoorDash thoroughly
    • Then add second app
    • Don’t overwhelm yourself starting with 3 apps

    Multi-App Logistics

    Phone setup:

    • Mount phone on dashboard
    • Split screen or quick app switching
    • Notifications enabled for all apps
    • Charger always plugged in (battery drain)

    App management:

    1. Turn on all apps
    2. Wait for offers
    3. Accept best offer (decline others)
    4. Pause other apps
    5. Complete delivery
    6. Unpause all apps
    7. Repeat

    Time management:

    • Check all apps every 30-60 seconds
    • Quick decision-making critical
    • Don’t overthink—accept or decline fast

    Advanced Stacking

    What is stacking:

    • Taking 2 orders simultaneously
    • Delivering both
    • Only if: Same direction, both on time

    Safe stacking scenarios:

    Example 1:

    • DoorDash: Restaurant A to Customer 1 (3 miles north)
    • Uber Eats: Restaurant B to Customer 2 (2.5 miles north, near Customer 1)
    • Both restaurants ready in 5 minutes
    • Accept both, deliver both

    Dangerous stacking:

    • Opposite directions
    • One restaurant slow (other food gets cold)
    • Customers too far apart

    Violation risks:

    • Contract violation if late
    • Bad rating
    • Customer complaints
    • Potential deactivation

    Only stack if you’re confident both deliveries succeed

    Platform-Specific Strategies

    DoorDash:

    • Has “Top Dasher” program (early access to scheduling)
    • Requires 70% acceptance rate
    • Not worth it if multi-apping (you’ll decline more)
    • Ignore Top Dasher, cherry-pick orders

    Uber Eats:

    • Shows total payout upfront
    • Can decline without penalty
    • Perfect for multi-app selective strategy

    Grubhub:

    • Scheduled blocks (guarantee minimum in some markets)
    • Can help fill gaps between peak times
    • Less volume but sometimes higher pay

    Instacart:

    • Longer time commitment per order
    • Use during slow food delivery times
    • Or as primary with food delivery as filler

    Multi-App Earnings Example

    Scenario: Friday 5pm-9pm (4 hours)

    DoorDash only:

    • 12 deliveries × $7 average = $84
    • $21/hour

    Multi-app (DD + UE + GH):

    • 16 deliveries (selecting best from all 3 apps)
    • Average $9 each (higher standard)
    • $36/hour

    Difference: $60 extra in 4 hours

    Over 20 hours/week: $300 extra/week = $1,200/month

    Managing Multiple 1099s

    Tax consideration:

    • Each platform sends separate 1099
    • More paperwork
    • Need to track income from each
    • Use app like Stride or Everlance

    Not a problem, just requires organization

    When to Single-App

    Times single app works:

    • During extreme peak (one app has constant orders)
    • Platform-specific promotions
    • Learning new platform

    But generally: Multi-app = significantly higher earnings


    Maximizing Your Hourly Rate {#maximize-rate}

    Beyond multi-apping, strategic decisions that compound earnings.

    Peak Time Focus

    If you can only work limited hours:

    Work ONLY peak times:

    • Lunch: 11am-1:30pm
    • Dinner: 5:30pm-9pm
    • Weekend nights: 6pm-midnight

    Example:

    • Work 12 hours/week (peak only)
    • Average $30/hour (peak rate)
    • $360/week = $1,440/month

    vs.

    • Work 12 hours/week (random times)
    • Average $18/hour (off-peak)
    • $216/week = $864/month

    Difference: $576/month for same hours worked

    Zone Selection

    All zones are not equal:

    Good zones:

    • Wealthy neighborhoods (higher tips)
    • Dense restaurant areas
    • Business districts (lunch)

    Bad zones:

    • Sparse restaurants (lots of driving)
    • Low-income areas (lower tips, nothing wrong with area, just tip economics)
    • Far from your home (dead miles getting there)

    Find your golden zone:

    • Track earnings by area
    • Identify 2-3 zones with best pay
    • Only work those zones
    • Reject orders taking you out of zone

    Order Selectivity

    Acceptance rate doesn’t matter (except Top Dasher)

    Be ruthlessly selective:

    • Decline low-pay orders
    • Decline long-distance
    • Decline problem restaurants
    • Your time = your money

    Example:

    Driver A (accepts everything):

    • Acceptance rate: 90%
    • 5 deliveries/hour
    • Average $6 each
    • $30/hour gross

    Driver B (selective):

    • Acceptance rate: 40%
    • 4 deliveries/hour (more waiting but better orders)
    • Average $10 each
    • $40/hour gross

    Selectivity = higher hourly rate

    Dead Time Elimination

    Every minute not earning is money lost:

    Strategies:

    1. Position strategically between orders

    • Don’t drive home
    • Stay in hotspot
    • Ready for next order

    2. Decline orders taking you away from hotspot

    • $8 order, 6 miles into suburbs = $8 then 6 miles back (empty)
    • True earning: $8 for 20+ minutes = $24/hour
    • Better: Wait 3 minutes for $7 order in zone = $7 for 12 minutes = $35/hour

    3. Multi-app during slow periods

    • Turn on all apps
    • Increases chances of orders

    4. Know when to call it

    • If slow for 30+ minutes, go home
    • Don’t waste gas idling

    Expense Minimization

    Your true rate = gross – expenses

    Biggest expenses:

    1. Gas (30-40% of expenses)

    • Get fuel-efficient vehicle
    • Use GasBuddy app (find cheapest gas)
    • Costco/Sam’s Club membership (cheaper gas)
    • Consider hybrid/EV

    2. Maintenance (25-30% of expenses)

    • DIY oil changes ($30 vs. $70)
    • Rotate tires yourself
    • Preventive maintenance prevents expensive repairs

    3. Vehicle depreciation (20-25%)

    • Buy used, not new (let someone else take depreciation hit)
    • Higher mileage car okay if reliable (already depreciated)

    4. Insurance (10-15%)

    • Shop insurance annually
    • Rideshare/delivery endorsement required
    • Don’t cheap out (risk not worth it)

    Vehicle Choice Impact

    Vehicle comparison (same 1,000 miles/week gig work):

    Gas guzzler (20 mpg):

    • 50 gallons/week × $3.50 = $175/week gas
    • $700/month gas
    • Maintenance: $200/month
    • Total: $900/month expenses

    Hybrid (50 mpg):

    • 20 gallons/week × $3.50 = $70/week gas
    • $280/month gas
    • Maintenance: $120/month (less wear)
    • Total: $400/month expenses

    Difference: $500/month = $6,000/year

    The right vehicle can add $6,000/year to your pocket

    Seasonal Strategy

    Earnings vary by season:

    High earning seasons:

    • December (holidays)
    • Tax refund season (March-April)
    • Summer (vacations, events)
    • Bad weather periods

    Slow seasons:

    • January (broke from holidays)
    • September (back to school)
    • Mid-summer heat

    Strategy:

    • Work more during high-earning seasons
    • Take breaks during slow seasons (or supplement with other work)

    Promotion Maximization

    Platforms offer promotions:

    • Peak pay
    • Quest bonuses (complete X deliveries, earn $Y)
    • Referral bonuses
    • Guaranteed earnings

    Maximize promotions:

    1. Track promo schedule (usually predictable)
    2. Plan work around promotions
    3. Complete quest challenges if math works out
    4. Don’t chase promotions into slow hours (calculate real rate)

    Example quest:

    • “Complete 25 deliveries Friday-Sunday, earn $50 bonus”
    • 25 deliveries × $7 = $175 base
    • Bonus: $50
    • Total: $225
    • Time: 10 hours
    • $22.50/hour

    Worth it? Depends on your usual rate and if you’d work anyway


    Tax Strategies for Gig Workers {#taxes}

    Critical topic most gig workers ignore until tax time.

    Understanding Your Tax Situation

    You’re self-employed:

    • No taxes withheld from gig pay
    • You owe income tax + self-employment tax
    • Quarterly estimated taxes required (if owing $1,000+)

    Self-employment tax:

    • 15.3% (Social Security + Medicare)
    • On top of income tax
    • Covers both employer and employee portions

    Total tax burden:

    • Self-employment tax: 15.3%
    • Federal income tax: 10-37% (depends on bracket)
    • State income tax: 0-13% (depends on state)

    Rough estimate: 25-40% of net income goes to taxes

    Tracking Mileage (Critical)

    Standard mileage deduction (2024): $0.67/mile

    Every mile while working is deductible:

    • Drive to hotspot
    • Between deliveries
    • Returning home after last delivery
    • To/from gas station during work
    • To/from car wash for gig work

    NOT deductible:

    • Commute from home to start work (first trip)
    • Personal errands
    • Commute home after work (last trip)

    Tracking methods:

    1. Automatic apps (best):

    • Stride (free, most popular)
    • Everlance
    • MileIQ
    • Tracks automatically, generates reports

    2. Manual log:

    • Note odometer start/end each shift
    • Acceptable but tedious

    Example impact:

    Annual gig driving: 20,000 miles
    Deduction: 20,000 × $0.67 = $13,400

    Tax savings (25% bracket): $3,350

    NOT tracking mileage = giving away $3,000+

    Other Deductions

    What you can deduct:

    Vehicle expenses (if not using standard mileage):

    • Gas
    • Oil changes
    • Repairs
    • Car washes
    • Depreciation

    Note: Can’t deduct both mileage AND actual expenses. Choose one.
    Standard mileage usually better and simpler.

    Phone:

    • Portion used for gig work (usually 30-50%)
    • $80/month × 50% = $40/month = $480/year deduction

    Phone accessories:

    • Mount
    • Charger
    • External battery

    Hot bags:

    • Insulated delivery bags
    • Coolers

    Supplies:

    • Hand sanitizer
    • Napkins for customers
    • Pens

    Clothing:

    • If required uniform
    • Not regular clothes

    Fees:

    • Background checks
    • Vehicle inspections
    • Parking (for deliveries)
    • Tolls (work-related)

    Apps/Software:

    • Mileage tracking apps
    • Tax software
    • Music subscriptions (for work)

    Quarterly Estimated Taxes

    If you expect to owe $1,000+ annually:

    Must pay quarterly:

    • April 15
    • June 15
    • September 15
    • January 15

    How much to pay:

    Simple method:

    • Set aside 25-30% of net income each week
    • Pay quarterly
    • Adjust based on actual tax bracket

    Example:

    • Gig income: $3,000/month
    • Expenses: -$900
    • Net: $2,100
    • Set aside (28%): $588/month
    • Quarterly payment: $1,764

    Penalties for not paying:

    • IRS charges penalties + interest
    • Can be $500-1,000+ if significantly underpaid

    Tax Software

    Best for gig workers:

    1. TurboTax Self-Employed ($119)

    • Handles Schedule C (business income)
    • Tracks quarterly taxes
    • Imports from gig platforms
    • Mileage tracking integration

    2. H&R Block Premium ($85)

    • Similar features
    • Slightly cheaper

    3. FreeTaxUSA ($15 state, free federal)

    • Budget option
    • Manual entry

    DIY vs. CPA:

    • Simple situation (just gig work): DIY software fine
    • Complex (other businesses, property, investments): CPA worth it

    Tax Tips

    1. Keep receipts

    • Photo immediately
    • Store in Google Drive/Dropbox
    • Organize by month

    2. Separate bank account

    • Business checking for gig income
    • Makes tracking easier
    • Looks more professional if audited

    3. Track income by platform

    • Each platform sends 1099
    • Reconcile with your tracking
    • Catch errors

    4. Don’t skip filing

    • Even if you didn’t make much
    • Establishes record
    • Avoid penalties

    5. Consider incorporation

    • If making $50k+ from gig work
    • LLC or S-Corp can save on taxes
    • Consult CPA

    Tax Deduction Example

    Annual gig earnings: $45,000

    Without deductions:

    • Income: $45,000
    • Self-employment tax: $6,885
    • Income tax (22% bracket): $9,900
    • Total tax: $16,785
    • Take-home: $28,215

    With deductions:

    • Gross income: $45,000
    • Mileage (20,000 mi × $0.67): -$13,400
    • Phone: -$480
    • Hot bags/supplies: -$200
    • Apps: -$120
    • Net income: $30,800
    • Self-employment tax: $4,709
    • Income tax (22% bracket): $6,776
    • Total tax: $11,485
    • Take-home: $33,515

    Difference: $5,300 more in pocket

    Tracking deductions = thousands saved


    Vehicle Maintenance & Expenses {#vehicle}

    Your vehicle is your income source. Maintain it.

    Preventive Maintenance

    Critical regular maintenance:

    Oil changes:

    • Every 5,000 miles (or manufacturer recommendation)
    • DIY: $30
    • Shop: $70
    • Neglect = engine damage ($3,000-8,000)

    Tire rotation:

    • Every 7,500 miles
    • DIY: Free (if you have jack)
    • Shop: $20-40
    • Extends tire life 20-30%

    Tire replacement:

    • Every 40,000-60,000 miles
    • Cost: $400-800 (set of 4)
    • Don’t cheap out (safety + fuel economy)

    Brake pads:

    • Every 30,000-50,000 miles
    • Cost: $150-400
    • Catch early (avoid rotor damage)

    Air filter:

    • Every 15,000 miles
    • DIY: $15
    • Shop: $30-50
    • Improves fuel economy

    Transmission fluid:

    • Every 60,000 miles
    • Cost: $150-250
    • Prevents transmission failure ($3,000-5,000)

    Tracking Maintenance

    Use app or spreadsheet:

    • Log all maintenance
    • Track mileage at each service
    • Set reminders for next service
    • Helps with tax deductions

    Recommended: Car Minder app (free)

    Fuel Economy Tips

    Driving habits:

    • Gentle acceleration (aggressive = 10-30% worse MPG)
    • Coast to stops
    • Maintain steady speed
    • Use cruise control on highway

    Vehicle maintenance:

    • Proper tire pressure (check monthly)
    • Clean air filter
    • Remove excess weight from car
    • Regular oil changes

    Route optimization:

    • Avoid traffic (wastes gas idling)
    • Combine errands
    • Plan efficient routes

    Impact:

    • Good habits: 30 MPG
    • Bad habits: 22 MPG
    • On 1,000 miles/week: $50-70/week difference

    When to Quit Gig Work (Vehicle)

    Red flags:

    • Major repair costs exceeding $2,000
    • Frequent breakdowns
    • Unsafe to drive
    • Failed inspection (can’t be fixed reasonably)

    Decision framework:

    Vehicle value: $3,000
    Repair needed: $2,500

    Options:

    1. Repair ($2,500) + continue gig work
    2. Sell as-is ($1,000), buy different car
    3. Stop gig work, use for personal only

    Consider:

    • How long will repair last?
    • Can you afford to be without vehicle during repair?
    • Is it time for different vehicle?

    Don’t throw good money after bad

    Insurance Considerations

    Types needed:

    Personal auto insurance:

    • Required by law
    • Covers personal use

    Rideshare/delivery endorsement:

    • $10-30/month extra
    • Covers you while delivering
    • Many drivers skip (risky)

    Commercial insurance:

    • If doing gig work full-time
    • More expensive ($200-400/month)
    • Comprehensive coverage

    What platforms provide:

    Rideshare (Uber/Lyft):

    • Coverage while passenger in car
    • Limited coverage while waiting for ride
    • Nothing while offline

    Delivery:

    • Very limited coverage
    • Often only covers restaurant’s food
    • Your vehicle damage = your problem

    Reality:
    Many gig workers operate with just personal insurance (against terms of service, risk of denied claim)

    Recommendation:
    Get rideshare endorsement minimum ($10-30/month) for peace of mind


    Staying Safe in the Gig Economy {#safety}

    Safety should never be compromised for earnings.

    Delivery Safety

    General precautions:

    1. Trust your instincts

    • Sketchy area/situation = decline order
    • No delivery worth your safety
    • Report concerns to platform

    2. Be aware of surroundings

    • Park in lit areas
    • Don’t leave car running/unlocked
    • Lock doors immediately after entering car
    • Have phone accessible

    3. Night delivery safety

    • Flashlight for dark addresses
    • Don’t enter customer homes
    • Stay on porch/doorway
    • Scan for threats before exiting car

    4. Apartment/complex safety

    • Don’t follow strangers into buildings
    • Use customer’s code or call
    • Avoid isolated stairwells
    • Trust gut if building feels unsafe

    5. Customer interaction

    • “Hand it to me” orders: Have phone recording (don’t notify, just for protection)
    • Maintain professional distance
    • Don’t enter homes
    • If customer inappropriate, report and leave

    Vehicle Safety

    Avoid breakdowns:

    • Regular maintenance (covered above)
    • Don’t run gas too low
    • Carry emergency kit:
      • Jumper cables
      • Tire iron/jack
      • Flashlight
      • First aid kit
      • Water
      • Phone charger

    If breakdown occurs:

    • Pull off road safely
    • Hazards on
    • Call roadside assistance
    • Don’t accept help from strangers (use AAA or insurance roadside)

    Scam Awareness

    Common gig worker scams:

    1. Fake support calls

    • Scammer calls claiming to be platform support
    • Asks for password or sensitive info
    • Platform NEVER asks for password via phone
    • Hang up, report

    2. Customer “cancel” scam (delivery)

    • Customer claims they cancelled order
    • Asks you to cancel on your end
    • They keep food and money
    • Always verify through app

    3. Cash orders (rideshare)

    • Passenger claims app not working
    • Offers cash payment
    • Often short-changes or doesn’t pay
    • Only accept rides through app

    4. “Owe money” scam

    • Text/email claiming you owe money to platform
    • Link to fake website
    • Steal login credentials
    • Never click links in unexpected messages

    Health & Wellbeing

    Physical health:

    Sitting/driving hazards:

    • Back pain (get lumbar support)
    • Eye strain (blue light glasses)
    • Posture issues (regular stretching)

    Recommendations:

    • Stretch every 2 hours
    • Get out of car between orders
    • Proper seat adjustment
    • Hydrate regularly

    Food/bathroom:

    • Pack healthy snacks
    • Avoid fast food every shift
    • Use restaurant bathrooms (ask politely)
    • Gas station restrooms

    Mental health:

    • Gig work can be isolating
    • Join gig worker communities (Reddit, Facebook groups)
    • Set boundaries (don’t work 7 days/week)
    • Take days off

    Burnout prevention:

    • Vary your gigs (delivery + tasks)
    • Don’t work exhausted (accidents happen)
    • Have hobbies outside gig work
    • Track income to see progress (motivating)

    Weather Safety

    Dangerous conditions:

    Rain:

    • Slow down
    • Increase following distance
    • Avoid standing water
    • Turn on headlights

    Snow/Ice:

    • Decline deliveries if roads unsafe
    • Your safety > any promotion
    • Have proper tires
    • Carry ice scraper, blanket

    Extreme heat:

    • Stay hydrated
    • Air conditioning running (yes, costs gas, but prevents heat stroke)
    • Take breaks in shade

    When to stop working:

    • Conditions unsafe
    • You feel unwell
    • Visibility too poor
    • Roads impassable

    No delivery is worth an accident


    Avoiding Common Gig Worker Mistakes {#mistakes}

    Learn from others’ expensive lessons.

    Mistake #1: Not Tracking Mileage

    The error:
    Forgetting to log miles all year, losing $3,000-5,000 in deductions

    The fix:

    • Download Stride or similar app TODAY
    • Turn on automatic tracking
    • Review weekly to ensure it’s working

    Mistake #2: Accepting Every Order

    The error:

    • Accepting $3 order for 8 miles
    • Destroying hourly rate
    • Wasting time and gas

    The fix:

    • Set minimum standards ($1.50-2/mile)
    • Decline bad orders without guilt
    • Track your actual earnings by order type
    • Learn which orders are profitable

    Mistake #3: Working Only One App

    The error:
    Sitting in parking lot waiting 10 minutes between orders

    The fix:

    • Add second app minimum
    • Run simultaneously
    • Choose best offer
    • Drastically reduce dead time

    Mistake #4: Ignoring Expenses

    The error:
    “I made $800 this week!” (ignoring $250 in gas/expenses)

    The fix:

    • Calculate true net hourly rate
    • Track all expenses
    • Know your real earnings
    • Budget based on net, not gross

    Mistake #5: No Tax Planning

    The error:
    Spending all earnings, owing $5,000 at tax time with no money saved

    The fix:

    • Set aside 25-30% every payment
    • Pay quarterly estimated taxes
    • Track deductions
    • Don’t spend tax money

    Mistake #6: Wrong Vehicle

    The error:
    Using gas-guzzler truck getting 15 MPG for deliveries

    The fix:

    • Calculate cost per mile
    • Consider fuel-efficient vehicle
    • Run the math on monthly gas costs
    • Switch vehicles if possible

    Mistake #7: Skipping Maintenance

    The error:
    Ignoring check engine light, leading to $3,000 repair

    The fix:

    • Follow maintenance schedule
    • Address issues early (cheaper)
    • DIY simple maintenance
    • Budget for vehicle expenses

    Mistake #8: Working Random Hours

    The error:
    Working Tuesday 2pm-5pm (slowest time), making $10/hour

    The fix:

    • Focus on peak times
    • Work when demand is highest
    • Track your earnings by time of day
    • Optimize schedule

    Mistake #9: No Strategy or Tracking

    The error:
    Just “winging it” without analyzing what’s working

    The fix:

    • Track hourly earnings by:
      • Platform
      • Time of day
      • Day of week
      • Zone
    • Analyze monthly
    • Optimize based on data

    Mistake #10: Burning Out

    The error:
    Working 70+ hours/week, hating gig work, quitting

    The fix:

    • Set sustainable schedule
    • Take days off
    • Variety (mix gigs)
    • Remember why you’re doing this
    • It’s a means to an end, not forever (unless you want it to be)

    Success Stories & Earnings Breakdowns {#success}

    Real gig workers, real numbers.

    Success Story #1: Maria – Full-Time Multi-Apper

    Background:

    • Age 29, lost corporate job during pandemic
    • Needed income immediately
    • Started DoorDash, expanded to multi-app strategy

    Strategy:

    • DoorDash + Uber Eats + Grubhub + Instacart
    • Works 45 hours/week
    • Focus on peak times (lunch + dinner + weekend)
    • Drives 2015 Prius (50 MPG)
    • Ruthless about order selection ($2/mile minimum)

    Monthly breakdown:

    • Gross earnings: $6,200
    • Gas (1,200 miles/week @ 50 MPG): -$504
    • Maintenance budget: -$200
    • Phone: -$40
    • Net before taxes: $5,456
    • Taxes set aside (28%): -$1,528
    • Net after taxes: $3,928/month

    Key to success:
    “I treat this like a real job. I track everything, work peak times only, and never accept orders under $2/mile. Multi-apping changed everything—I went from $18/hour on DoorDash alone to $32/hour running all four apps.”


    Success Story #2: James – Weekend Warrior

    Background:

    • Full-time teacher
    • Wanted extra $1,000/month for debt payoff
    • Limited to evenings and weekends

    Strategy:

    • Uber + Lyft rideshare
    • Friday/Saturday nights only (8pm-2am)
    • Focuses on surge pricing
    • Targets bar districts and events

    Monthly breakdown (4 weekends):

    • Hours: 24 (6 hours × 4 weekends)
    • Gross: $720 (average $30/hour with surge)
    • Gas: -$60
    • Net before taxes: $660
    • Taxes (set aside 25%): -$165
    • Net after taxes: $495/month

    Plus:

    • Minimal hours (24/month)
    • Works around teaching schedule
    • On track to pay off $15k debt in 2 years

    Key to success:
    “I only work when surge pricing is active. I’d rather work 6 hours at $30/hour than 12 hours at $18/hour. Quality over quantity.”


    Success Story #3: David – Task Specialist

    Background:

    • Age 45, handy skills from home ownership
    • Laid off from manufacturing
    • Pivoted to TaskRabbit

    Strategy:

    • TaskRabbit furniture assembly specialist
    • Built reputation with 100+ 5-star reviews
    • Charges $55/hour (above market rate)
    • Works 30 hours/week

    Monthly breakdown:

    • Hours: 120/month
    • Rate: $55/hour
    • Gross: $6,600
    • TaskRabbit fee (15%): -$990
    • Gas/tools: -$300
    • Net before taxes: $5,310
    • Taxes (30%): -$1,593
    • Net after taxes: $3,717/month

    Key to success:
    “I became THE furniture assembly guy in my area. I invested in quality tools, watched YouTube videos to get faster, and delivered exceptional service. Now I can charge premium rates and stay booked.”


    Success Story #4: Sarah – Grocery Delivery Pro

    Background:

    • Age 33, stay-at-home mom
    • Needed flexible income around kids’ schedules
    • Started Instacart

    Strategy:

    • Instacart only (knows stores inside-out)
    • Shops only stores she’s familiar with
    • Works 20 hours/week (while kids in school)
    • Focus on efficiency (averages 50 seconds per item)

    Monthly breakdown:

    • Batches: 40/month
    • Average per batch: $28
    • Gross: $1,120
    • Gas: -$168
    • Net before taxes: $952
    • Taxes (25%): -$238
    • Net after taxes: $714/month

    Plus:

    • Completely flexible (drops/adds hours as needed)
    • Home by 3pm for kids
    • Exercise (walking stores)

    Key to success:
    “I shop the same three stores. I know exactly where everything is. I’m so fast now that I can do batches other shoppers won’t touch because they’d take too long. Speed is money in grocery delivery.”


    Earnings Reality Check

    Common thread in success stories:

    • Strategy, not just hours
    • Specialization
    • Track everything
    • Know their numbers
    • Treat it like a business

    What separates success from struggle:

    • Successful: $25-35/hour net
    • Struggling: $12-18/hour net
    • Difference: Knowledge, strategy, execution

    Is the Gig Economy Right for You? {#right-for-you}

    Final assessment to determine if gig work fits your situation.

    When Gig Work Makes Sense

    ✅ You’re a good fit if:

    Financial situation:

    • Need income quickly (can start within 1 week)
    • Need flexible extra income (not full-time job)
    • Have 3-month emergency fund (cushion for slow periods)
    • Can handle income variability

    Lifestyle:

    • Want control over schedule
    • Comfortable being alone (delivery)
    • Don’t need social interaction from work
    • Like driving/being on the go

    Personality:

    • Self-disciplined
    • Detail-oriented (tracking expenses)
    • Can handle rejection (bad tips, declined orders)
    • Proactive problem-solver

    Resources:

    • Reliable vehicle (preferably fuel-efficient)
    • Smartphone
    • Auto insurance
    • Clean driving record

    Goals:

    • Temporary income (between jobs, paying off debt)
    • Supplement primary income
    • Test entrepreneurship (self-employment)
    • Build savings for specific goal

    When to Avoid Gig Work

    ❌ Not a good fit if:

    Financial situation:

    • Need guaranteed income (bills due)
    • Can’t afford vehicle repairs
    • No financial cushion
    • Poor credit (affects insurance costs)

    Lifestyle:

    • Need consistent 9-5 structure
    • Value coworker relationships
    • Want to separate work from personal life completely

    Personality:

    • Need external motivation (boss)
    • Struggle with organization
    • Can’t handle uncertainty
    • Avoid confrontation (customer issues)

    Resources:

    • Unreliable vehicle
    • Poor driving record
    • No smartphone or data plan

    Goals:

    • Want career advancement
    • Need health insurance from employer
    • Building resume for traditional employment
    • Prefer team environment

    The Ideal Gig Worker Profile

    Most successful gig workers:

    • Age 25-45 (insurance rates, energy levels)
    • Own fuel-efficient vehicle (fully paid or manageable payment)
    • Treat gig work as actual business
    • Track everything meticulously
    • Strategic about when/where they work
    • Multi-app from day one
    • Have specific financial goal (not just “make money”)
    • Plan to do gig work for 6-24 months (not forever)

    Alternative Paths

    If gig work isn’t right, consider:

    For flexibility:

    • Remote customer service jobs (scheduled but from home)
    • Freelancing (skills-based, covered in separate article)

    For quick income:

    • Selling items you own
    • One-time gigs (moving jobs, yard work)
    • Temporary staffing agencies

    For long-term:

    • Traditional employment with benefits
    • Build online business (longer timeline)
    • Develop skills for higher-paying work

    [Internal Link: Explore alternatives in “Best Side Hustles: Make Extra Money on Your Schedule“]


    Frequently Asked Questions {#faq}

    Q: How much can I realistically make my first month?

    A: Realistically, $800-1,500 for part-time (15-20 hours/week), $2,000-3,500 for full-time (40 hours/week). First month you’re learning, so earnings are lower. By month 3-4, expect 20-30% higher earnings as you optimize.


    Q: Do I need a new car to do gig work?

    A: No. Most platforms accept cars 15 years old or newer. Many successful gig workers drive 10-year-old Priuses. Reliability matters more than newness. A well-maintained 2010 Civic beats a problematic 2020 car.


    Q: Can I do gig work with a full-time job?

    A: Yes, 64% of gig workers have another job. Work evenings (5-9pm) and weekends. Many earn $800-1,500/month working 15-20 hours/week around their job. Just ensure you’re not too tired (safety risk).


    Q: What’s the best app for beginners?

    A: DoorDash for delivery (most orders, easiest to understand). Uber for rideshare (most rides). Start with one, master it, then add second app within 4-8 weeks.


    Q: How do I handle taxes if I’ve never been self-employed?

    A:

    1. Download Stride app (tracks mileage automatically)
    2. Set aside 25-30% of net income each week
    3. Pay quarterly estimated taxes (April, June, September, January)
    4. Use TurboTax Self-Employed at tax time ($119, handles everything)
    5. Track all expenses (gas, phone, supplies)

    Q: Is it worth it if I have a gas-guzzler?

    A: Probably not. If your vehicle gets under 20 MPG, your gas costs will eat 40-50% of earnings. Consider: borrowing more efficient vehicle, renting hybrid through Hertz/Lyft, or doing task-based gigs instead (less driving).


    Q: Can I make $5,000/month doing gig work?

    A: Yes, but requires: working 45-50 hours/week, multi-apping, strategic peak time focus, fuel-efficient vehicle, and top-tier markets. Not easy, but achievable. Expect 6-month ramp-up to reach this level.


    Q: What if I get into an accident while delivering?

    A: This depends on your insurance:

    • With rideshare/delivery endorsement: Your insurance covers (with deductible)
    • Without: Insurance may deny claim (you were working, not personal use)
    • Platform coverage: Very limited, usually doesn’t cover your vehicle

    Get rideshare endorsement. Costs $10-30/month, saves you if accident happens.


    Q: How do I get more orders?

    A:

    • Multi-app (turns on more order flow)
    • Work peak times (more demand)
    • Position in busy zones
    • Maintain high ratings (better priority)
    • Accept enough orders to stay active (don’t decline 20 in a row)

    Q: Can I write off my car payment?

    A: No, you can’t deduct the car payment itself. But you CAN deduct:

    • Mileage (standard $0.67/mile covers gas, maintenance, depreciation)
    • OR actual expenses (gas, oil, repairs, depreciation) if you track everything
    • Choose one method, not both. Mileage is usually simpler and better.

    Q: What if a customer doesn’t tip?

    A: You’ll see tip amount before accepting (DoorDash, Uber Eats show total payout). If it’s too low, decline. For rideshare, you don’t see tip until after, but tips show up within 24 hours. Can’t do much about it except maintain high ratings to encourage tips.


    Q: Should I quit my job to do gig work full-time?

    A: Generally no, unless:

    • You have 6-month emergency fund
    • You’ve done gig work part-time for 3+ months (know you can earn enough)
    • You don’t need health insurance from employer (or have alternative)
    • You’ve calculated taxes and expenses (not just gross income)
    • You have specific plan (debt payoff, save for business, temporary situation)

    Better: Reduce to part-time job + gig work, test before fully quitting.


    Q: How long does approval take?

    A:

    • Background check: 3-10 days usually
    • Vehicle inspection (if required): Same day
    • Fastest approval: DoorDash, Uber Eats (often 3-5 days)
    • Slowest: Instacart (can take 2 weeks)

    Apply to multiple platforms simultaneously to start earning faster.


    Q: Can I bring my kids with me while delivering?

    A: Platform policies vary:

    • Delivery (DoorDash, Uber Eats): Technically against policy, but many parents do it (car seat required)
    • Rideshare: Absolutely not (safety, insurance, customer experience)
    • Instacart/grocery: Against policy

    Reality: Many delivery drivers do bring kids in car seat, but it’s at your own risk (insurance, platform deactivation risk).


    Q: What’s the best time to start gig work?

    A: Now. Don’t wait for “perfect time.” But if you want to optimize:

    • Best months: March-May (tax refund season), November-December (holidays)
    • Worst months: January (post-holiday broke), September (back-to-school)

    Start during good months, build experience, survive slow months.


    Conclusion {#conclusion}

    The gig economy offers genuine opportunity to earn $2,000-6,000/month on your own schedule. But success requires strategy, not just effort.

    The key differentiators between struggling and thriving:

    Struggling gig workers ($12-18/hour):

    • Run one app only
    • Accept every order
    • Work random times
    • Don’t track expenses
    • Unprepared for taxes
    • Wrong vehicle for the job

    Thriving gig workers ($25-40/hour):

    • Multi-app strategically
    • Cherry-pick best orders
    • Focus on peak times
    • Track everything meticulously
    • Plan for taxes quarterly
    • Optimize vehicle choice

    The difference: $500-1,500/month for the same hours worked.

    Your action plan to start:

    Week 1: Preparation

    • Apply to 3-4 platforms (DoorDash, Uber Eats, Grubhub, Instacart)
    • Download Stride app (mileage tracking)
    • Vehicle inspection if required
    • Set up separate checking account for gig income

    Week 2: First earnings

    • Start with one app (master it)
    • Work 10-15 hours (learn the ropes)
    • Track every mile
    • Set aside 28% for taxes

    Week 3-4: Optimization begins

    • Add second app
    • Start multi-apping
    • Identify peak times in your market
    • Calculate true hourly rate
    • Adjust strategy

    Month 2-3: Refinement

    • Add third app if beneficial
    • Develop your “golden zones”
    • Build minimum acceptance criteria
    • Pay first quarterly estimated tax
    • Optimize schedule based on data

    Month 4+: Mastery

    • Consistently hitting earnings goals
    • Efficient routes and timing
    • Tax system working smoothly
    • Sustainable schedule
    • Clear path to financial goal

    Remember why you’re doing this:

    Gig work is a tool, not a destination. Whether you’re:

    • Paying off debt
    • Building emergency fund
    • Saving for a goal
    • Between jobs
    • Supplementing income
    • Testing self-employment

    Keep your “why” front and center. It’s what sustains you through slow days, difficult customers, and the occasional frustration.

    The gig economy isn’t perfect:

    • Income variability is real
    • No benefits or security
    • Vehicle wear and tear
    • Weather dependency
    • Platform algorithm changes

    But it offers something increasingly rare:

    • True flexibility
    • Income control (work more = earn more)
    • No boss or office politics
    • Quick start (earning within days)
    • Valuable business skills

    For the right person, in the right situation, with the right strategy—gig work can be a powerful financial tool.

    Final thoughts:

    Track everything. Multi-app always. Be selective with orders. Plan for taxes. Maintain your vehicle. Work peak times. Protect your safety. Have an exit plan.

    Your car, your rules, your income.

    Now get out there and maximize your earnings.

  • Online Business Ideas: Start a Profitable Business From Home

    Online Business Ideas: Start a Profitable Business From Home

    Table of Contents

    1. Introduction
    2. What Makes an Online Business Different?
    3. The Online Business Landscape in 2025
    4. How to Choose the Right Online Business
    5. E-Commerce & Product-Based Businesses
    6. Service-Based Online Businesses
    7. Content & Media Online Businesses
    8. Education & Information Businesses
    9. Technology & Software Businesses
    10. Subscription & Membership Businesses
    11. Low-Investment Online Business Ideas
    12. High-Profit Margin Online Businesses
    13. How to Validate Your Business Idea
    14. Essential Tools and Platforms
    15. Legal & Business Setup
    16. Marketing Your Online Business
    17. Scaling from Side Hustle to Full-Time Business
    18. Common Online Business Mistakes to Avoid
    19. Success Stories: Real Online Businesses
    20. Frequently Asked Questions
    21. Conclusion

    Introduction {#introduction}

    The barriers to starting a business have never been lower. No storefront needed. No massive inventory. No geographic limitations. Just you, a laptop, an internet connection, and an idea.

    In 2024, there are over 26 million online businesses globally, and that number is growing by 12% annually. The online business economy is projected to reach $8.1 trillion by 2026 (eMarketer).

    But here’s the reality check the “guru” courses won’t tell you:

    • 90% of online businesses fail within the first year
    • Most “overnight success” stories took 2-3 years of grinding
    • “Passive income” businesses require massive upfront work
    • Competition is global and fierce
    • Many “profitable” business ideas are actually saturated

    However—and this is critical—the 10% that succeed can build life-changing income:

    • Location independence (work from anywhere)
    • Income potential far exceeding traditional jobs
    • True ownership of your income source
    • Scalability beyond trading time for money
    • Potential exit (selling the business for 3-5x annual profit)

    In this comprehensive guide, you’ll discover:

    ✅ 20+ proven online business models with realistic income potential
    ✅ Low-investment options you can start with under $500
    ✅ Step-by-step frameworks to validate ideas before investing
    ✅ Honest assessments of difficulty, competition, and profitability
    ✅ Real case studies from actual online business owners
    ✅ Tools and platforms to launch quickly
    ✅ Marketing strategies that actually work in 2025

    This isn’t a “get rich quick” guide. It’s a realistic roadmap to building a legitimate online business that can generate anywhere from $2,000/month in supplemental income to $50,000+/month as a full-time venture.

    Whether you’re looking to escape the 9-to-5, supplement your income, or build wealth through entrepreneurship—there’s an online business model that fits your situation.

    Your journey to online business ownership starts now.


    What Makes an Online Business Different? {#what-makes-different}

    Before diving into specific business ideas, let’s understand what makes online businesses unique.

    Defining an Online Business

    An online business is any business that operates primarily or entirely through the internet, with transactions, marketing, customer service, and/or product delivery happening online.

    Key characteristics:

    • Internet-dependent: Primary business activities happen online
    • Global reach: Can serve customers anywhere (vs. local-only)
    • Lower overhead: No physical storefront or location required
    • Digital-first: Leverages technology for operations
    • Scalable: Can grow revenue without proportional cost increases

    Online Business vs. Traditional Business

    Aspect Traditional Business Online Business
    Startup costs $10,000-$100,000+ $100-$10,000
    Location requirement Physical location needed Work from anywhere
    Customer reach Local/regional Global
    Operating hours Limited (9-5, etc.) 24/7
    Overhead costs High (rent, utilities, staff) Low (hosting, software)
    Time to launch 3-12 months 1 week to 3 months
    Inventory needed Often yes Sometimes no (dropshipping, digital)
    Scalability Limited (physical constraints) High (digital scalability)
    Marketing reach Local advertising Global digital marketing
    Exit potential 2-3x annual profit 3-5x annual profit

    Types of Online Business Models

    1. E-Commerce (Selling Physical Products)

    • Traditional inventory
    • Dropshipping
    • Print-on-demand
    • Subscription boxes

    2. Service-Based

    • Freelancing (covered in separate article)
    • Consulting
    • Agencies
    • Done-for-you services

    3. Digital Products

    • Online courses
    • Ebooks/guides
    • Software/apps
    • Templates and tools
    • Stock media

    4. Content & Advertising

    • Blogs with ads
    • YouTube channels
    • Podcasts
    • Niche websites

    5. Affiliate & Lead Generation

    • Affiliate marketing
    • Lead generation sites
    • Comparison/review sites

    6. Platforms & Marketplaces

    • Online marketplaces
    • Community platforms
    • SaaS (Software as a Service)

    7. Subscription & Membership

    • Membership sites
    • Subscription boxes
    • Online communities
    • Premium content

    The Online Business Spectrum

    Not all online businesses are equally “online”:

    100% Online (Pure Digital):

    • SaaS business
    • Digital course platform
    • Affiliate marketing site
    • Advantage: Lowest overhead, highest margins, most scalable
    • Challenge: Often competitive, requires technical skills

    Mostly Online (Physical Component):

    • E-commerce (you ship products)
    • Print-on-demand
    • Advantage: Tangible products easier to understand/sell
    • Challenge: Inventory, shipping, returns

    Hybrid (Online + Offline):

    • Local service business with online booking
    • Online store with local pickup
    • Advantage: Less competition, serve local + online
    • Challenge: Not fully location-independent

    Advantages of Online Businesses

    1. Low Barrier to Entry

    • Start with $100-1,000 (many cases)
    • No storefront lease
    • No inventory required (some models)
    • Minimal equipment (laptop + internet)

    2. Location Independence

    • Work from home
    • Work while traveling
    • Hire globally
    • Serve customers worldwide

    3. Flexibility

    • Set your own hours
    • Work around life commitments
    • Scale up or down as needed

    4. Scalability

    • Add customers without proportional cost increase
    • Digital products: sell unlimited copies
    • Automation handles growth
    • Can scale to 7-8 figures with small team

    5. Lower Operating Costs

    • No retail space rent ($2,000-10,000/month saved)
    • Lower utilities
    • Smaller team (or solo)
    • Remote contractors vs. full-time employees

    6. Data & Testing

    • Track everything (analytics)
    • A/B test quickly
    • Pivot based on data
    • Understand customers deeply

    7. Exit Opportunities

    • Online businesses sell for 3-5x annual profit
    • Multiple marketplaces (Flippa, Empire Flippers, FE International)
    • Growing buyer market

    Challenges of Online Businesses

    1. High Competition

    • Global competition (compete with entire world)
    • Low barriers = more competitors
    • Constant innovation required

    2. Technology Dependence

    • Platform changes (Google algorithm, Facebook policy)
    • Technical issues can halt business
    • Requires ongoing tech learning

    3. Customer Acquisition

    • No foot traffic
    • Must actively drive traffic (ads, SEO, social)
    • Marketing skills critical
    • Can be expensive

    4. Isolation

    • Work alone initially
    • Miss team collaboration
    • Must proactively build community

    5. Feast or Famine

    • Income can fluctuate wildly
    • Seasonal variations
    • Algorithm changes impact overnight

    6. Self-Discipline Required

    • No boss enforcing work
    • Easy to procrastinate
    • Must set own structure

    7. Initial Learning Curve

    • Website building
    • Marketing tactics
    • Analytics and tools
    • Business operations

    Who Thrives in Online Business?

    ✅ You’re likely to succeed if you:

    • Self-motivated (work without supervision)
    • Comfortable with technology
    • Adaptable (things change constantly)
    • Patient (takes 6-18 months usually)
    • Willing to learn continuously
    • Good at problem-solving
    • Financially stable (can handle income fluctuation)
    • Persistent (won’t quit after setbacks)

    ❌ Online business may not suit you if you:

    • Need guaranteed paycheck
    • Prefer clear instructions/structure
    • Avoid technology
    • Give up easily
    • Can’t handle uncertainty
    • Want immediate results
    • Need social interaction daily
    • Are risk-averse

    Income Potential Reality Check

    Realistic income progression for successful online business:

    Months 1-6:

    • Income: $0-500/month typically
    • Reality: Building foundation, learning
    • Many quit here (seeing no results yet)

    Months 7-12:

    • Income: $500-2,000/month
    • Reality: Starting to gain traction
    • Still side hustle level

    Year 2:

    • Income: $2,000-6,000/month
    • Reality: Can supplement or replace salary
    • Serious business emerging

    Year 3+:

    • Income: $5,000-20,000+/month (if successful)
    • Reality: Full-time business supporting lifestyle
    • Top performers exceed $50,000/month

    Important: These are successful businesses. Many never get past month 6.

    Online Business Success Rate

    The hard truth:

    • 90% of online businesses fail within first year
    • 95% fail within 5 years
    • Only 5% reach profitability above $100,000/year

    Why most fail:

    • Gave up too early (quit at month 4-6)
    • Poor business idea (no market demand)
    • Inadequate marketing
    • Undercapitalized (ran out of money)
    • Didn’t validate before building
    • Wrong business model for skills/situation

    Why the 10% succeed:

    • Validated demand first
    • Consistent execution
    • Adapted based on feedback
    • Adequate funding/runway
    • Strong marketing
    • Chose right business for their strengths
    • Didn’t quit during difficult months

    This guide focuses on increasing your odds of being in the successful 10%.


    The Online Business Landscape

    Understanding current trends helps you choose a business with tailwinds, not headwinds.

    Market Size & Growth

    Global e-commerce:

    • $6.3 trillion in 2024
    • Growing 10% annually
    • Expected $8.1 trillion by 2026

    U.S. online business statistics:

    • 26.5 million online businesses
    • 12% growth year-over-year
    • E-commerce represents 15% of total retail (rising)

    Market maturity:

    • No longer “early days”
    • Established infrastructure (Shopify, Amazon, platforms)
    • Easier to start than ever
    • More competitive than ever

    Trending Business Models (2025)

    What’s HOT (growing demand, good opportunities):

    1. AI-Enhanced Services 🔥

    • AI consulting for small businesses
    • AI content creation services
    • Custom GPT development
    • AI automation implementation
    • Why hot: Businesses need help navigating AI, high demand
    • Competition: Low (still emerging)

    2. Sustainability & Eco Products 🌱

    • Eco-friendly product lines
    • Sustainable fashion
    • Zero-waste products
    • Carbon offset services
    • Why hot: Consumer demand growing 25%/year
    • Competition: Moderate

    3. Health & Wellness Digital Products 💪

    • Mental health apps/programs
    • Fitness coaching online
    • Nutrition planning
    • Biohacking content
    • Why hot: $4.5 trillion wellness industry growing
    • Competition: High but fragmented

    4. Remote Work Solutions 💼

    • Virtual team building services
    • Remote work software
    • Online collaboration tools
    • Virtual office services
    • Why hot: Remote work now permanent for many
    • Competition: Moderate to high

    5. Personalization Services 🎯

    • Custom product creation
    • Personalized nutrition
    • Tailored learning programs
    • Customized gift businesses
    • Why hot: Consumers want unique, not mass-produced
    • Competition: Moderate

    6. Short-Form Video Content Creation 📱

    • TikTok/Reels editing services
    • Short-form video strategy
    • Content repurposing agencies
    • Why hot: Massive platform investment in short video
    • Competition: Low to moderate (skills gap)

    7. Elder Care & Senior Services 👴

    • Online senior communities
    • Tech support for seniors
    • Senior-focused products
    • Aging-in-place solutions
    • Why hot: 10,000 people turn 65 daily in U.S.
    • Competition: Low (underserved market)

    8. Niche Subscription Boxes 📦

    • Highly specialized boxes (not generic)
    • Subscription boxes for specific hobbies
    • Cultural/international subscriptions
    • Why hot: Subscription economy still growing
    • Competition: High in broad categories, low in micro-niches

    What’s COOLING (declining or saturated):

    1. Generic Dropshipping ❄️

    • AliExpress → Shopify model
    • Why cooling: Saturated, low margins, long shipping
    • Alternative: Branded dropshipping or print-on-demand

    2. Broad Affiliate Blogs ❄️

    • General review sites
    • Why cooling: Google favors authority/expertise
    • Alternative: Deep niche authority sites

    3. Generic Online Courses ❄️

    • “How to make money online” courses
    • Why cooling: Market exhausted
    • Alternative: Highly specific skill courses

    4. Basic Print-on-Demand ❄️

    • Generic t-shirt designs
    • Why cooling: Race to bottom on price
    • Alternative: Niche designs for specific communities

    5. Cryptocurrency-Based Businesses ❄️

    • NFT marketplaces
    • Crypto education
    • Why cooling: Market maturity, regulation uncertainty
    • Alternative: Wait for next cycle or blockchain utility focus

    Platform Trends

    Growing platforms (where to build):

    • TikTok Shop: E-commerce integration, massive reach
    • YouTube Shorts: Monetization opportunities expanding
    • Substack: Newsletter-based businesses thriving
    • Shopify: Continual feature expansion
    • Discord: Community-based businesses

    Declining platforms:

    • Traditional blogging: Harder to monetize via ads
    • Facebook organic reach: Near zero for businesses
    • Twitter/X: Uncertain future, volatility

    Consumer Behavior Shifts

    What consumers want in 2025:

    1. Authenticity over polish

    • Real people, not perfect influencers
    • Behind-the-scenes content
    • Founder stories

    2. Values alignment

    • Shop from businesses matching their values
    • Sustainability, ethics matter
    • Willing to pay premium for aligned values

    3. Community over transaction

    • Want to belong to brand communities
    • Engage beyond purchase
    • Membership models growing

    4. Convenience uber alles

    • Same-day delivery expectations
    • One-click purchasing
    • Seamless experiences

    5. Education + Entertainment (Edutainment)

    • Want to learn while being entertained
    • TikTok teaching moments
    • Short-form educational content

    6. Personalization

    • Expect tailored experiences
    • Custom products
    • Personalized recommendations

    Economic Factors

    Recession-resistant business models:

    • Essential services
    • Budget-friendly products
    • Self-improvement/education (people invest in themselves)
    • Small luxuries (lipstick effect)
    • Repair/maintenance services

    Recession-vulnerable:

    • High-ticket luxury items
    • Discretionary entertainment
    • Travel-related
    • Non-essential subscriptions

    2025 economic context:

    • Inflation moderating but prices remain high
    • Consumers more price-sensitive
    • Value for money critical
    • Trade-down from premium to mid-tier

    Smart positioning: Offer premium quality at accessible prices

    Technology Enablers

    What makes online businesses easier in 2025:

    AI Tools:

    • Content creation (ChatGPT, Jasper, Claude)
    • Design (Midjourney, DALL-E, Canva AI)
    • Customer service (AI chatbots)
    • Analytics and insights
    • Impact: One person can do work of five

    No-Code Platforms:

    • Shopify (e-commerce)
    • Webflow (websites)
    • Bubble (web apps)
    • Zapier (automation)
    • Impact: Build complex businesses without coding

    Payment Processing:

    • Stripe, PayPal integration
    • Buy-now-pay-later (Klarna, Affirm)
    • Cryptocurrency options
    • Impact: Frictionless global transactions

    Marketing Automation:

    • Email automation (ConvertKit, Klaviyo)
    • Social media scheduling (Buffer, Later)
    • Ad automation (Facebook Advantage+)
    • Impact: Marketing on autopilot

    Logistics Solutions:

    • Fulfillment networks (Amazon FBA, ShipBob)
    • Print-on-demand (Printful, Printify)
    • Dropshipping apps (Oberlo, Spocket)
    • Impact: Sell physical products without inventory

    Competitive Landscape

    How competitive is online business in 2025?

    High competition:

    • E-commerce (general products)
    • Digital courses (broad topics)
    • Affiliate marketing
    • Content creation

    Moderate competition:

    • Specialized services
    • Niche products
    • B2B services
    • Local-to-online hybrid

    Low competition:

    • Emerging technologies (AI services)
    • Underserved demographics (seniors)
    • Hyper-niche products
    • Complex B2B solutions

    Strategy: Go narrow and deep, not broad and shallow


    How to Choose the Right Online Business {#choose-right}

    With hundreds of possible online businesses, how do you choose?

    The Three-Circle Framework

    The perfect online business sits at intersection of:

    1. PASSION/INTEREST
    What you enjoy doing (won’t burn out)

    2. SKILLS/STRENGTHS
    What you’re good at (can deliver quality)

    3. MARKET DEMAND/PROFIT
    What people will pay for (sustainable business)

    ❌ Only passion: Hobby, not business (starving artist)
    ❌ Only skills: Boring, will quit (joyless expertise)
    ❌ Only profit: Soulless, difficult to maintain (chasing money)

    ✅ All three: Sustainable, enjoyable, profitable business

    Assessment Questions

    Answer these honestly:

    Passion/Interest Assessment

    What topics do you naturally gravitate toward?

    • What do you read about in free time?
    • What do you watch on YouTube?
    • What could you talk about for hours?
    • What problems do you enjoy solving?

    List 5 topics/activities you’re passionate about:


    Skills/Strengths Assessment

    What are you naturally good at?

    • What do people ask you for help with?
    • What tasks feel easy to you but hard to others?
    • What have you been formally trained in?
    • What have you done professionally?

    Professional skills:


    Natural talents:


    Learned skills:


    Market Demand Assessment

    Of your passions, which have market demand?

    Test with these questions:

    • Are people already paying for solutions? (Proof of market)
    • Is the market growing or shrinking? (Trends)
    • Are existing solutions inadequate? (Gap you can fill)
    • Can customers afford to pay? (Economic viability)

    Quick validation:

    • Google search your idea + “buy” (see if people search to purchase)
    • Check Amazon/Etsy for similar products (do they sell?)
    • Look at competitors (are they making money?)
    • Survey potential customers (would they pay?)

    Your Business Fit Score

    For each business idea you’re considering, rate 1-10:

    Example: Online Fitness Coaching

    Passion: 9/10 (Love fitness and helping people)
    Skills: 7/10 (Certified trainer, but new to online delivery)
    Market Demand: 9/10 (Huge market, proven willingness to pay)
    Total Score: 25/30 (Strong fit)

    Your idea: ________________________

    Passion: ___/10
    Skills: ___/10
    Market Demand: ___/10
    Total Score: ___/30

    Scoring:

    • 25-30: Excellent fit, strong potential
    • 20-24: Good fit, worth pursuing
    • 15-19: Moderate fit, may need to build skills or find better idea
    • Below 15: Poor fit, reconsider

    Practical Constraints to Consider

    Time availability:

    • 5-10 hours/week: Service business, freelancing, content creation
    • 10-20 hours/week: E-commerce, course creation, small agency
    • 20-40 hours/week: Full-scale business, software, larger ventures

    Financial investment:

    • $0-500: Content, affiliate, freelancing, dropshipping
    • $500-5,000: E-commerce with inventory, course production, tools
    • $5,000+: Software development, agency, inventory-based business

    Risk tolerance:

    • Low risk: Service-based, freelancing (get paid before delivering)
    • Medium risk: Small product inventory, course creation
    • High risk: Large inventory, software development, platform building

    Technical ability:

    • Low-tech: Coaching, content creation, social media management
    • Medium-tech: E-commerce (Shopify), online courses, affiliate sites
    • High-tech: Software development, app creation, complex platforms

    Timeline to income:

    • Fast (1-3 months): Freelancing, service business, consulting
    • Medium (3-6 months): E-commerce, course creation, affiliate
    • Slow (6-12+ months): Content sites, software, complex businesses

    Business Model Decision Tree

    Start here: What appeals to you more?

    Option A: Selling products (physical or digital)
    → Go to Product-Based section

    Option B: Selling services (your time/expertise)
    → Go to Service-Based section

    Option C: Building audience/platform
    → Go to Content/Media section

    Option D: Creating tools/software
    → Go to Technology section


    The “Hell Yes” Test

    Before committing to a business idea:

    Ask yourself:

    • Can I see myself doing this for 2+ years?
    • Would I work on this even if growth was slow?
    • Do I get excited talking about this topic?
    • Would I do this even if I didn’t need money? (passion test)

    If any answer is “no” or “maybe”—reconsider.

    You need “HELL YES” conviction to push through difficult early months.


    Common Selection Mistakes

    Mistake #1: Chasing trends blindly

    • Seeing “NFTs are hot!” and jumping in
    • By the time you notice trend, often too late
    • Better: Find timeless needs, use current trends as delivery method

    Mistake #2: Choosing solely based on profit potential

    • “This makes $100k/year!” (but you hate it)
    • Burnout inevitable
    • Better: Choose profitable idea you also enjoy

    Mistake #3: Picking business beyond skill level

    • Want to build SaaS with no coding experience
    • Won’t learn fast enough to compete
    • Better: Build on existing skills, learn incrementally

    Mistake #4: Ignoring market validation

    • “I think people would love this!” (with no proof)
    • Build for months, launch to crickets
    • Better: Validate BEFORE building

    Mistake #5: Trying to serve everyone

    • “My product is for anyone who needs X”
    • Too broad, ineffective marketing
    • Better: Specific niche, specific customer

    Quick-Start Recommendation by Situation

    Situation 1: “I have $500, 10 hours/week, need income in 3 months”
    → Best options: Service-based freelancing, consulting, virtual assistance

    Situation 2: “I have $5,000, 20 hours/week, can wait 6-12 months”
    → Best options: E-commerce with inventory, course creation, niche site

    Situation 3: “I have $0, 15 hours/week, technical skills”
    → Best options: Freelance development, SaaS tool, app development

    Situation 4: “I have $2,000, 30 hours/week, creative skills”
    → Best options: Digital product business, content creation, design agency

    Situation 5: “I have $10,000, 40 hours/week, business experience”
    → Best options: Full-scale e-commerce, agency, software business


    Your Business Selection Worksheet

    Top 3 business ideas I’m considering:

    Idea #1: _______________________________

    • Passion score: ___/10
    • Skills score: ___/10
    • Market demand score: ___/10
    • Total: ___/30

    Idea #2: _______________________________

    • Passion score: ___/10
    • Skills score: ___/10
    • Market demand score: ___/10
    • Total: ___/30

    Idea #3: _______________________________

    • Passion score: ___/10
    • Skills score: ___/10
    • Market demand score: ___/10
    • Total: ___/30

    Winner (highest score): _______________________________

    Next step: Validate this idea before building (see Validation section)


    E-Commerce & Product-Based Businesses {#ecommerce}

    Let’s dive into specific online business models. We’ll start with selling physical products.


    1. Print-on-Demand Business ⭐ LOW INVESTMENT

    What it is: Create designs, upload to platform, products printed/shipped only when ordered (zero inventory).

    How it works:

    1. Create designs (t-shirts, mugs, posters, phone cases, etc.)
    2. Upload to POD platform (Printful, Printify, Redbubble)
    3. Platform prints & ships when customer orders
    4. You keep profit margin

    Investment needed: $0-500

    • Designs (DIY or hire designer: $0-300)
    • Website (Shopify: $39/month or use free marketplace)
    • Marketing ($0-200 to start)

    Income potential: $500-5,000/month

    • Beginner: $200-800/month
    • Established: $2,000-5,000/month
    • Top sellers: $10,000+/month

    Time to profit: 1-6 months

    Difficulty: ⭐⭐ (Easy to start, hard to stand out)


    Best platforms:

    Integrated POD + Marketplace:

    • Redbubble: Zero setup, upload designs, they handle everything (lowest margins)
    • TeePublic: Similar to Redbubble
    • Society6: Art-focused, higher-end products

    POD + Your Store:

    • Printful: Integrates with Shopify, Etsy, Amazon
    • Printify: Similar to Printful, often cheaper
    • SPOD: Shopify’s official POD partner

    Product types:

    • Apparel (t-shirts, hoodies, leggings)
    • Home décor (throw pillows, wall art, blankets)
    • Accessories (phone cases, tote bags, stickers)
    • Stationery (notebooks, planners)
    • Drinkware (mugs, water bottles)

    Profit margins:

    Example: T-shirt

    • Retail price: $25
    • Base cost (print + shirt): $12
    • Platform fee: $0 (Printful) or 20% (Redbubble = $5)
    • Your profit: $13 (Printful) or $8 (Redbubble)

    To make $2,000/month:

    • Need ~150 sales/month ($13 profit each)
    • 5 sales per day

    Success strategies:

    1. Niche down specifically

    • ❌ Generic: “Funny t-shirts”
    • ✅ Specific: “T-shirts for cat-loving nurses”
    • Easier to market, less competition

    2. Leverage trends intelligently

    • Use Google Trends, TikTok trends
    • Create designs fast for trending topics
    • Example: TV show launches, viral memes

    3. Build brand, not just products

    • Cohesive aesthetic
    • Target specific audience
    • Tell story

    4. Use multiple products per design

    • One good design → 20 products
    • Increases revenue per design

    5. SEO optimize listings

    • Use keywords in titles, descriptions
    • Especially important on Etsy, Redbubble

    Pros:
    ✅ Zero inventory risk
    ✅ Low startup cost
    ✅ No shipping/fulfillment hassles
    ✅ Easy to start
    ✅ Scalable
    ✅ Can run while traveling

    Cons:
    ❌ Lower profit margins than traditional e-commerce
    ❌ Very competitive
    ❌ Quality control limited (you don’t handle products)
    ❌ Shipping times can be long (7-14 days)
    ❌ Difficult to build brand loyalty


    Realistic expectations:

    Month 1-2:

    • Learning platform, creating designs
    • First few sales ($0-100)

    Month 3-6:

    • 50-100 designs uploaded
    • $200-800/month income

    Month 7-12:

    • 200+ designs, established store
    • $1,000-3,000/month

    Year 2:

    • Multiple stores, outsourcing design
    • $3,000-8,000/month (if successful)

    When to choose POD:
    ✅ You’re creative or can hire designers
    ✅ Want low-risk entry to e-commerce
    ✅ Don’t have money for inventory
    ✅ Want passive-ish income
    ✅ Enjoy design/visual work

    ❌ Avoid if you want highest profit margins (traditional e-commerce better)

    [Internal Link: Fund POD startup with income from “Best Side Hustles for 2025: Make Extra Money on Your Schedule”]


    2. Dropshipping Business

    What it is: Sell products online without holding inventory; supplier ships directly to customer.

    How it works:

    1. Set up online store (Shopify)
    2. Add products from suppliers (AliExpress, CJ Dropshipping, Spocket)
    3. Customer orders from your store
    4. You forward order to supplier
    5. Supplier ships to customer
    6. You keep markup

    Investment needed: $500-3,000

    • Shopify: $39/month
    • Domain: $15/year
    • Apps/plugins: $30-100/month
    • Product samples: $100-200
    • Marketing budget: $300-2,500 (critical)

    Income potential: $1,000-10,000/month

    • Most beginners: $500-2,000/month
    • Established stores: $5,000-15,000/month
    • Top performers: $50,000+/month

    Time to profit: 3-6 months (marketing dependent)

    Difficulty: ⭐⭐⭐⭐ (Easy to start, very hard to succeed)


    Dropshipping models:

    1. General Store

    • Sell variety of products
    • Test multiple niches
    • Pro: Flexibility to pivot
    • Con: Hard to build brand, ineffective marketing

    2. Niche Store

    • Focus on one product category
    • Example: Pet products, fitness equipment
    • Pro: Easier to market, build authority
    • Con: Limited product range

    3. One-Product Store

    • Sell single hero product
    • Deep focus, perfect for Facebook ads
    • Pro: Laser-focused marketing
    • Con: All eggs in one basket

    Recommendation: Start with niche store


    Finding products:

    Supplier platforms:

    • AliExpress: Largest selection, longest shipping (15-30 days)
    • CJ Dropshipping: Faster shipping, better quality control
    • Spocket: US/EU suppliers (faster shipping, higher costs)
    • Modalyst: Brand-name products

    Product selection criteria:
    ✅ Solves specific problem
    ✅ Not available in local stores
    ✅ High perceived value vs. cost
    ✅ Profit margin 3x cost minimum
    ✅ Lightweight (lower shipping costs)
    ✅ Not fragile (fewer returns)

    Avoid:
    ❌ Highly seasonal products (unless intentional)
    ❌ Branded/trademarked items (legal issues)
    ❌ Products with huge Amazon presence (can’t compete)


    Profit margins:

    Example: Fitness resistance bands

    • Supplier cost: $8
    • Shipping: $3
    • Total cost: $11
    • Retail price: $39.99
    • Payment processing (3%): $1.20
    • Gross profit: $27.79

    After expenses:

    • Marketing cost per sale: $15 (Facebook ads)
    • Net profit: $12.79 per sale

    To make $5,000/month profit:

    • Need ~391 sales/month
    • ~13 sales/day
    • Marketing spend: ~$5,865/month
    • Gross revenue: ~$15,636/month

    Math is tight. Marketing efficiency is everything.


    Success strategies:

    1. Branded dropshipping

    • Create brand identity
    • Custom packaging (many suppliers offer)
    • Build real business, not just arbitrage

    2. Focus on marketing

    • Dropshipping is 80% marketing, 20% product
    • Learn Facebook ads or TikTok ads
    • Budget $500-2,000/month for ads minimum

    3. Fast shipping is critical

    • Use US/EU suppliers when possible
    • Or China warehouses with 5-7 day shipping
    • 30-day AliExpress shipping = bad reviews

    4. Exceptional customer service

    • Respond within 24 hours
    • Proactive communication
    • Handle issues generously
    • Build trust despite not controlling fulfillment

    5. Test products systematically

    • Don’t marry first product
    • Test 5-10 products
    • Double down on winners

    Pros:
    ✅ Low startup cost (vs. traditional inventory)
    ✅ No inventory management
    ✅ Easy to test products
    ✅ Scalable
    ✅ Can run from anywhere

    Cons:
    ❌ Very competitive (low barrier = lots of competition)
    ❌ Thin profit margins
    ❌ Shipping issues (delays, quality, tracking)
    ❌ No control over fulfillment
    ❌ Hard to build sustainable brand
    ❌ Suppliers can run out of stock
    ❌ Returns/refunds cut into profits


    Realistic expectations:

    Month 1-3:

    • Store setup, testing products
    • Losing money on ads (learning)
    • $0-500 revenue, negative profit

    Month 4-6:

    • Found winning product(s)
    • Breaking even or small profit
    • $2,000-5,000 revenue, $200-1,000 profit

    Month 7-12:

    • Optimized ads, scaling winners
    • $5,000-15,000 revenue, $1,000-4,000 profit

    Note: Most dropshippers fail or quit before month 6. Success requires persistence through learning phase.


    When to choose dropshipping:
    ✅ You have marketing budget ($1,000+ to test)
    ✅ Willing to learn paid advertising
    ✅ Comfortable with uncertainty
    ✅ Patient during testing phase
    ✅ Want to learn e-commerce with low risk

    ❌ Avoid if you want passive income (requires active marketing)
    ❌ Avoid if you can’t afford $1,000+ ad testing budget
    ❌ Avoid if you need immediate profit


    3. Amazon FBA (Fulfillment by Amazon)

    What it is: Sell products on Amazon; Amazon stores, packs, and ships your inventory.

    How it works:

    1. Source products (wholesale, private label, or manufacture)
    2. Send inventory to Amazon warehouse
    3. Create product listings on Amazon
    4. Customer orders
    5. Amazon fulfills and ships
    6. You keep profit (after Amazon fees)

    Investment needed: $3,000-10,000

    • Initial inventory: $2,000-7,000
    • Amazon seller account: $39.99/month
    • Product samples: $100-300
    • Photography: $100-500
    • UPC codes: $30
    • Shipping to Amazon: $200-500

    Income potential: $2,000-20,000+/month

    • Beginners: $1,000-3,000/month
    • Established: $5,000-15,000/month
    • Successful brands: $50,000+/month

    Time to profit: 3-9 months

    Difficulty: ⭐⭐⭐⭐ (Requires capital, complex, competitive)


    Amazon FBA models:

    1. Private Label

    • Find generic product
    • Add your brand/packaging
    • Sell as branded product
    • Most common approach

    2. Wholesale

    • Buy name-brand products wholesale
    • Resell on Amazon
    • Lower margins, easier to start

    3. Retail Arbitrage

    • Buy clearance/sale items retail
    • Resell on Amazon
    • Time-intensive, not scalable

    Recommendation: Private label offers best long-term potential


    Finding products to sell:

    Criteria for good Amazon product:
    ✅ Sells 300+ units/month (demand exists)
    ✅ Priced $15-50 (sweet spot)
    ✅ Small/lightweight (lower FBA fees)
    ✅ Few reviews (<500 on top listings = less competition)
    ✅ 3x profit margin after all fees
    ✅ Evergreen (not seasonal/trendy)
    ✅ Not fragile
    ✅ Not restricted category

    Tools for product research:

    • Jungle Scout ($29-79/month)
    • Helium 10 ($29-99/month)
    • AMZScout ($30-50/month)

    Process:

    1. Use tool to find product categories meeting criteria
    2. Order samples from Alibaba suppliers
    3. Test quality
    4. Calculate total costs + fees
    5. If profitable, order inventory

    Costs breakdown example:

    Product: Yoga mat

    Upfront costs:

    • Manufacturing (500 units @ $4 each): $2,000
    • Shipping to Amazon (sea freight): $400
    • Photography/listing: $200
    • Total investment: $2,600

    Per-unit economics:

    • Manufacturing cost: $4.00
    • Shipping to Amazon: $0.80
    • Landed cost: $4.80

    Sale price: $24.99
    Amazon fees (referral + FBA): $9.37
    Cost of goods: $4.80
    Advertising (PPC): $3.00
    Gross profit per unit: $7.82

    Profit margin: 31%

    To make $5,000/month:

    • Need ~640 sales/month
    • ~21 sales/day
    • Inventory: 640 × $4.80 = $3,072 tied up monthly

    Success strategies:

    1. Product differentiation

    • Don’t sell identical product to competitors
    • Add features, improve packaging, bundle items
    • Example: Not just yoga mat—yoga mat with alignment markers + carrying strap

    2. Listing optimization

    • Professional photos (hire photographer)
    • Keyword-rich title
    • Bullet points highlighting benefits
    • A+ content
    • Great listings convert 2-3x better

    3. Launch strategy critical

    • First 30 days determine ranking
    • Run aggressive PPC campaigns
    • Consider launch service (deals, promotions)
    • Get reviews fast (Request a Review button, follow-up emails)

    4. Master Amazon PPC

    • Sponsored Products ads
    • Start broad, optimize to profitable keywords
    • Minimum $20/day ad spend

    5. Protect your listing

    • Register brand (Amazon Brand Registry)
    • Prevents hijackers
    • Unlocks A+ content

    Pros:
    ✅ Access to massive customer base (300M+ Amazon customers)
    ✅ Amazon handles fulfillment (storage, packing, shipping, returns)
    ✅ Fast shipping (Prime badge)
    ✅ Scalable (Amazon handles growth)
    ✅ Can build sellable brand (3-4x annual profit exit)

    Cons:
    ❌ High upfront investment (inventory)
    ❌ Complex fee structure (eats margins)
    ❌ Intense competition
    ❌ Amazon policy changes (can kill product overnight)
    ❌ Account suspension risk (strict rules)
    ❌ Long-term storage fees (inventory must move)
    ❌ Amazon owns customer relationship (can’t build email list)
    ❌ Race to bottom on price


    Realistic expectations:

    Month 1-3:

    • Research, source, order inventory
    • Waiting for manufacturing/shipping
    • $0 revenue

    Month 4-6:

    • Launch product
    • Heavy ad spend (losing money)
    • $3,000-8,000 revenue, breakeven or small loss

    Month 7-12:

    • Optimized, gaining reviews
    • $8,000-15,000 revenue, $2,000-5,000 profit
    • Reorder inventory

    Year 2:

    • Mature product, add SKUs
    • $15,000-30,000 revenue, $5,000-10,000 profit

    Challenges:

    • 50% of Amazon sellers fail in first year
    • Requires capital cushion (don’t invest last $5,000)
    • Must reinvest profits into inventory for growth

    When to choose Amazon FBA:
    ✅ Have $5,000-10,000 investment capital
    ✅ Comfortable with inventory risk
    ✅ Want access to massive marketplace
    ✅ Willing to learn complex platform
    ✅ Patient (takes 6-12 months to profit)

    ❌ Avoid if you have limited capital (too risky)
    ❌ Avoid if you want quick returns (slow to profit)
    ❌ Avoid if you can’t handle complexity


    4. Subscription Box Business

    What it is: Curate products, subscribers receive box monthly/quarterly.

    How it works:

    1. Choose niche (beauty, snacks, books, pets, etc.)
    2. Source products (wholesale, partnerships)
    3. Create subscription tiers
    4. Market to build subscriber base
    5. Fulfill boxes monthly
    6. Collect recurring revenue

    Investment needed: $2,000-10,000

    • Initial inventory: $1,000-5,000
    • Packaging/boxes: $200-500
    • Website (Cratejoy or Shopify): $30-100/month
    • Marketing: $500-3,000
    • Shipping materials: $200-500

    Income potential: $2,000-20,000/month

    • 100 subscribers × $35/box = $3,500/month revenue
    • After costs (product, shipping, packaging): ~40% margin = $1,400 profit
    • 500 subscribers = $7,000 profit/month

    Time to profit: 6-12 months

    Difficulty: ⭐⭐⭐⭐ (Logistics complex, competitive)


    Successful subscription box niches:

    Underserved (good opportunities):

    • Hobby-specific: Specific crafts, games, activities
    • Dietary-specific: Keto, vegan, allergen-free snacks
    • Cultural: International snacks, books from specific countries
    • Professional: Tools for specific professions
    • Pet-specific: Boxes for reptiles, birds (not just dogs/cats)
    • Wellness: Mental health, meditation, self-care
    • Sustainable: Eco-friendly household products

    Saturated (avoid):

    • Generic beauty boxes
    • General snack boxes
    • Broad “self-care” boxes

    Key: Go micro-niche, not broad


    Economics example:

    Niche: Monthly book box for sci-fi fans

    Subscription price: $39.99/month

    Costs per box:

    • Book (wholesale): $8
    • 2-3 themed items: $5
    • Box/packaging: $3
    • Shipping (USPS): $5
    • Payment processing (3%): $1.20
    • Total cost: $22.20
    • Gross margin: $17.79 (45%)

    With 200 subscribers:

    • Monthly revenue: $7,998
    • Total costs: $4,440
    • Gross profit: $3,558
    • Operating expenses (marketing, tools, labor): $1,500
    • Net profit: ~$2,058/month

    Success strategies:

    1. Niche down radically

    • Not “book box” → “Sci-fi book box for women”
    • Not “pet box” → “Box for senior dogs with joint issues”
    • Easier to market, build community

    2. Build community, not just box

    • Facebook group for subscribers
    • Exclusive content
    • Unboxing experiences
    • Member-only perks

    3. Leverage curation expertise

    • Position as curator/expert
    • Share stories behind items
    • Educational component

    4. Retention is everything

    • Subscriber lifetime value critical
    • Focus on reducing churn
    • Personalization increases retention
    • Surprise & delight

    5. Partner with brands

    • Get products at cost or free (exposure for them)
    • Reduces product costs
    • Expands what you can include

    Pros:
    ✅ Recurring revenue (predictable)
    ✅ Build loyal community
    ✅ Creative & fun
    ✅ Premium pricing possible
    ✅ Can become valuable asset (sell business for 3-5x ARR)

    Cons:
    ❌ Logistics intensive (fulfillment every month)
    ❌ Customer acquisition expensive
    ❌ High churn (subscribers cancel)
    ❌ Inventory risk (must order before knowing exact subscriber count)
    ❌ Shipping costs eat margins
    ❌ Seasonal fluctuations (December high, January drop)


    Realistic expectations:

    Month 1-3:

    • Build website, source products
    • First 10-30 subscribers (friends, family)
    • Losing money (acquiring customers)

    Month 4-8:

    • 50-150 subscribers
    • Breakeven or small profit
    • Refining box contents based on feedback

    Month 9-18:

    • 200-500 subscribers
    • $2,000-8,000 profit/month
    • Optimized operations

    Critical metric: Churn rate

    • 5-10% monthly churn is typical
    • Need constant new subscriber acquisition
    • Retention campaigns critical

    When to choose subscription box:
    ✅ You’re passionate about specific niche
    ✅ Enjoy curation and discovery
    ✅ Have logistics capability (or partner)
    ✅ Comfortable with monthly fulfillment grind
    ✅ Can invest $5,000-10,000

    ❌ Avoid if you want hands-off business
    ❌ Avoid if you can’t handle physical fulfillment
    ❌ Avoid if you’re in saturated niche


    5. Handmade Products (Etsy Business)

    What it is: Create handmade products, sell on Etsy or own website.

    How it works:

    1. Make products by hand (jewelry, home décor, art, etc.)
    2. List on Etsy marketplace
    3. Take orders
    4. Create product
    5. Ship to customer

    Investment needed: $200-2,000

    • Materials/supplies: $100-1,000
    • Tools/equipment: $0-500 (if don’t have)
    • Etsy fees: $0.20 per listing
    • Photography setup: $50-200
    • Packaging: $50-300

    Income potential: $500-5,000/month

    • Part-time: $500-2,000/month
    • Full-time: $3,000-8,000/month
    • Top sellers: $15,000+/month

    Time to profit: 1-4 months

    Difficulty: ⭐⭐⭐ (Moderate—creative skill required)


    Popular handmade categories:

    High demand on Etsy:

    • Personalized gifts (custom names, dates)
    • Wedding items (invitations, décor, favors)
    • Jewelry (especially personalized)
    • Home décor (signs, wall art)
    • Planners/stationery
    • Baby items (clothes, blankets, milestone items)
    • Pet accessories
    • Digital downloads (printables, templates)

    Trending:

    • Sustainability (upcycled, eco-friendly materials)
    • Minimalist aesthetic
    • Boho/cottagecore style
    • Personalization

    Economics example:

    Product: Personalized wood family sign

    Costs:

    • Wood: $5
    • Stain/paint: $2
    • Hardware/accessories: $1
    • Labor (2 hours @ $15/hr): $30
    • Packaging: $2
    • Total cost: $40

    Selling price: $85
    Etsy fees (6.5% + $0.20): $5.73
    Payment processing (3% + $0.25): $2.80
    Shipping (charged to customer): $0
    Profit per item: $36.47

    To make $3,000/month:

    • Need ~82 sales/month
    • ~3 sales/day
    • ~6 hours/day production time

    Reality: Time-intensive. Hard to scale beyond $5,000/month solo.


    Success strategies:

    1. Niche specialization

    • Not “jewelry” → “Personalized birthstone jewelry for mothers”
    • Not “home décor” → “Farmhouse wood signs with family names”

    2. Professional photography

    • Quality photos = 3x sales
    • Natural lighting
    • Lifestyle shots (in use)
    • Multiple angles
    • Invest in light box ($50)

    3. SEO optimization critical

    • Etsy is search engine
    • Keywords in titles, tags, descriptions
    • Research what buyers search
    • Tools: eRank, Marmalead

    4. Fast shipping

    • Etsy rewards fast fulfillment
    • Offer 1-3 day processing
    • Provides tracking

    5. Stellar customer service

    • Respond within 24 hours
    • Go above and beyond
    • Reviews are everything
    • 5-star reviews boost ranking

    6. Expand beyond Etsy

    • Build own website (Shopify)
    • Direct traffic there (avoid Etsy fees)
    • Build email list
    • Social media following

    Pros:
    ✅ Creative and fulfilling work
    ✅ Low startup cost
    ✅ Access to established marketplace (Etsy traffic)
    ✅ Can start part-time
    ✅ Premium pricing possible (handmade commands higher prices)
    ✅ Build real brand

    Cons:
    ❌ Time-intensive (you make everything)
    ❌ Hard to scale (limited by your time)
    ❌ Etsy fees eat into profits (9-12% total)
    ❌ Competitive marketplace
    ❌ Algorithm changes affect visibility
    ❌ Physical product challenges (inventory, shipping)


    Realistic expectations:

    Month 1:

    • Set up shop, list products
    • First few sales (5-10)
    • $100-500 revenue

    Month 2-4:

    • Building reviews, improving SEO
    • 20-50 sales/month
    • $500-2,000 revenue

    Month 5-12:

    • Established shop, steady sales
    • 50-150 sales/month
    • $2,000-6,000 revenue
    • $1,000-3,000 profit

    Scaling challenge:

    • Can hire help (production assistants)
    • Or transition to manufacturing (lose “handmade” appeal)
    • Many stay at $3,000-5,000/month sweet spot

    When to choose handmade Etsy:
    ✅ You’re creative and enjoy crafting
    ✅ Have skill in specific craft
    ✅ Want to start small and test
    ✅ Prefer making things to digital work
    ✅ Can handle repetition (making same thing often)

    ❌ Avoid if you want passive income (very active)
    ❌ Avoid if you want to scale big (limited by time)
    ❌ Avoid if you hate shipping/logistics


    Service-Based Online Businesses {#service-based}

    Moving from products to services—selling your expertise and time.


    6. Freelancing (Covered in Separate Article)

    Quick overview:

    • Offer services on project basis
    • Writing, design, development, marketing, VA, etc.
    • $2,000-10,000/month realistic
    • Covered in depth in dedicated article

    [Internal Link: See complete guide “How to Start Freelancing: Turn Your Skills Into Income”]


    7. Online Coaching/Consulting Business ⭐ HIGH PROFIT

    What it is: Provide 1-on-1 or group coaching/consulting in your area of expertise.

    How it works:

    1. Identify your expertise (business, health, life, career, etc.)
    2. Create coaching package/program
    3. Market your services
    4. Deliver coaching sessions (Zoom)
    5. Help clients achieve specific results

    Investment needed: $100-2,000

    • Website: $50-500
    • Scheduling tool (Calendly): $0-10/month
    • Zoom Pro: $15/month
    • Marketing: $0-1,000
    • Certification (optional): $0-2,000

    Income potential: $3,000-20,000+/month

    • Beginner coaches: $2,000-5,000/month
    • Established coaches: $8,000-15,000/month
    • Top coaches: $30,000-100,000+/month

    Time to profit: 1-6 months

    Difficulty: ⭐⭐⭐ (Moderate—requires expertise + sales skills)


    Coaching niches:

    Business coaching:

    • Sales coaching
    • Marketing coaching
    • Leadership development
    • Startup coaching
    • Productivity coaching

    Career coaching:

    • Resume/interview coaching
    • Career transition
    • Executive coaching
    • LinkedIn optimization

    Health/Wellness:

    • Nutrition coaching
    • Fitness coaching
    • Mental health coaching
    • Sleep coaching

    Life coaching:

    • Relationship coaching
    • Parenting coaching
    • Confidence/mindset coaching
    • Financial coaching

    Specialized:

    • ADHD coaching
    • Grief coaching
    • Author coaching

    The more specific, the easier to market and charge premium.


    Pricing models:

    1. Hourly sessions

    • $100-500/hour (depending on niche/experience)
    • Good for starting, but limits income

    2. Package deals

    • 6 sessions over 3 months: $1,500-5,000
    • Commitment ensures results
    • Higher perceived value

    3. Group coaching

    • 10 people × $500 = $5,000
    • Leverage your time
    • Weekly group calls

    4. High-ticket programs

    • 6-12 month intensive: $10,000-50,000
    • For experienced coaches
    • Transformational results

    Example: Business coaching for solopreneurs

    Package: “Six-Figure Solopreneur” 3-month program

    Includes:

    • 12 1-on-1 sessions (weekly)
    • Email support between sessions
    • Templates and resources
    • Accountability

    Price: $3,000

    Clients: 8 per cohort (manageable)
    Revenue per cohort: $24,000
    Time commitment: ~40 hours (3 months)
    Effective hourly rate: $600/hour

    Run 4 cohorts/year = $96,000 annual revenue


    Success strategies:

    1. Prove results

    • Case studies critical
    • Before/after transformations
    • Testimonials with specifics
    • “Sarah increased revenue from $50k to $200k in 6 months”

    2. Niche down

    • Not “life coach” → “Burnout recovery coach for healthcare professionals”
    • Easier to become known expert
    • Can charge premium

    3. Content marketing

    • Blog, podcast, YouTube
    • Give value for free
    • Builds authority
    • Attracts ideal clients

    4. Free discovery calls

    • 30-min complimentary session
    • Understand their problem
    • Present your solution
    • Conversion rates: 20-50%

    5. Leverage frameworks

    • Create proprietary method/system
    • “The 5 Pillars of X”
    • Makes you unique
    • Easier to explain value

    Pros:
    ✅ High profit margins (80-90%)
    ✅ No inventory or physical products
    ✅ Deeply rewarding work
    ✅ Flexible schedule
    ✅ Can work from anywhere
    ✅ Builds personal brand
    ✅ Scalable (group coaching, courses)

    Cons:
    ❌ Requires expertise/credibility
    ❌ Must be comfortable selling
    ❌ Time-for-money (unless you scale to group/courses)
    ❌ Client results vary (can be frustrating)
    ❌ Emotional labor (holding space for clients)
    ❌ Feast or famine if not consistent with marketing


    Realistic expectations:

    Month 1-3:

    • Building credibility, website, content
    • First 1-3 clients (often discounted)
    • $500-2,000/month

    Month 4-8:

    • 5-8 clients
    • Refining offer based on results
    • $3,000-6,000/month

    Month 9-18:

    • 10-15 clients or group programs
    • Established authority
    • $8,000-15,000/month

    Scaling:

    • Add group coaching (leverage time)
    • Create digital course (passive income)
    • Train other coaches (licensing model)

    When to choose coaching/consulting:
    ✅ You have deep expertise in specific area
    ✅ You enjoy helping people 1-on-1
    ✅ You’re comfortable with sales
    ✅ You can produce measurable results
    ✅ You have credibility (or can build it)

    ❌ Avoid if you lack expertise (build it first via freelancing)
    ❌ Avoid if you hate sales conversations
    ❌ Avoid if you want passive income (active work)


    8. Digital Marketing Agency

    What it is: Provide marketing services (SEO, PPC, social media, content) to businesses.

    How it works:

    1. Choose service offering (SEO, Facebook ads, etc.)
    2. Build own skills or hire contractors
    3. Find clients (outreach, referrals, content marketing)
    4. Deliver results
    5. Retain clients on monthly retainers

    Investment needed: $500-5,000

    • Website: $100-1,000
    • Tools/software: $100-500/month
    • Contractor costs: $0-2,000 (can start solo)
    • Marketing: $0-2,000

    Income potential: $5,000-50,000+/month

    • Solo operator: $5,000-15,000/month
    • Small team: $15,000-40,000/month
    • Established agency: $50,000-200,000+/month

    Time to profit: 2-6 months

    Difficulty: ⭐⭐⭐⭐ (Requires skills + sales + management)


    Agency service options:

    Specialized (recommended):

    • SEO agency (search engine optimization)
    • PPC agency (Google Ads, Facebook Ads management)
    • Social media agency (content + management)
    • Content marketing agency (blog writing, content strategy)
    • Email marketing agency (automation, campaigns)

    Full-service (harder to position):

    • All of the above
    • Harder to become known for anything
    • More complex operations

    Recommendation: Start specialized, expand later


    Agency pricing models:

    1. Monthly retainer

    • $1,000-10,000/month per client
    • Ongoing services
    • Predictable revenue
    • Most common model

    2. Project-based

    • Website redesign: $5,000-50,000
    • Campaign setup: $2,000-10,000
    • One-time work

    3. Performance-based

    • % of ad spend
    • % of revenue generated
    • Higher risk, higher reward

    4. Hybrid

    • Retainer + performance bonuses
    • Best of both worlds

    Example: Facebook Ads Agency

    Service: Manage Facebook ad campaigns for e-commerce brands

    Pricing: $2,500/month retainer + 10% of ad spend

    Client spending $10,000/month on ads:

    • Retainer: $2,500
    • Performance: $1,000
    • Total: $3,500/month per client

    With 5 clients: $17,500/month revenue

    Costs:

    • Ad tools (Madgicx, etc.): $200/month
    • Contractor (ad creative): $1,500/month
    • Profit: $15,800/month

    Success strategies:

    1. Niche down by industry

    • Not “We do Facebook ads for anyone”
    • “We do Facebook ads for DTC beauty brands”
    • Easier to get known
    • Case studies more relevant
    • Can charge premium

    2. Results-focused positioning

    • Lead with outcomes, not services
    • “We help e-commerce brands scale to $1M/month with Facebook ads”
    • Specific, measurable, credible

    3. Build case studies early

    • Offer first 3 clients discounted rates
    • Document everything
    • Results = future sales ammunition

    4. White-label contractors

    • Don’t try to do everything yourself
    • Hire specialists (Upwork, Fiverr)
    • You manage, they execute
    • Allows scaling

    5. Systematize everything

    • SOPs (standard operating procedures)
    • Templates for common tasks
    • Onboarding process
    • Reporting templates
    • Allows delegation and scaling

    Pros:
    ✅ High income potential
    ✅ Recurring revenue (retainers)
    ✅ Scalable (hire team)
    ✅ Sellable business (3-5x annual profit)
    ✅ Remote-friendly
    ✅ Helps businesses grow (rewarding)

    Cons:
    ❌ Client management intensive
    ❌ Results pressure (must deliver ROI)
    ❌ Competitive market
    ❌ Constantly evolving (platforms change)
    ❌ Feast or famine early on
    ❌ Difficult clients sometimes
    ❌ Managing team adds complexity


    Realistic expectations:

    Month 1-4:

    • Build skills, create offer
    • First 1-2 clients
    • $2,000-5,000/month revenue

    Month 5-12:

    • 3-8 clients
    • Refining systems
    • $8,000-20,000/month revenue
    • $4,000-12,000 profit (after contractors)

    Year 2-3:

    • 10-20 clients
    • Small team or contractors
    • $30,000-80,000/month revenue
    • $15,000-40,000 profit

    Scaling:

    • Add services to existing clients
    • Build team to handle more clients
    • Eventually step back to CEO role

    When to choose agency:
    ✅ You have marketing skills (or will learn)
    ✅ Comfortable with client management
    ✅ Want to build scalable business
    ✅ Enjoy sales and business development
    ✅ Can deliver measurable results

    ❌ Avoid if you want solo/lifestyle business (agencies require management)
    ❌ Avoid if you don’t have marketing skills and aren’t willing to learn
    ❌ Avoid if you hate sales


    9. Virtual Assistant Agency

    What it is: Provide virtual assistant services to clients, eventually building team of VAs.

    How it works:

    1. Start as VA yourself (learn the work)
    2. Get 3-5 clients
    3. Hire other VAs to take on work
    4. You manage client relationships
    5. Scale team as you add clients

    Investment needed: $100-1,000

    • Website: $50-500
    • Scheduling/project management tools: $20-50/month
    • Initial marketing: $0-500

    Income potential: $3,000-20,000+/month

    • Solo VA: $2,000-5,000/month
    • With 3 VAs: $8,000-15,000/month
    • Established agency: $20,000-50,000+/month

    Time to profit: 1-3 months

    Difficulty: ⭐⭐⭐ (Moderate—requires organization + client management)


    VA services to offer:

    General:

    • Email management
    • Calendar scheduling
    • Data entry
    • Research

    Specialized (higher rates):

    • Real estate VA (MLS listings, client management)
    • E-commerce VA (product listings, inventory)
    • Bookkeeping VA (QuickBooks, financial reports)
    • Social media VA (scheduling, engagement)
    • Podcast VA (editing, show notes)

    Recommendation: Specialize for higher rates and easier marketing


    Pricing models:

    Hourly:

    • You charge client: $30-60/hour
    • You pay VA: $10-25/hour
    • Margin: $15-35/hour

    Package:

    • 20 hours/month: $800
    • 40 hours/month: $1,400
    • Predictable for client and you

    Retainer:

    • Ongoing monthly fee
    • Most stable for agency

    Example: Real Estate VA Agency

    Service: Provide VAs to real estate agents

    Package: 40 hours/month of support for $1,600

    You pay VA: $15/hour × 40 = $600
    Your gross margin: $1,000

    With 8 clients: $8,000/month gross profit
    Your time: Mostly client management, quality control
    VAs do actual work

    Operating costs: $500/month (tools, marketing)
    Net profit: $7,500/month


    Success strategies:

    1. Start as VA yourself

    • Learn what clients need
    • Build processes
    • Get testimonials
    • Then hire others

    2. Niche by industry

    • “VAs for real estate agents”
    • “VAs for e-commerce brands”
    • Understand industry = better service

    3. Build SOP library

    • Document everything
    • Makes training new VAs easy
    • Ensures consistency
    • Allows scaling

    4. Vet VAs carefully

    • Test task before hiring
    • Check references
    • Start with trial period
    • Quality = your reputation

    5. Overdeliver early

    • Exceed expectations with first clients
    • Leads to referrals (main growth source)
    • Easier to raise rates

    Pros:
    ✅ Low startup cost
    ✅ Recurring revenue
    ✅ Scalable (hire more VAs)
    ✅ Remote business
    ✅ Helps overwhelmed business owners
    ✅ Can start solo, grow to agency

    Cons:
    ❌ Managing people (VAs)
    ❌ Client management intensive
    ❌ Quality control challenges
    ❌ VA turnover (must constantly recruit)
    ❌ Margins tighter than other businesses
    ❌ Time zone coordination


    Realistic expectations:

    Month 1-3:

    • Solo VA getting first clients
    • 3-5 clients
    • $2,000-4,000/month (doing work yourself)

    Month 4-8:

    • Hire first VA
    • 5-10 clients
    • $5,000-8,000/month
    • Starting to step back from delivery

    Month 9-18:

    • 3-5 VAs on team
    • 15-25 clients
    • $12,000-20,000/month
    • Mostly managing, less doing

    When to choose VA agency:
    ✅ You’re highly organized
    ✅ Good at managing people
    ✅ Enjoy client relationships
    ✅ Want to build team business
    ✅ Willing to start by doing the work

    ❌ Avoid if you don’t want to manage people
    ❌ Avoid if you want completely passive income
    ❌ Avoid if you lack organizational skills


    Content & Media Online Businesses {#content-media}

    Building businesses around creating content and building audience.

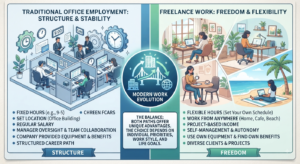

    10. YouTube Channel (Ad Revenue + Sponsorships)

    What it is: Create video content, monetize through ads, sponsorships, and affiliate links.

    How it works:

    1. Choose niche/topic
    2. Create consistent valuable videos
    3. Build subscriber base
    4. Reach monetization (1,000 subs + 4,000 watch hours)
    5. Earn from ads + sponsorships + affiliate links

    Investment needed: $200-2,000

    • Camera: $0 (smartphone) – $1,000 (DSLR)
    • Microphone: $50-300
    • Lighting: $50-200
    • Editing software: $0 (DaVinci Resolve free) – $20/month (Premiere Pro)
    • Thumbnail graphics: $0 (Canva free) – $13/month (Canva Pro)

    Income potential: $500-10,000+/month

    • Small channel (10k subs): $200-1,000/month
    • Medium channel (100k subs): $2,000-8,000/month
    • Large channel (1M subs): $10,000-50,000+/month

    Time to profit: 6-24 months (to reach monetization)

    How to Start Freelancing: Turn Your Skills Into Income


    YouTube income streams:

    1. Ad revenue (AdSense)

    • $2-10 per 1,000 views (CPM) depending on niche
    • Finance/business: $8-15 CPM
    • Gaming/entertainment: $2-5 CPM
    • Education: $5-10 CPM

    Example:

    • 100,000 views/month
    • $5 CPM average
    • $500/month ad revenue

    2. Sponsorships

    • Brands pay for dedicated segment in video
    • $10-50 per 1,000 views (CPM)
    • Example: 50k views, $25 CPM = $1,250 per sponsored video

    3. Affiliate links

    • Recommend products in description
    • Earn commission on sales
    • Example: Amazon Associates, course affiliates

    4. Your own products/services

    • Sell courses, coaching, products to audience
    • Often most profitable (once audience established)

    Total income = Ads + Sponsorships + Affiliates + Products


    High-CPM YouTube niches (2025):

    Best for ad revenue:

    • Personal finance ($10-20 CPM)
    • Investing/stocks ($12-25 CPM)
    • Real estate ($10-18 CPM)
    • Technology/software ($8-15 CPM)
    • Business/entrepreneurship ($8-12 CPM)

    Lower CPM but high engagement:

    • Lifestyle/vlogging ($2-6 CPM)
    • Gaming ($2-5 CPM)
    • Comedy/entertainment ($3-6 CPM)

    Trending topics (growing fast):

    • AI/ChatGPT tutorials
    • Side hustle/make money online
    • Productivity/self-improvement
    • Sustainable living
    • Personal development

    Success strategies:

    1. Niche clarity

    • Not “random vlogs”
    • “Personal finance tips for millennials”
    • Easier to attract and retain subscribers

    2. Consistency is king

    • Upload schedule (weekly minimum)
    • Subscriber expectations
    • Algorithm rewards consistency
    • Most successful: 2-3 videos/week

    3. Thumbnail + title = everything

    • 50% of success is clickability
    • A/B test thumbnails
    • Study successful channels in niche

    4. First 30 seconds critical

    • Hook viewers immediately
    • “In this video you’ll learn…”
    • Don’t waste time with long intros

    5. Optimize for SEO

    • Keyword research (TubeBuddy, VidIQ)
    • Title, description, tags
    • Helps new channels get discovered

    6. Engage with audience

    • Respond to comments (first hour crucial)
    • Ask questions in videos
    • Build community
    • Algorithm favors engagement

    7. Leverage shorts

    • YouTube Shorts getting massive push
    • Repurpose long content into shorts
    • Drives traffic to main channel

    Pros:
    ✅ Huge income potential (once established)
    ✅ Multiple revenue streams
    ✅ Build personal brand
    ✅ Can scale beyond ad revenue
    ✅ Creative and fulfilling
    ✅ Global reach

    Cons:
    ❌ Very slow to monetize (6-24 months typically)
    ❌ Extremely competitive
    ❌ Algorithm dependency (changes impact views)
    ❌ Requires consistent content production
    ❌ Technical skills (video, audio, editing)
    ❌ Public-facing (not for everyone)
    ❌ Burnout risk (constant content treadmill)


    Realistic expectations:

    Month 1-6:

    • Learning, creating first videos
    • 0-1,000 subscribers
    • $0 revenue (not monetized yet)
    • This is where 90% quit

    Month 7-12:

    • Hit monetization threshold
    • 1,000-10,000 subscribers
    • $50-500/month revenue
    • Growth accelerating

    Month 13-24:

    • 10,000-50,000 subscribers
    • $500-3,000/month revenue
    • First sponsorship opportunities
    • Starting to feel viable

    Year 3+:

    • 50,000-500,000 subscribers
    • $3,000-15,000/month revenue
    • Multiple income streams
    • Full-time potential

    Key: Most people quit before month 12. Persistence is everything.


    When to choose YouTube:
    ✅ You’re comfortable on camera (or willing to learn)
    ✅ You can commit to 2+ years before meaningful income
    ✅ You enjoy video creation
    ✅ You have interesting knowledge/personality
    ✅ You’re consistent and disciplined

    ❌ Avoid if you need income quickly (takes 1-2 years)
    ❌ Avoid if you hate being on camera (faceless channels harder to grow)
    ❌ Avoid if you can’t commit to consistent publishing


    11. Blogging (SEO + Ads + Affiliates)

    What it is: Write content targeting search traffic, monetize with ads and affiliate links.

    How it works:

    1. Choose profitable niche
    2. Create SEO-optimized content
    3. Build search traffic (Google)
    4. Monetize with display ads (Mediavine, AdThrive)
    5. Add affiliate links to products
    6. Traffic = income

    Investment needed: $100-1,000

    • Domain: $12/year
    • Hosting: $5-30/month
    • WordPress theme: $0-60
    • SEO tools: $0-100/month (Ahrefs, Semrush)
    • Content creation: $0-500 (if outsourcing)

    Income potential: $500-10,000+/month

    • New blog (50k monthly views): $200-800/month
    • Established (200k monthly views): $2,000-6,000/month
    • Authority site (1M+ monthly views): $10,000-40,000+/month

    Time to profit: 6-18 months (SEO takes time)

    Difficulty: ⭐⭐⭐⭐ (Difficult—requires SEO knowledge, patience, writing)


    Blogging income sources:

    1. Display ads

    • Google AdSense: $5-15 per 1,000 pageviews (RPM)
      • Can join immediately, lower rates
    • Mediavine: $15-30 RPM
      • Requires 50k monthly sessions
    • AdThrive: $20-40 RPM
      • Requires 100k monthly pageviews
      • Highest paying

    Example:

    • 100,000 monthly pageviews
    • Mediavine at $20 RPM
    • $2,000/month ad revenue

    2. Affiliate marketing

    • Promote products, earn commission
    • Amazon Associates: 1-10% commission
    • Higher-ticket affiliates: 20-50% commission
    • Recurring (software): 20-30% monthly

    Example:

    • Review article for web hosting
    • 10,000 monthly visitors
    • 2% click + 5% convert = 10 sales
    • $50 commission each
    • $500/month from one article

    3. Sponsored posts

    • Brands pay for dedicated article
    • $100-2,000 per post (depending on traffic)

    4. Your own products

    • Sell courses, ebooks, tools
    • Highest margin (once audience built)

    Total income = Ads + Affiliates + Sponsorships + Products


    Profitable blog niches (2025):

    High RPM (ad revenue):

    • Personal finance ($25-40 RPM)
    • Insurance/legal ($30-50 RPM)
    • B2B/SaaS ($20-35 RPM)
    • Home improvement ($18-30 RPM)

    High affiliate potential:

    • Web hosting/tech ($100-200 per sale)
    • Finance (credit cards, investing)
    • Online courses/education
    • Health/supplements

    Growing niches:

    • Sustainable living
    • Remote work
    • AI tools/productivity
    • Side hustles/entrepreneurship

    Success strategies:

    1. Keyword research is everything

    • Find keywords with:
      • Search volume (1,000+ searches/month)
      • Low competition (DR <30 competitors)
      • Buyer intent (people ready to purchase)
    • Tools: Ahrefs, Semrush, Ubersuggest

    2. Quality over quantity

    • Not “publish 100 thin articles”
    • “Publish 25 comprehensive, best-in-category articles”
    • Google favors depth and quality

    3. Build topical authority

    • Cover one topic comprehensively
    • Not “general lifestyle blog”
    • “Coffee brewing methods blog” (specific)
    • Easier to rank, establish expertise

    4. Update old content

    • Refresh articles annually
    • Add new information
    • Improve SEO
    • Often easier than creating new

    5. Build backlinks

    • Guest posting
    • Digital PR
    • Create linkable assets (studies, tools, infographics)
    • Critical ranking factor

    6. Email list

    • Capture emails from day 1
    • Traffic diversification
    • Launch platform for products
    • Most valuable asset
  • How to Start Freelancing: Turn Your Skills Into Income

    How to Start Freelancing: Turn Your Skills Into Income

    Table of Contents

    1. Introduction
    2. What is Freelancing? (And Is It Right for You?)
    3. The Freelancing Landscape in 2025
    4. Freelancing vs. Traditional Employment: Honest Comparison
    5. Step 1: Identify Your Freelance Skills
    6. Step 2: Choose Your Freelancing Niche
    7. Step 3: Set Your Rates (What to Charge)
    8. Step 4: Build Your Portfolio (Even with No Experience)
    9. Step 5: Choose Your Freelancing Platforms
    10. Step 6: Create Winning Profiles and Proposals
    11. Step 7: Find Your First Clients
    12. Step 8: Deliver Exceptional Work
    13. Step 9: Get Reviews and Build Reputation
    14. Step 10: Scale Your Freelance Income
    15. Essential Freelancing Business Setup
    16. Managing Finances as a Freelancer
    17. Avoiding Common Freelancing Mistakes
    18. Freelancing Success Stories
    19. Frequently Asked Questions
    20. Conclusion

    Introduction {#introduction}

    Imagine setting your own schedule, choosing your clients, working from anywhere, and earning $3,000, $5,000, or even $10,000+ per month doing work you actually enjoy. That’s the promise of freelancing—and it’s not fantasy.

    In 2024, 64 million Americans freelanced, contributing $1.27 trillion to the U.S. economy (Upwork’s Freelance Forward report). The freelance revolution isn’t coming—it’s here.

    But here’s what the “quit your job and freelance!” gurus won’t tell you:

    Starting a successful freelance career is harder than it looks. Most beginners make critical mistakes that cost them months of struggle:

    • Charging too little (or too much)
    • Targeting the wrong clients
    • Creating profiles that get ignored
    • Giving up after the first rejections
    • Poor time management leading to burnout

    The good news? All of these mistakes are avoidable when you know what you’re doing.

    In this comprehensive guide, you’ll learn:

    • How to identify marketable freelance skills (even if you think you have none)
    • Exactly how to set rates that attract clients and pay your bills
    • Step-by-step process to land your first client in 30 days
    • How to build a portfolio from scratch (no previous clients required)
    • Which platforms actually work for beginners
    • How to scale from $500/month to $5,000+/month
    • Real frameworks, templates, and scripts that work

    This isn’t theory—it’s the exact roadmap that has helped thousands of people build successful freelance careers, many starting from absolute zero.

    Whether you want to freelance full-time, supplement your income with a lucrative side hustle, or test the waters before leaving your day job—this guide gives you everything you need.

    Your freelance journey starts now. Let’s turn your skills into income.


    What is Freelancing? (And Is It Right for You?) {#what-is}

    The Definition

    Freelancing is self-employment where you offer services to multiple clients on a project or contract basis, rather than working as a full-time employee for one company.

    Key characteristics:

    • You are your own boss (no manager telling you what to do)
    • Multiple clients (not dependent on single employer)
    • Project-based or retainer work (defined scope or ongoing relationship)
    • Location independent (often work remotely)
    • You set your rates (within market range)
    • You control your schedule (mostly—clients have deadlines)

    What Freelancing Is NOT

    ❌ Not a get-rich-quick scheme
    Building a freelance business takes 3-6 months to see meaningful income, 12-18 months to replace full-time salary.

    ❌ Not completely passive income
    You trade time/skills for money. If you stop working, income stops. (Unlike true passive income like dividends or rental properties)

    ❌ Not easier than a regular job
    Different challenges: finding clients, inconsistent income, self-discipline, no benefits, you handle everything.

    ❌ Not guaranteed income
    Some months are great ($8,000). Some months are slow ($1,500). Income fluctuates.

    The Honest Pros and Cons

    Advantages:

    ✅ Flexibility and Freedom

    • Work from anywhere with WiFi
    • Set your own schedule (morning person? Night owl? Your choice)
    • Take vacation when you want (if you plan ahead)
    • No commute (save 1-2 hours/day)

    ✅ Income Potential

    • No salary cap (earn based on value you provide)
    • Multiple clients = multiple income streams
    • Can raise rates as you gain experience
    • Top freelancers earn $100,000-$300,000+/year

    ✅ Variety and Learning

    • Work on diverse projects
    • Multiple industries and clients
    • Constantly learning new skills
    • Never boring

    ✅ Be Your Own Boss

    • No office politics
    • No bad managers
    • Choose clients you want to work with
    • Fire clients you don’t like

    ✅ Tax Benefits

    • Home office deduction
    • Equipment write-offs
    • Business expense deductions
    • Potentially lower tax burden than W-2 employee

    Disadvantages:

    ❌ Income Instability

    • Month-to-month variation (feast or famine)
    • No guaranteed paycheck
    • Clients can cancel projects
    • Economic downturns hit freelancers hard

    ❌ No Benefits

    • No employer health insurance
    • No 401(k) match
    • No paid vacation
    • No sick days
    • No unemployment insurance (in most states)

    ❌ You Are the Business

    • Must find clients (sales/marketing)
    • Must do bookkeeping
    • Must handle customer service
    • Must manage projects
    • Wear all the hats

    ❌ Self-Discipline Required

    • Easy to procrastinate
    • No one making sure you work
    • Must manage time effectively
    • Burnout risk (no clear work/life boundaries)

    ❌ Isolation

    • Work alone (often)
    • No coworkers to chat with
    • Can be lonely
    • Must proactively create social connections

    ❌ Payment Issues

    • Chasing late payments
    • Clients who don’t pay
    • Cash flow challenges
    • Seasonal fluctuations

    Is Freelancing Right for YOU?

    Take this honest self-assessment:

    ✅ Freelancing might be a great fit if you:

    • Are self-motivated (don’t need external pressure to work)
    • Comfortable with income variability
    • Enjoy variety (different projects, clients)
    • Have marketable skills
    • Good at time management
    • Don’t mind wearing multiple hats (worker, salesperson, accountant)
    • Willing to hustle in the beginning
    • Can handle rejection (proposals will get rejected)
    • Have financial cushion (3-6 months expenses saved)

    ❌ Freelancing might NOT be for you if you:

    • Need predictable paycheck every two weeks
    • Struggle with self-discipline
    • Want comprehensive benefits package
    • Hate “selling” or finding clients
    • Need clear 9-5 structure
    • Cannot afford income fluctuation
    • Want to clock out at 5pm and forget work
    • Need social interaction from coworkers daily

    The middle ground: Start freelancing as side hustle while keeping day job

    • Test whether you like it
    • Build skills and clients
    • Create financial cushion
    • Transition gradually when ready
    • Best of both worlds

    Types of Freelancing

    Service-based (most common):

    • Writing and content creation
    • Graphic design
    • Web development
    • Marketing (SEO, social media, ads)
    • Virtual assistance
    • Video editing
    • Consulting
    • Bookkeeping
    • Translation

    Creative:

    • Photography
    • Illustration
    • Music production
    • Voice acting
    • Animation

    Technical:

    • Software development
    • Data analysis
    • IT support
    • Cybersecurity

    Professional:

    • Legal services
    • Accounting
    • Business consulting
    • Coaching

    Most beginners start with service-based freelancing (writing, design, VA work, basic web development) because barriers to entry are lower.


    The Freelancing Landscape{#landscape}

    Understanding the current market helps you make informed decisions.

    Freelancing by the Numbers

    Market size:

    • 64 million Americans freelanced in 2024 (38% of workforce)
    • Up from 59 million in 2020
    • Projected to be 90 million by 2028 (majority of workforce)

    Earnings:

    • Median freelance income: $28,000/year (part-time)
    • Full-time freelancers: $67,000/year median
    • Top 25% of freelancers: $100,000+/year
    • Top 10%: $200,000+/year

    Time breakdown:

    • 36% freelance full-time (primary income)
    • 64% freelance part-time (side income)
    • Average part-timer: 15 hours/week
    • Average full-timer: 36 hours/week

    Industries hiring most freelancers:

    1. Technology (software development, IT, data)
    2. Creative (design, writing, video)
    3. Marketing (SEO, social media, advertising)
    4. Business consulting
    5. Administrative support

    Platform vs. Direct Client Statistics

    Where freelancers find work:

    • 43% through freelancing platforms (Upwork, Fiverr, etc.)
    • 38% through direct outreach/networking
    • 12% through referrals
    • 7% through agencies

    Most successful freelancers use multiple channels (not just one platform)

    Freelancing Trends in 2025

    What’s hot:

    ✅ AI-assisted services

    • Prompt engineering
    • AI content editing/refinement
    • AI tool implementation
    • Training businesses to use AI

    ✅ Short-form video content

    • TikTok, Reels, YouTube Shorts creation
    • Video editing for social media
    • High demand, relatively low supply

    ✅ Sustainability consulting

    • ESG reporting
    • Sustainable business practices
    • Carbon footprint analysis

    ✅ Remote work infrastructure

    • Virtual event management
    • Remote team building
    • Digital collaboration tools setup

    ✅ Niche expertise

    • Specialized skills command premium rates
    • “Jack of all trades” less valuable
    • Deep knowledge > broad knowledge

    What’s declining:

    ❌ Generic services

    • “I’ll do anything” approach
    • Commodity services
    • Race-to-the-bottom pricing

    ❌ Outdated skills

    • Flash development
    • Outdated CMS platforms
    • Declining social platforms

    Income Potential by Skill (2025 Averages)

    Skill Beginner Rate Intermediate Expert Notes
    Writing $20-40/hr $50-100/hr $100-250/hr Niche specialists earn more
    Graphic Design $25-45/hr $50-100/hr $100-200/hr Logo design, branding premium
    Web Development $30-60/hr $75-150/hr $150-300/hr Specialized frameworks pay more
    Social Media Mgmt $20-40/hr $50-100/hr $100-200/hr Paid ads expertise premium
    Virtual Assistant $15-30/hr $35-60/hr $60-100/hr Specialized VAs earn more
    Video Editing $25-50/hr $60-125/hr $125-250/hr Motion graphics command premium
    SEO Services $30-60/hr $75-150/hr $150-300/hr Technical SEO highly valued
    Bookkeeping $25-50/hr $60-100/hr $100-150/hr CPA certification boosts rates
    Consulting $50-150/hr $150-300/hr $300-1,000/hr Industry expertise critical

    Key insight: Specialists earn 2-3x more than generalists in the same field

    Global Competition Reality

    The challenge:

    • You’re competing globally (someone in lower-cost country will undercut you)
    • $5/hour freelancers exist on platforms
    • Clients can choose anyone, anywhere

    Why you can still win:

    • Quality: Better work justifies higher rates
    • Communication: Native English speakers (if applicable) have advantage
    • Reliability: Show up on time, meet deadlines
    • Specialization: Deep niche expertise is rare globally
    • Time zones: Same timezone as client is valuable
    • Cultural fit: Understanding client’s market/culture

    Don’t compete on price alone. Compete on value.

    Economic Factors Affecting Freelancing

    Positive trends:

    • Remote work normalized (more companies comfortable hiring freelancers)
    • Economic uncertainty (companies prefer contract workers over full-time hires)
    • Gig economy infrastructure matured (easier to freelance than ever)
    • Global talent pool accessible to clients

    Challenges:

    • AI automation (some tasks becoming automated)
    • Economic recessions (freelancers feel it first)
    • Platform fees increasing (Upwork raised fees)
    • Saturation in popular categories

    Bottom line: Freelancing is growing but becoming more competitive. Specialization and quality win.


    Freelancing vs. Traditional Employment: Honest Comparison {#comparison}

    Let’s be brutally honest about both paths.

    Income Comparison

    Traditional Employment:

    • Stability: ⭐⭐⭐⭐⭐
      Predictable biweekly paycheck
    • Potential: ⭐⭐⭐
      Salary cap, annual raises 3-5%
    • Benefits value: ⭐⭐⭐⭐⭐
      Health insurance, 401(k) match, paid time off adds $15,000-$30,000/year value

    Freelancing:

    • Stability: ⭐⭐
      Highly variable month-to-month
    • Potential: ⭐⭐⭐⭐⭐
      Unlimited ceiling, can double income year-over-year
    • Benefits value: ⭐
      Pay for everything yourself

    Real example:

    • Employee: $60,000 salary + $18,000 benefits = $78,000 total compensation
    • Freelancer: Must earn $78,000+ to match, PLUS pay self-employment tax (additional 7.65%)
    • Freelancer needs to earn ~$84,000 to equal $60,000 employee position

    Time and Flexibility

    Traditional Employment:

    • Fixed schedule (usually 9-5)
    • Limited vacation (2-3 weeks)
    • Commute time (30-60 min each way)
    • Office environment (distractions, meetings)
    • Clear boundaries (work ends at 5pm)

    Freelancing:

    • Flexible schedule (work when you want—with deadlines)
    • Unlimited vacation (if you can afford it)
    • No commute (work from home)
    • Choose your environment
    • Boundaries blur (work-life integration challenging)

    Career Growth

    Traditional Employment:

    • Clear path: Entry → Mid-level → Senior → Management
    • Training: Employer pays for professional development
    • Network: Built-in colleagues and industry connections
    • Mentorship: Access to senior employees
    • Resume: Impressive company names add credibility

    Freelancing:

    • Unclear path: You define your own trajectory
    • Training: Pay for your own education
    • Network: Must proactively build (no built-in network)
    • Mentorship: Find your own (harder)
    • Resume: Portfolio matters more than company names

    Financial Security

    Traditional Employment:

    Benefit Value/Impact
    Health insurance $500-1,500/month employer contribution
    401(k) match 3-6% of salary (free money)
    Unemployment insurance Safety net if laid off
    Disability insurance Often provided
    Paid vacation 2-4 weeks/year
    Paid sick leave 5-10 days/year
    Stable paycheck Priceless for some

    Freelancing:

    • Pay for own health insurance ($300-1,000+/month)
    • No 401(k) match (but can contribute to Solo 401k/SEP IRA)
    • No unemployment (unless you paid into it)
    • Buy own disability insurance
    • No paid vacation (don’t work = don’t get paid)
    • No paid sick leave
    • Income varies wildly

    Stress and Control

    Traditional Employment:

    • Control: ⭐⭐
      Limited say in projects, schedule, methods
    • Job security stress: ⭐⭐⭐
      Can be laid off anytime
    • Office politics: ⭐⭐⭐⭐
      Navigate workplace dynamics
    • Work-life boundaries: ⭐⭐⭐⭐
      Generally clear separation

    Freelancing:

    • Control: ⭐⭐⭐⭐⭐
      Choose projects, clients, rates, methods
    • Income stress: ⭐⭐⭐⭐
      “Where’s next client coming from?”
    • Office politics: ⭐
      Minimal (work alone)
    • Work-life boundaries: ⭐⭐
      Hard to separate (work from home)

    Which Path for YOU?

    Choose traditional employment if:

    • You value stability and predictable income
    • You want comprehensive benefits
    • You prefer clear structure and direction
    • You enjoy team environment
    • You’re risk-averse
    • You have dependents relying on your income
    • You’re early in career building foundational skills

    Choose freelancing if:

    • You crave flexibility and control
    • You’re comfortable with income variability
    • You’re self-disciplined and motivated
    • You have emergency fund (3-6 months expenses)
    • You enjoy variety and new challenges
    • You’re willing to trade security for freedom
    • You have marketable skills

    The hybrid approach (recommended for beginners):

    1. Keep full-time job (security, benefits, steady income)
    2. Start freelancing on side (evenings, weekends)
    3. Build skills, clients, income to $2,000-3,000/month
    4. Save 12 months of living expenses
    5. Transition to full-time freelancing if desired

    This gives you:

    • Security while you learn
    • Time to test if you like freelancing
    • Financial cushion before going full-time
    • Client base already established
    • Lower risk

    [Internal Link: Build emergency fund first with “Emergency Fund Guide: How Much to Save and Where to Keep It” before freelancing full-time]


    Step 1: Identify Your Freelance Skills {#identify-skills}

    “But I don’t have any marketable skills!”


    This is the #1 objection I hear. And it’s almost always false.

    The truth: You have more marketable skills than you realize. You just haven’t identified them yet.

    The Skills Inventory Exercise

    Grab a pen and paper. Let’s uncover your freelanceable skills.

    Category 1: Professional Skills (From Jobs)

    What have you done in any job (current or past)?

    Common professional skills that translate to freelancing:

    Writing & Communication:

    • Written emails, reports, presentations?
      → Freelance: Business writing, email marketing, copywriting
    • Created documentation or training materials?
      → Freelance: Technical writing, instructional design
    • Managed social media for employer?
      → Freelance: Social media management

    Design & Creative:

    • Made presentations (PowerPoint, Google Slides)?
      → Freelance: Presentation design
    • Created graphics, flyers, or marketing materials?
      → Freelance: Graphic design
    • Edited photos or videos?
      → Freelance: Photo/video editing

    Administrative:

    • Scheduled meetings, managed calendars?
      → Freelance: Virtual assistant
    • Handled customer service?
      → Freelance: Customer support specialist
    • Did data entry or spreadsheets?
      → Freelance: Data entry, Excel specialist

    Technical:

    • Built or managed websites?
      → Freelance: Web development, WordPress management
    • Used specific software (Salesforce, QuickBooks, AutoCAD)?
      → Freelance: Software consultant/trainer
    • Troubleshot tech problems?
      → Freelance: Tech support

    Marketing & Sales:

    • Ran advertising campaigns?
      → Freelance: PPC management, Facebook Ads specialist
    • Optimized website for search?
      → Freelance: SEO consultant
    • Sold products or services?
      → Freelance: Sales consultant, business development

    Finance & Numbers:

    • Managed budgets or bookkeeping?
      → Freelance: Bookkeeper, financial analyst
    • Prepared financial reports?
      → Freelance: Financial reporting specialist
    • Handled payroll?
      → Freelance: Payroll specialist

    Project Management:

    • Coordinated projects or teams?
      → Freelance: Project manager
    • Organized events?
      → Freelance: Event coordinator

    List 5-10 things you’ve done in jobs:


    Category 2: Educational Background

    What did you study? What degrees or certifications do you have?

    Examples:

    • English degree → Writing, editing, proofreading
    • Marketing degree → Digital marketing, content strategy
    • Accounting → Bookkeeping, tax preparation
    • Graphic design → Logo design, branding
    • Computer science → Software development, app creation
    • Business → Business consulting, strategy
    • Teaching → Online tutoring, course creation

    Even “useless” degrees have freelance applications:

    • History degree → Research, historical content writing
    • Philosophy degree → Analytical writing, content strategy
    • Art degree → Illustration, creative direction

    Your education: _______________________________

    How it translates to freelancing: _______________________________

    Category 3: Hobbies & Passions

    What do you do for fun? What are you naturally good at?

    Common hobby → freelance translations:

    • Photography → Event photography, stock photography, photo editing
    • Writing stories → Fiction ghostwriting, creative writing
    • Fitness enthusiast → Fitness content writing, coaching
    • Gaming → Gaming content creation, Twitch editing
    • Cooking → Recipe development, food blogging
    • Crafts → Etsy seller, craft tutorial creation
    • Languages → Translation, language tutoring
    • Reading → Book reviewing, proofreading
    • Social media user → Social media management
    • YouTube watcher → Video editing, thumbnail design

    Your hobbies: _______________________________

    Freelance potential: _______________________________

    Category 4: Soft Skills (Often Overlooked)

    Personal qualities that are valuable in freelancing:

    • Organized? → Virtual assistant, project management
    • Detail-oriented? → Proofreading, data entry, QA testing
    • Great communicator? → Customer service, community management
    • Problem solver? → Consulting, business analysis
    • Patient teacher? → Tutoring, training content creation
    • Creative thinker? → Content creation, copywriting
    • Tech-savvy? → Tech support, software training
    • Persuasive? → Copywriting, sales writing

    Your top 3 soft skills:


    Category 5: Life Experience

    Unique experiences create niche expertise:

    Examples:

    • Parenting → Parenting blog writing, family content
    • Homeownership → Real estate content, home improvement writing
    • Chronic illness → Healthcare content, patient advocacy writing
    • Travel → Travel writing, destination guides
    • Starting a business → Business content, entrepreneur coaching
    • Going through divorce → Legal content, life coaching content
    • Learning new language → Language learning content

    Your unique experiences: _______________________________

    Niche opportunities: _______________________________

    Identifying Transferable Skills

    Many skills transfer across industries:

    Customer service → Sales writing
    (Understanding customer pain points)

    Teaching → Content creation
    (Explaining concepts clearly)

    Project management → Virtual assistance
    (Organization, coordination)

    Retail/hospitality → Customer support
    (People skills, problem-solving)

    The “I Literally Have Nothing” Solution

    If you genuinely have no marketable skills yet, here are fast-track options:

    Learn a high-demand skill in 30-90 days:

    Fastest to learn and start earning:

    1. Social media management (30 days)
      • Free courses: HubSpot, Meta Blueprint
      • Practice on own accounts
      • First clients: Local small businesses
    2. Basic graphic design (30-60 days)
      • Learn Canva (dead simple)
      • Tutorial: YouTube (free)
      • Niche: Social media graphics, presentations
    3. Virtual assistant (immediate)
      • Leverage organizational skills
      • Learn basic tools (Google Workspace, project management)
      • Start: General VA, specialize later
    4. Freelance writing (60 days)
      • Practice writing daily
      • Learn SEO basics (free: Moz, Ahrefs blog)
      • Start: Blog posts, website copy
    5. Basic WordPress management (45 days)
      • Set up own WordPress site
      • Learn basics: plugins, themes, updates
      • Service: WordPress maintenance for small businesses

    Investment: $0-200 (mostly free learning)
    Time to first client: 30-90 days
    First income: $300-1,000/month realistic

    Your Skills Action Plan

    By now, you should have identified 5-10 potential freelance skills.

    Next step: Narrow to 1-3 to start with

    Criteria for choosing:

    1. Market demand (people actually hire for this?)
    2. Your proficiency (can you deliver quality work?)
    3. Enjoyment (will you hate doing this 20 hrs/week?)
    4. Income potential (does it pay enough?)
    5. Competition (too saturated or good opportunity?)

    Your top 1-3 freelance skills to pursue:


    Congratulations. You now know what you’re freelancing.


    Step 2: Choose Your Freelancing Niche {#choose-niche}

    Here’s a harsh truth: “I’m a freelance writer” won’t get you hired.

    But “I write conversion-focused landing pages for SaaS companies” will.

    The difference? Niche specificity.

    Why Niching Matters

    The generalist trap:

    • Competes with everyone
    • Race to the bottom on price
    • No differentiation
    • “Jack of all trades, master of none”

    The specialist advantage:

    • Less competition
    • Higher rates (2-3x generalists)
    • Easier to market yourself
    • Attract ideal clients
    • Become the expert

    Real example:

    • Generic: “Freelance writer” – competing with 10 million writers
    • Niche: “Financial content writer for FinTech startups” – competing with hundreds

    Who gets hired at higher rates? The specialist.

    The Niche Formula

    A strong freelance niche has three components:

    1. WHAT (Service)
    What specific service do you provide?

    2. WHO (Target Client)
    Who specifically do you serve?

    3. WHY (Benefit/Result)
    What outcome do they get?

    Formula: I help [WHO] with [WHAT] so they can [WHY/BENEFIT]

    Examples:

    Weak (too broad):

    • “I’m a freelance designer”
    • “I do social media”
    • “I’m a virtual assistant”

    Strong (specific niche):

    • “I design landing pages for e-commerce brands to increase conversion rates”
    • “I manage Instagram accounts for sustainable fashion brands to build engaged communities”
    • “I provide bookkeeping for therapists and counselors so they can focus on patients, not paperwork”

    How to Choose Your Niche

    Step 1: Start with your skill (from previous section)

    Example: Freelance writing

    Step 2: Identify industries/client types you understand or enjoy

    Common client types:

    • Small businesses
    • Startups
    • E-commerce brands
    • SaaS companies
    • Healthcare practices
    • Real estate agents
    • Coaches/consultants
    • Agencies
    • Non-profits
    • B2B companies
    • B2C companies

    Example: I understand SaaS companies (worked at one, or use lots of SaaS tools)

    Step 3: Identify specific problems they have

    SaaS companies need:

    • Website copy that explains complex products simply
    • Blog content for SEO
    • Case studies to prove ROI
    • Email sequences to nurture trials
    • Product documentation

    Example: They need website copy that converts free trials to paid customers

    Step 4: Combine into niche statement

    “I write conversion-focused website copy for B2B SaaS companies to turn more free trials into paid customers”

    That’s a niche.

    Niche Ideas by Skill

    For Writers:

    Niche Target Client Specific Service
    Healthcare content Medical practices, hospitals Patient education materials
    SaaS copywriting Software companies Website copy, product descriptions
    Financial writing FinTech, banks, advisors Blog content, white papers
    E-commerce product descriptions Online retailers SEO-optimized product copy
    Real estate content Agents, brokerages Property descriptions, market reports
    Sustainability content Green companies ESG reports, sustainability content
    HR content HR departments, recruiting firms Job descriptions, company culture content

    For Designers:

    Niche Target Client Specific Service
    Restaurant menu design Restaurants Print and digital menus
    Real estate branding Real estate agents Logo, business cards, signage
    E-book cover design Authors, publishers Fiction/non-fiction covers
    Social media graphics E-commerce brands Instagram, Pinterest graphics
    Pitch deck design Startups seeking funding Investor presentation design
    Course materials design Online educators Workbooks, slide decks

    For Virtual Assistants:

    Niche Target Client Specific Service
    Real estate VA Real estate agents Transaction coordination, client communication
    E-commerce VA Online store owners Product listings, customer service, inventory
    Podcast VA Podcasters Show notes, guest coordination, editing management
    Social media VA Coaches, influencers Scheduling, engagement, DM management
    Legal VA Attorneys, law firms Document preparation, client intake

    For Web Developers:

    Niche Target Client Specific Service
    WordPress for therapists Therapists, counselors HIPAA-compliant websites, booking systems
    Shopify for artisans Craftspeople, makers Online shop setup and optimization
    Landing pages for coaches Life coaches, business coaches High-converting single-page sites
    Restaurant websites Restaurants Mobile-friendly sites with online ordering

    The “Riches in the Niches” Proof

    Generic freelancer:

    • Rate: $25/hour
    • Competing with thousands
    • Clients: “Looking for cheapest option”

    Niched freelancer:

    • Rate: $75-150/hour (same skill, different positioning)
    • Competing with dozens
    • Clients: “Need expert who understands my industry”

    The niche premium is real: 2-3x higher rates for the same work.

    “But Won’t Niching Limit My Opportunities?”

    Common fear: “If I specialize, I’ll miss out on other work!”

    Reality: The opposite happens.

    When you’re specific:

    • Ideal clients find you easily
    • You become referrable (“I know the PERFECT person for this”)
    • You attract more work, not less
    • You can always expand later

    When you’re generic:

    • You’re invisible in the crowd
    • No one refers you (“They do… everything?”)
    • You compete on price only

    You can always say yes to off-niche work if you want. But your marketing should be niche-specific.

    Starting Broad, Then Narrowing

    If you’re truly unsure, use this approach:

    Month 1-3: Start broad, take various projects

    • Learn what you enjoy
    • See what pays well
    • Discover what clients need

    Month 4-6: Notice patterns

    • Which projects did you love?
    • Which clients were best to work with?
    • Which work paid best?

    Month 7+: Declare your niche based on data

    • Double down on what worked
    • Market specifically to that niche
    • Raise rates

    Example:

    • Months 1-3: General freelance writing (everything)
    • Months 4-6: Notice most enjoyable/profitable = FinTech blog posts
    • Month 7+: Rebrand as “FinTech content specialist”

    Your Niche Worksheet

    My core skill: _______________________________

    Industries I know/enjoy:


    Specific problems they have: _______________________________

    My niche statement:

    “I help [TARGET CLIENT] with [SPECIFIC SERVICE] so they can [BENEFIT]”

    I help _______________ with _______________ so they can _______________

    Example filled in:

    “I help eco-conscious e-commerce brands with product photography so they can showcase their products beautifully and increase online sales”


    Step 3: Set Your Rates (What to Charge) {#set-rates}

    “How much should I charge?”

    This question keeps beginners up at night. Charge too little, you’re broke. Charge too much, you get no clients.

    Here’s the framework to price correctly from day one.

    Pricing Models Explained

    1. Hourly Rate

    How it works:

    • Charge per hour worked
    • Track time, bill client
    • Example: $50/hour × 10 hours = $500

    Pros:

    • Simple to understand
    • Fair for undefined scope
    • Good for beginners

    Cons:

    • Income capped by hours available
    • Penalizes efficiency (faster work = less money)
    • Clients watch the clock
    • Difficult to scale

    When to use: Starting out, unclear scope projects, ongoing retainer work


    2. Project-Based (Flat Fee)

    How it works:

    • Quote one price for entire project
    • Example: “Logo design: $800”
    • Client knows total cost upfront

    Pros:

    • Rewards efficiency (finish fast, keep hourly rate high)
    • Client likes certainty
    • Can be more profitable
    • Scalable (not tied to hours)

    Cons:

    • Must estimate time accurately
    • Scope creep risk (client adds work)
    • Can underestimate and lose money

    When to use: Defined scope projects, once you know how long things take


    3. Retainer

    How it works:

    • Monthly fee for ongoing work
    • Example: “$2,000/month for 20 hours of social media management”
    • Recurring revenue

    Pros:

    • Predictable income
    • Client committed long-term
    • Build relationship
    • Financial stability

    Cons:

    • Requires proving ongoing value
    • Can feel like employee without benefits
    • Scope creep over time

    When to use: After proving value, for ongoing needs (VA, social media, content creation)


    4. Value-Based Pricing

    How it works:

    • Price based on value delivered, not time spent
    • Example: “This landing page will increase your revenue by $50,000/year. I charge $5,000.”
    • Price reflects ROI, not hours

    Pros:

    • Highest earning potential
    • Rewards expertise
    • Client happy to pay (they make more)
    • Not limited by time

    Cons:

    • Hard to quantify value
    • Requires business acumen
    • Client must understand ROI
    • Difficult for beginners

    When to use: Experienced freelancers, measurable outcomes (conversion optimization, paid ads management)


    How to Calculate Your Hourly Rate

    Even if you price by project, you need to know your hourly baseline.

    The formula:

    1. Determine annual income need

    What do you need to earn per year?

    Example: $60,000/year

    2. Add 30% for expenses and taxes

    Freelancers pay more taxes (self-employment tax) + expenses (software, tools, health insurance)

    $60,000 × 1.30 = $78,000 needed

    3. Determine billable hours

    Not all hours are billable. You’ll spend time on:

    • Finding clients
    • Admin tasks
    • Breaks
    • Sick days
    • Vacation

    Realistic billable hours:

    • Full-time freelancer: 25-30 hours/week billable (out of 40)
    • Part-time freelancer: 10-15 hours/week billable

    Full-time example: 25 billable hours/week × 48 weeks (4 weeks vacation) = 1,200 billable hours/year

    4. Calculate hourly rate

    Annual need ÷ Billable hours = Hourly rate

    $78,000 ÷ 1,200 hours = $65/hour minimum

    That’s your baseline to meet $60,000/year take-home goal.


    Market Rate Research

    Your calculated rate is one data point. Now check market rates.

    Where to research rates:

    1. Freelance platform averages

    • Upwork: Search your skill, filter by rate
    • Fiverr: Check what top sellers charge
    • Freelancer.com: Browse job postings

    2. Industry surveys

    • Freelance Writers Den (for writers)
    • Design Census (for designers)
    • Freelancing Females survey
    • Upwork’s rate database

    3. Ask other freelancers

    • Join Facebook groups for your niche
    • Connect on LinkedIn
    • Professional associations

    4. Check job postings

    • Indeed, LinkedIn job posts (for full-time equivalent)
    • Divide annual salary by 2,000 to get rough hourly rate
    • Freelance rate should be 1.5-2x that (no benefits)

    Rate Ranges by Experience Level

    General guidelines (adjust by niche):

    Beginner (0-6 months freelancing):

    • Writing: $20-40/hour
    • Design: $25-45/hour
    • Web development: $30-60/hour
    • Virtual assistant: $15-30/hour
    • Social media management: $20-40/hour

    Intermediate (6 months – 3 years):

    • Writing: $50-100/hour
    • Design: $50-100/hour
    • Web development: $75-150/hour
    • Virtual assistant: $35-60/hour
    • Social media management: $50-100/hour

    Expert (3+ years, specialized niche):

    • Writing: $100-250/hour
    • Design: $100-200/hour
    • Web development: $150-300/hour
    • Virtual assistant: $60-100/hour (specialized)
    • Social media management: $100-200/hour

    Note: These are averages. Location, niche, and individual skill significantly affect rates.


    The Pricing Strategy for Beginners

    Starting out, you face a dilemma:

    • Charge market rate → few clients (no experience/portfolio)
    • Charge low → get exploited and go broke

    The solution: Strategic underpricing initially

    Month 1-3: Build portfolio pricing

    • Charge 20-30% below market rate
    • Example: If market is $50/hour, charge $35-40/hour
    • Goal: Get 5-10 projects, build reviews

    Month 4-6: Approach market pricing

    • Raise rates to market average
    • You now have portfolio and reviews
    • Example: Raise to $50/hour

    Month 7-12: Above market pricing

    • Charge 10-20% above market average
    • You have proven track record
    • Can be selective with clients
    • Example: $55-60/hour

    Month 13+: Premium pricing

    • Charge based on value, not time
    • Niche expertise commands premium
    • Example: $75-100/hour or project-based

    Key: Raise rates regularly. Every 3-6 months in first 2 years.


    How to Present Your Rates

    DON’T:
    ❌ “I charge $35/hour, but I’m flexible”
    (Signals desperation, invites negotiation)

    ❌ “Whatever you think is fair”
    (Unprofessional, will get lowballed)

    ❌ “I don’t know, what’s your budget?”
    (Puts you at disadvantage)

    DO:
    ✅ “My rate for this project is $500”
    (Confident, specific)

    ✅ “Based on the scope, I quote $1,200 for this project”
    (Professional, justified)

    ✅ “My hourly rate is $50. For this project, I estimate 10 hours, so approximately $500 total”
    (Transparent, helpful)


    Handling “You’re Too Expensive”

    When clients push back on your rate:

    Response framework:

    1. Confirm value
    “I understand budget is a consideration. Let me make sure this project would truly deliver the results you need…”

    2. Justify price
    “My rate reflects [specific expertise/results you deliver]. For example, [past success story]…”

    3. Offer alternatives
    “If budget is tight, we could [reduce scope, phase the project, create payment plan]…”

    4. Stand firm (if appropriate)
    “I’m confident this investment will [deliver X result]. If the budget truly doesn’t work, I completely understand and happy to refer you to someone who might fit better.”

    DO NOT:
    ❌ Immediately drop your rate (devalues your work)
    ❌ Get defensive (unprofessional)
    ❌ Take low-paying work out of desperation (sets bad precedent)

    Sometimes the answer is “This client isn’t the right fit” — and that’s okay.


    Package Pricing Strategy

    Instead of à la carte pricing, create packages:

    Example: Social Media Management

    Basic Package: $500/month

    • 3 posts per week
    • 1 platform
    • Monthly analytics report

    Standard Package: $1,000/month ⭐ MOST POPULAR

    • 5 posts per week
    • 2 platforms
    • Community management (respond to comments)
    • Monthly strategy call

    Premium Package: $2,000/month

    • Daily posts
    • 3 platforms
    • Community management
    • Paid ads management
    • Weekly strategy calls
    • Priority support

    Why this works:

    • Clients self-select based on budget
    • Middle option sells most (anchoring effect)
    • Upsell opportunity (start Basic, upgrade to Standard)
    • Predictable pricing (easier to sell)

    Your Pricing Worksheet

    Annual income goal: $___________

    + 30% for expenses/taxes = $___________

    ÷ Billable hours per year (_____ hrs/week × 48 weeks) = _____ hours

    = $_______ minimum hourly rate

    Market research (your skill/niche):

    • Beginner rate: $______/hour
    • Intermediate rate: $______/hour
    • Expert rate: $______/hour

    Your starting rate (months 1-3): $______/hour

    Your 6-month goal rate: $______/hour

    Your 12-month goal rate: $______/hour


    Step 4: Build Your Portfolio (Even with No Experience) {#build-portfolio}

    **[Continue to next response due to length – need to cover remaining sections:

    • Build Portfolio
    • Choose Platforms
    • Create Profiles/Proposals
    • Find First Clients
    • Deliver Work
    • Get Reviews
    • Scale Income
    • Business Setup
    • Finances
    • Mistakes
    • Success Stories
    • FAQ
    • Conclusion]**
  • Passive Income Ideas: 15 Ways to Earn Money While You Sleep

    Passive Income Ideas: 15 Ways to Earn Money While You Sleep

    Table of Contents

    1. Introduction
    2. What is Passive Income? (The Truth vs. The Hype)
    3. Active vs. Passive Income: Understanding the Difference
    4. How Much Passive Income Can You Really Make?
    5. Passive Income Myth-Busting
    6. 15 Best Passive Income Ideas for 2025
    7. How to Build Multiple Passive Income Streams
    8. Passive Income Tax Implications
    9. Common Mistakes to Avoid
    10. Getting Started: Your 90-Day Action Plan
    11. Real Success Stories
    12. Frequently Asked Questions
    13. Conclusion

    Introduction {#introduction}

    Imagine waking up to find you’ve made $100 while you slept. Not because you worked overnight, but because systems you built continue generating income whether you’re working, sleeping, or on vacation.

    This isn’t a fantasy—it’s passive income.

    But here’s what the internet gurus won’t tell you: True passive income requires significant upfront effort or capital. There’s no such thing as completely effortless income. The “passive” part comes later, after you’ve done the work to set up the income stream.

    The reality check: According to a 2024 study by the Financial Independence community, it takes the average person 12-24 months to build a passive income stream generating $500/month, and most successful passive income earners have 3-5 different streams working together.

    But here’s the exciting part: Once established, passive income streams can generate money with minimal ongoing effort, creating:

    • Financial security beyond your day job
    • Freedom to pursue what matters most
    • Faster wealth accumulation
    • A path to financial independence
    • Income that doesn’t require trading time for money

    In this comprehensive guide, you’ll discover:

    • 15 realistic passive income strategies (no get-rich-quick schemes)
    • Honest assessments of required effort, capital, and time to profitability
    • Which passive income streams work best for different situations
    • How to avoid common pitfalls that drain money instead of generating it
    • Real examples from people earning actual passive income

    Whether you have $100 or $10,000 to invest, whether you prefer creating digital products or owning rental properties, whether you’re starting from scratch or have existing skills—there’s a passive income strategy that fits your situation.

    This guide cuts through the hype and gives you actionable strategies to build real passive income in 2025.

    Let’s build income streams that work while you sleep.


    What is Passive Income? (The Truth vs. The Hype) {#what-is}

    The Official Definition

    Passive income is earnings derived from sources that require minimal ongoing effort to maintain. It’s money you continue to receive after the initial work or investment is complete.

    The Three Types of Passive Income

    1. Investment-Based Passive Income

    • Requires capital (money) upfront
    • Examples: Dividend stocks, REITs, bonds, peer-to-peer lending
    • Ongoing effort: Minimal (monitoring investments)
    • Initial effort: Low (research and purchase)
    • Trade capital for income

    2. Asset-Based Passive Income

    • Requires creating or purchasing an asset
    • Examples: Rental properties, businesses, equipment leasing
    • Ongoing effort: Low to moderate (maintenance, management)
    • Initial effort: High (acquiring/creating asset)
    • Trade large upfront effort/capital for ongoing income

    3. Product-Based Passive Income

    • Requires creating something once, selling repeatedly
    • Examples: Digital products, books, online courses, stock photos
    • Ongoing effort: Low (marketing, updates)
    • Initial effort: High (creation)
    • Trade time/expertise for scalable income

    What Passive Income Is NOT

    ❌ It’s NOT completely effortless
    Every passive income stream requires either:

    • Significant upfront time/effort (creating products, building systems)
    • Significant upfront capital (investments, real estate)
    • Some ongoing maintenance (even if minimal)

    ❌ It’s NOT instant
    Most passive income streams take 6-24 months to generate meaningful income. Anyone promising “$10,000/month passive income in 30 days” is lying or selling something.

    ❌ It’s NOT risk-free
    All income streams carry risk:

    • Investments can lose value
    • Digital products may not sell
    • Rental properties can have problem tenants
    • Platforms can change rules

    ❌ It’s NOT “get rich quick”
    Passive income is a wealth-building strategy, not a lottery ticket. It compounds over time.

    The Passive Income Spectrum

    Not all “passive” income is equally passive:

    Income Type Upfront Effort Ongoing Effort Capital Needed Passiveness Rating
    Dividend Stocks Low Minimal Medium-High ⭐⭐⭐⭐⭐ Most Passive
    REITs Low Minimal Medium ⭐⭐⭐⭐⭐ Most Passive
    Rental Property Medium-High Low-Medium High ⭐⭐⭐ Moderately Passive
    Online Course Very High Low-Medium Low ⭐⭐⭐⭐ Very Passive
    Affiliate Marketing Medium-High Medium Low ⭐⭐⭐ Moderately Passive
    Digital Products High Low Low ⭐⭐⭐⭐ Very Passive
    YouTube Channel Very High Medium Low ⭐⭐ Less Passive
    Peer-to-Peer Lending Low Low Medium ⭐⭐⭐⭐ Very Passive

    The Honest Timeline

    Month 0-3: Research and setup

    • Learning about the income stream
    • Creating products or researching investments
    • Building systems and infrastructure
    • Income: $0

    Month 4-6: Initial launch/investment

    • Publishing products or making investments
    • Initial marketing efforts
    • Testing and refining
    • Income: $0-$100/month typically

    Month 7-12: Growth phase

    • Income starts trickling in
    • Optimizing what works
    • Building momentum
    • Income: $100-$500/month if going well

    Month 13-24: Maturity

    • Income becomes more consistent
    • Less active management needed
    • Truly “passive” phase begins
    • Income: $500-$2,000+/month if successful

    Most people quit during months 4-8 when effort is high but income is still low.

    What Makes Income “Passive”?

    An income stream is passive when:

    ✅ Income continues without active work
    You can stop working on it and money still comes in

    ✅ Time invested doesn’t scale linearly with income
    You don’t need to double your hours to double your income

    ✅ It runs on systems or assets
    The income is generated by something you created/own, not by trading your time

    ✅ Ongoing maintenance is minimal
    Less than 5-10 hours per month to maintain

    Example of PASSIVE income:

    • Create online course (200 hours initial work)
    • Course sells while you sleep
    • Spend 2 hours/month updating and marketing
    • Earn $1,500/month from 500 sales × $3 profit
    • Passive: Yes (2 hours/month maintenance, income continues)

    Example of ACTIVE income disguised as passive:

    • Freelance writing marketed as “passive”
    • Must write new articles to get paid
    • Income stops when you stop writing
    • Passive: No (actively trading time for money)

    Active vs. Passive Income: Understanding the Difference {#active-vs-passive}

    Understanding this distinction is crucial for building true passive income streams.

    Active Income

    Definition: Income that requires continuous work. When you stop working, income stops.

    Characteristics:

    • Direct exchange: time for money
    • Income stops if you stop working
    • Limited by hours available
    • Predictable and immediate
    • Examples: Salary, hourly work, freelancing, most side hustles

    Advantages:
    ✅ Immediate income
    ✅ Predictable
    ✅ Lower initial risk
    ✅ No upfront capital needed

    Disadvantages:
    ❌ Time-limited (only 24 hours/day)
    ❌ Income ceiling (your hourly rate × available hours)
    ❌ No income if you’re sick, on vacation, or stop working
    ❌ Doesn’t scale

    Passive Income

    Definition: Income that continues with minimal ongoing effort after initial setup.

    Characteristics:

    • Upfront work/investment, ongoing returns
    • Income continues when you stop working
    • Can scale beyond your time
    • Delayed gratification
    • Examples: Dividends, rental income, digital products

    Advantages:
    ✅ Scalable beyond your time
    ✅ Income continues during vacations, illness, retirement
    ✅ Can build multiple streams
    ✅ Compounds over time

    Disadvantages:
    ❌ Requires significant upfront effort or capital
    ❌ Delayed income (months to years)
    ❌ Risk (may not generate expected income)
    ❌ Often requires ongoing minor maintenance

    The Hybrid: Semi-Passive Income

    Many income streams fall somewhere in between:

    Examples:

    • YouTube channel: High initial effort, moderate ongoing effort (weekly videos), income continues from old videos
    • Blog with ads: High initial effort, low ongoing effort (occasional posts), income from old content
    • Managed rental property: Upfront purchase, moderate ongoing (property manager handles day-to-day)
    • Affiliate marketing: High initial effort (building audience), moderate ongoing (maintaining content)

    These require more than true passive but less than active work—call them “semi-passive.”

    Comparison Table

    Aspect Active Income Semi-Passive Passive Income
    Time to first dollar Immediate-1 month 3-12 months 6-24 months
    Upfront effort Low High Low-High (varies)
    Ongoing effort Continuous 5-15 hrs/week 0-5 hrs/month
    Income if you stop working $0 Decreases slowly Continues
    Scalability Limited Moderate High
    Capital required None Low-Medium Low-High (varies)
    Risk level Low Medium Medium-High
    Income ceiling Your hours × rate Moderate High/Unlimited

    Why You Need Both

    The balanced approach:

    Active income provides:

    • Immediate cash flow
    • Predictable monthly income
    • Funds to invest in passive income

    Passive income provides:

    • Long-term wealth building
    • Financial security
    • Income diversification
    • Path to financial independence

    Smart strategy:

    1. Earn active income (job, side hustle)
    2. Invest portion into building passive income
    3. As passive income grows, reduce active income dependency
    4. Eventually passive income can replace active income

    Example progression:

    • Year 1: $60,000 active income + $0 passive
    • Year 2: $60,000 active + $3,000 passive (started investing)
    • Year 3: $60,000 active + $9,000 passive (growing)
    • Year 5: $60,000 active + $24,000 passive (substantial)
    • Year 10: $30,000 active (part-time) + $60,000 passive (can work less)

    [Internal Link: Use active income from “Best Side Hustles for 2025: Make Extra Money on Your Schedule” to fund passive income investments]


    How Much Passive Income Can You Really Make? {#how-much}

    Let’s set realistic expectations based on actual data, not internet guru promises.


    Average Passive Income by Stream Type

    Based on surveys of 1,000+ passive income earners (Financial Independence community, 2024):

    Income Stream Average Monthly Income Time to Reach This Upfront Investment
    Dividend Stocks $200-$500 Immediate (after investment) $50,000-$100,000 invested
    REITs $150-$400 Immediate (after investment) $30,000-$80,000 invested
    Rental Property $200-$800 net/property 1-6 months (after purchase) $20,000-$100,000+ down payment
    Online Course $300-$1,500 6-18 months $0-$500
    E book/Book $100-$500 3-12 months $0-$2,000
    Affiliate Marketing $200-$2,000 12-24 months $0-$1,000
    YouTube Ad Revenue $100-$3,000 12-36 months $0-$2,000
    Print-on-Demand $50-$500 3-9 months $0-$500
    Stock Photography $50-$300 6-18 months $500-$3,000 (camera)
    App/Software $100-$5,000 6-24 months $0-$10,000
    Peer-to-Peer Lending $100-$300 Immediate $10,000-$50,000
    High-Yield Savings/CDs $40-$400 Immediate $10,000-$100,000
    Bond Ladder $150-$600 Immediate $30,000-$100,000
    Vending Machines $50-$300/machine 1-3 months $2,000-$5,000/machine
    ATM Machines $200-$500/machine 1-3 months $3,000-$10,000/machine

    Note: These are averages. Your results will vary significantly based on effort, capital, market conditions, and luck.

    The 1% Rule Reality

    Here’s a harsh truth:

    • 50% of people who start a passive income stream quit before seeing meaningful results
    • 30% make less than $100/month
    • 15% make $100-$500/month
    • 4% make $500-$2,000/month
    • 1% make $5,000+/month from a single stream

    Why the high failure rate?

    • Underestimate effort required
    • Expect results too quickly
    • Don’t invest enough (time or money)
    • Choose wrong stream for their skills/situation
    • Give up during the “valley of despair” (months 4-8)

    The Compounding Effect

    Single stream vs. multiple streams:

    Year 1:

    • Stream 1: $200/month
    • Total: $200/month

    Year 2:

    • Stream 1: $400/month (grew)
    • Stream 2: $100/month (new, still growing)
    • Total: $500/month

    Year 3:

    • Stream 1: $600/month
    • Stream 2: $300/month
    • Stream 3: $150/month (new)
    • Total: $1,050/month

    Year 5:

    • Stream 1: $800/month
    • Stream 2: $600/month
    • Stream 3: $500/month
    • Stream 4: $400/month
    • Stream 5: $200/month (newest)
    • Total: $2,500/month

    This is how people build substantial passive income—multiple streams compounding over years.

    Capital-Based Income Potential

    If you have money to invest:

    $10,000 invested:

    • Dividend stocks (4% yield): $33/month ($400/year)
    • REITs (6% yield): $50/month ($600/year)
    • High-yield savings (5% APY): $42/month ($500/year)

    $50,000 invested:

    • Dividend stocks (4% yield): $167/month ($2,000/year)
    • REITs (6% yield): $250/month ($3,000/year)
    • Rental property down payment: $200-800/month net (varies widely)

    $100,000 invested:

    • Dividend stocks (4% yield): $333/month ($4,000/year)
    • REITs (6% yield): $500/month ($6,000/year)
    • Multiple rental properties: $800-2,000/month net

    The rule of thumb: Need $25 invested for every $1 of annual passive income from investments (4% return)

    To generate $1,000/month ($12,000/year):

    • Need approximately $300,000 invested at 4% yield
    • OR successful digital product business
    • OR 3-5 rental properties
    • OR combination of multiple streams

    Effort-Based Income Potential

    If you have time but limited capital:

    200 hours upfront effort:

    • Create online course: Potential $300-1,500/month after 6-12 months
    • Write ebook: Potential $100-500/month after 3-6 months
    • Build affiliate website: Potential $200-2,000/month after 12-24 months

    500 hours upfront effort:

    • Develop app/software: Potential $500-5,000+/month after 12-24 months
    • Build YouTube channel: Potential $500-3,000+/month after 18-36 months
    • Create course library (multiple courses): Potential $1,000-5,000/month after 18-24 months

    The catch: High effort doesn’t guarantee high income. Many people invest 500 hours and make $50/month. Success requires effort PLUS market demand PLUS quality execution.

    First Year Expectations

    Be realistic about Year 1:

    Months 1-3:

    • Income: $0-$50
    • Reality: Setup, learning, creating
    • Feeling: Excited, motivated

    Months 4-6:

    • Income: $0-$100
    • Reality: Launched but little traction
    • Feeling: Frustrated, questioning

    Months 7-9:

    • Income: $50-$200
    • Reality: Some momentum building
    • Feeling: Cautiously optimistic

    Months 10-12:

    • Income: $100-$500
    • Reality: Seeing real results
    • Feeling: Motivated to continue

    Year 1 Total Income: $500-$2,000 typically (if you stick with it)

    Year 2 Total Income: $2,000-$8,000 (compounding effect)

    Year 3 Total Income: $5,000-$20,000 (multiple streams mature)

    Best Side Hustles for 2025: Make Extra Money on Your Schedule


    Passive Income Myth-Busting {#myths}

    Let’s destroy the most common passive income myths perpetuated by gurus and social media.

    Myth #1: “Passive Income is Effortless”

    The Myth:
    “Make $10,000/month while doing absolutely nothing!”

    The Reality:
    True passive income requires MASSIVE upfront effort or significant capital investment.

    Examples:

    • Online course: 100-300 hours to create + ongoing marketing
    • Rental property: Large down payment + ongoing maintenance/management
    • Dividend portfolio: Years of saving capital + ongoing monitoring
    • YouTube channel: 2-3 years of consistent content creation

    Bottom line: The passive part comes AFTER you’ve done the work. Nothing is free.


    Myth #2: “You Can Get Rich Quick with Passive Income”

    The Myth:
    “I made $50,000 in my first month!”

    The Reality:
    Most passive income streams take 1-2 years to generate $500/month.

    Timeline reality:

    • Month 1-6: $0-$100 total (for most people)
    • Month 7-12: $100-$500/month (if things go well)
    • Year 2: $500-$2,000/month (with optimization)
    • Year 3+: $1,000-$5,000/month (if successful)

    People showing “$50,000 first month” are:

    • Lying
    • Already had massive audience/capital
    • Showing revenue, not profit
    • Extreme outliers (0.01%)

    Myth #3: “Passive Income Requires No Maintenance”

    The Myth:
    “Set it and forget it!”

    The Reality:
    All passive income streams require some ongoing maintenance:

    • Investments: Rebalancing, monitoring, research (2-5 hrs/month)
    • Digital products: Updates, customer service, marketing (3-10 hrs/month)
    • Rental properties: Tenant issues, maintenance, bookkeeping (5-20 hrs/month unless using property manager)
    • Content sites: SEO updates, new content, technical maintenance (5-15 hrs/month)

    True “set it and forget it” options:

    • Dividend stocks (minimal oversight needed)
    • Index funds
    • REITs
    • Bonds

    Everything else requires ongoing work (even if reduced).


    Myth #4: “You Need to Quit Your Job to Build Passive Income”

    The Myth:
    “Go all-in and quit your job to focus on passive income!”

    The Reality:
    Most successful passive income builders started while working full-time.

    The smart approach:

    1. Keep day job (provides stability and capital)
    2. Build passive income streams nights/weekends
    3. Invest active income into passive income assets
    4. Once passive income = 50-75% of expenses, consider reducing work
    5. Once passive income > expenses, optional to quit (if desired)

    Quitting too early = financial stress = bad decisions = failure


    Myth #5: “Passive Income is Risk-Free”

    The Myth:
    “Just follow this system and you’re guaranteed to make money!”

    The Reality:
    All passive income carries risk:

    • Market investments: Can lose value (see 2008, 2020)
    • Rental properties: Bad tenants, repairs, vacancies, market downturns
    • Digital products: May not sell, platform changes, competition
    • Websites: Google algorithm changes can kill traffic overnight
    • Courses: Market saturation, platform fee changes

    Risk mitigation:

    • Diversify across multiple streams
    • Only invest money you can afford to lose
    • Have emergency fund in place
    • Don’t leverage excessively (especially real estate)

    Myth #6: “Anyone Can Make Passive Income”

    The Myth:
    “No skills, no capital, no problem—anyone can do this!”

    The Reality:
    Passive income requires one or both:

    • Capital (to invest in income-producing assets)
    • Skills/Time (to create income-producing products/systems)

    If you have neither capital nor time/skills:
    Focus first on active income to build capital and/or skills, THEN pursue passive income.

    Passive income is step 2, not step 1.


    Myth #7: “One Big Passive Income Stream is Enough”

    The Myth:
    “Find the ONE perfect passive income stream and you’re set!”

    The Reality:
    Diversification is crucial.

    Why single-stream is risky:

    • Platform dependency (YouTube changes algorithm, income drops 80%)
    • Market changes (rental market crashes)
    • Single point of failure

    Better approach:
    Build 3-5 complementary passive income streams:

    • Investment income (dividends, REITs)
    • Digital product income (course, ebooks)
    • Content income (blog, YouTube)
    • Asset income (rental property)

    If one struggles, others compensate.


    Myth #8: “Passive Income Doesn’t Require Money”

    The Myth:
    “Start with $0 and build passive income!”

    The Reality:
    You need either money OR massive time investment.

    Low-money options exist (digital products, content creation, affiliate marketing) BUT:

    • Require significant time (100-500+ hours)
    • Require skills (writing, video, design, marketing)
    • Have lower success rates
    • Take longer to generate income

    Capital accelerates everything:

    • $10,000 invested = immediate passive income (even if small)
    • Money for courses, tools, advertising
    • Can outsource work to speed up creation

    Most successful passive income earners invest both time AND money.


    Myth #9: “Passive Income Means You Never Work Again”

    The Myth:
    “Build passive income and retire to the beach!”

    The Reality:
    Most passive income earners continue working (though often on their own terms).

    Why people keep working:

    • Enjoy meaningful work
    • Want to grow income further
    • Healthcare/benefits through employment
    • Social connections
    • Sense of purpose

    What passive income DOES provide:

    • Freedom to choose work you enjoy
    • Ability to say no to bad jobs/clients
    • Reduced financial stress
    • Option to work part-time
    • Retirement security

    It’s about having options, not necessarily stopping all work.


    Myth #10: “Passive Income is Tax-Free”

    The Myth:
    “Passive income is a tax loophole!”

    The Reality:
    Almost all passive income is taxable.

    Tax implications:

    • Dividend income: Taxed (though qualified dividends get preferential rates)
    • Rental income: Taxed as ordinary income (minus expenses)
    • Interest income: Taxed as ordinary income
    • Royalties: Taxed as ordinary income
    • Capital gains: Taxed when you sell (preferential long-term rates)

    Tax advantages exist (depreciation on rentals, qualified dividends, long-term capital gains rates) but income isn’t tax-free.

    [We’ll cover this in detail in the Tax section]


    15 Best Passive Income Ideas for 2025 {#ideas}

    Now let’s dive into the actual strategies. I’ve organized them by category and provided brutally honest assessments.


    Investment-Based Passive Income {#investment}

    These require capital but minimal ongoing effort once established.


    1. Dividend Stocks ⭐ MOST PASSIVE

    What it is: Own shares of companies that pay regular dividends (portion of profits) to shareholders.

    Income potential: $200-$500/month per $50,000-$100,000 invested (4-5% yield)

    Passiveness level: ⭐⭐⭐⭐⭐ (Most passive option)

    Capital required: $1,000 minimum (realistically $10,000+ for meaningful income)

    Time to first income: Immediate (quarterly dividend payments)

    Upfront effort: Low (research and purchase)

    Ongoing effort: Minimal (1-2 hours/month monitoring)

    Risk level: Medium (market volatility, but less risky than growth stocks)


    How it works:

    1. Company makes profit
    2. Board declares dividend (say $0.50/share quarterly)
    3. You own 1,000 shares
    4. You receive $500 quarterly ($2,000/year)
    5. Reinvest or take as cash

    Types of dividend investments:

    Individual dividend stocks:

    • Blue-chip companies (Coca-Cola, Johnson & Johnson, Procter & Gamble)
    • Dividend aristocrats (25+ years of increasing dividends)
    • High-yield stocks (6-10% yield, higher risk)

    Dividend ETFs/Mutual Funds:

    • Vanguard Dividend Appreciation (VIG)
    • Schwab US Dividend Equity (SCHD)
    • Vanguard High Dividend Yield (VYM)
    • Lower risk than individual stocks (diversification)

    How to start:

    Step 1: Open brokerage account

    • Fidelity, Vanguard, Charles Schwab (all commission-free)
    • Takes 15 minutes online

    Step 2: Determine investment amount

    • Start with $1,000-5,000
    • Dollar-cost average over time (invest monthly)

    Step 3: Choose strategy

    Strategy A: Dividend ETF (easiest for beginners)

    • Buy SCHD or VYM
    • Instant diversification
    • Average 3-4% yield
    • Very low effort

    Strategy B: Individual dividend stocks

    • Research dividend aristocrats
    • Build portfolio of 10-20 stocks
    • Target average 4-5% yield
    • More effort but potentially higher returns

    Step 4: Reinvest or take cash

    • DRIP (Dividend Reinvestment Plan): Auto-reinvest dividends to buy more shares (compounds faster)
    • Cash: Take dividends as income

    Income examples:

    Investment Amount Annual Yield Monthly Income Notes
    $10,000 4% $33/month Starting point
    $25,000 4% $83/month Noticeable income
    $50,000 4% $167/month Meaningful income
    $100,000 4% $333/month Significant income
    $250,000 4% $833/month Substantial income
    $500,000 4% $1,667/month Major income stream

    To generate $1,000/month: Need ~$300,000 invested at 4% yield


    Pros:
    ✅ Truly passive (requires almost no ongoing work)
    ✅ Reliable companies with long dividend history
    ✅ Quarterly payments (predictable income)
    ✅ Potential for dividend growth over time
    ✅ Stock appreciation potential (bonus income)
    ✅ Liquid (can sell anytime if needed)
    ✅ Low time commitment

    Cons:
    ❌ Requires significant capital for meaningful income
    ❌ Dividends can be cut (during recessions)
    ❌ Stock value can decline (2008: many lost 50%+ temporarily)
    ❌ Taxable income (even if reinvested)
    ❌ Lower total returns than growth stocks historically
    ❌ Takes years to build substantial portfolio


    Tax implications:

    Qualified dividends:

    • Held stock 60+ days
    • Taxed at long-term capital gains rates (0%, 15%, or 20% depending on income)
    • More favorable than ordinary income

    Non-qualified dividends:

    • Taxed as ordinary income (your regular tax rate)
    • REITs pay non-qualified dividends

    Example:

    • $10,000 qualified dividend income
    • 15% tax bracket for long-term gains
    • Tax owed: $1,500
    • Net income: $8,500

    Success tips:

    1. Focus on dividend growth, not just high yield
      • 8-10% yield is often unsustainable (dividend cut risk)
      • 3-5% yield with dividend growth history is safer
    2. Diversify across sectors
      • Don’t put all in one industry
      • Mix: Consumer goods, healthcare, utilities, tech, financials
    3. Reinvest early, take income later
      • First 5-10 years: DRIP everything (compound growth)
      • Once portfolio is large enough: Take income
    4. Buy during market dips
      • Market crashes = dividend stocks on sale
      • Great buying opportunities (if you have cash)
    5. Track dividend history
      • Look for 10+ years of consistent/growing dividends
      • Avoid companies that cut dividends recently

    Recommended resources:

    • Seeking Alpha (dividend stock research)
    • Dividend.com (dividend calendar, stock screener)
    • DRIPInvesting.org (dividend reinvestment strategies)

    Realistic expectations:

    Year 1:

    • Invest $10,000
    • 4% yield = $400/year ($33/month)
    • Reinvest all dividends
    • Portfolio grows to $10,400 (plus any stock appreciation)

    Year 5:

    • Continue adding $5,000/year
    • Portfolio: ~$40,000
    • Income: $1,600/year ($133/month)
    • Still reinvesting

    Year 10:

    • Portfolio: ~$90,000 (with contributions + growth)
    • Income: $3,600/year ($300/month)
    • Can start taking income if desired

    Year 20:

    • Portfolio: ~$250,000
    • Income: $10,000/year ($833/month)
    • Meaningful passive income

    This is a long-term wealth-building strategy, not quick income.

    [Internal Link: Allocate side hustle income to investments with “Best Side Hustles for 2025: Make Extra Money on Your Schedule”]


    2. Real Estate Investment Trusts (REITs)

    What it is: Invest in real estate without buying physical property. REITs own/operate income-producing real estate and pay 90%+ of income as dividends.

    Income potential: $150-$400/month per $30,000-$80,000 invested (6-8% yield typically)

    Passiveness level: ⭐⭐⭐⭐⭐ (Extremely passive)

    Capital required: $1,000 minimum ($10,000+ for meaningful income)

    Time to first income: Immediate (monthly or quarterly dividends)

    Upfront effort: Low (research and purchase)

    Ongoing effort: Minimal (1-2 hours/month monitoring)

    Risk level: Medium-High (more volatile than dividend stocks, tied to real estate market)


    How it works:

    1. REIT owns properties (apartments, offices, warehouses, malls, hospitals)
    2. Collects rent from tenants
    3. Pays 90%+ of income to shareholders (required by law for tax advantages)
    4. You receive dividends (higher than typical stocks)
    5. Stock value fluctuates based on real estate market

    Types of REITs:

    By property type:

    • Residential: Apartments, single-family rentals
    • Commercial: Office buildings
    • Retail: Shopping malls, stores
    • Industrial: Warehouses, distribution centers
    • Healthcare: Hospitals, medical offices, senior living
    • Data Centers: Server facilities
    • Cell Towers: Telecommunications infrastructure
    • Storage: Self-storage facilities

    By structure:

    • Equity REITs: Own properties (most common)
    • Mortgage REITs: Own mortgages (higher yield, higher risk)
    • Hybrid REITs: Mix of both

    How to invest in REITs:

    Option A: Individual REITs
    Buy shares of specific REITs on stock market:

    • Realty Income (O) – “The Monthly Dividend Company”
    • Vanguard Real Estate (VNQ) – REIT index fund
    • Public Storage (PSA)
    • Digital Realty (DLR) – data centers
    • Welltower (WELL) – healthcare

    Option B: REIT ETFs/Mutual Funds

    • Vanguard Real Estate ETF (VNQ)
    • Schwab US REIT ETF (SCHH)
    • Instant diversification across many REITs

    How to start:

    Step 1: Open brokerage account (if you don’t have one)

    Step 2: Research REIT options

    • Look at dividend yield (6-8% is typical)
    • Check dividend payment history
    • Review property types and locations
    • Assess occupancy rates

    Step 3: Invest

    • Start with $1,000-5,000
    • REIT ETF is easiest for beginners (instant diversification)
    • Individual REITs if you want to specialize

    Step 4: Collect dividends

    • Many REITs pay monthly (unlike quarterly for stocks)
    • Reinvest or take as income

    Income examples:

    Investment Yield Monthly Income
    $10,000 6% $50/month
    $25,000 6% $125/month
    $50,000 6% $250/month
    $100,000 6% $500/month
    $200,000 6% $1,000/month

    At 6% yield, you need $200,000 invested to generate $1,000/month


    Pros:
    ✅ Higher yields than typical dividend stocks (6-8% vs. 3-4%)
    ✅ Monthly dividends (many REITs)
    ✅ Real estate exposure without being a landlord
    ✅ No maintenance, no tenants, no toilets
    ✅ Liquid (can sell anytime)
    ✅ Diversification across many properties
    ✅ Professional management
    ✅ Truly passive

    Cons:
    ❌ More volatile than bonds (stock price swings)
    ❌ Sensitive to interest rate changes (rise = REIT prices often fall)
    ❌ Dividends taxed as ordinary income (not qualified dividends)
    ❌ No depreciation tax benefits (unlike owning property)
    ❌ Less control than owning property
    ❌ Sector-specific risks (retail REITs struggled with e-commerce)


    Tax implications:

    REITs pay non-qualified dividends:

    • Taxed as ordinary income (your regular tax rate)
    • No preferential dividend tax rate
    • If you’re in 24% tax bracket, 24% of dividends go to taxes

    Example:

    • $6,000 REIT dividend income
    • 24% tax bracket
    • Tax owed: $1,440
    • Net income: $4,560

    Tax efficiency strategies:

    • Hold REITs in IRA/401(k) when possible (tax-deferred)
    • In taxable accounts, pair with tax-loss harvesting

    Best REITs for passive income (2025):

    Monthly dividend payers:

    1. Realty Income (O)
      • Yield: ~5.5%
      • Pays monthly for 54+ years
      • Diversified commercial properties
    2. STAG Industrial (STAG)
      • Yield: ~4.5%
      • Industrial warehouses
      • E-commerce tailwind

    High-yield options:
    3. AGNC Investment (AGNC) – Mortgage REIT

    • Yield: ~12-14%
    • Higher risk (mortgage REIT)
    • Monthly payments

    Diversified REIT funds:
    4. Vanguard Real Estate ETF (VNQ)

    • Yield: ~4%
    • 160+ REITs
    • Lowest risk (diversification)

    Success tips:

    1. Start with REIT ETF
      • Diversification reduces risk
      • Easier than picking individual REITs
      • Good foundation
    2. Avoid extremely high yields
      • 12-15% yields often unsustainable
      • Dividend cut risk
      • Stick to 5-8% range for safety
    3. Diversify by property type
      • Don’t put everything in retail (declining)
      • Mix: Industrial, residential, healthcare, data centers
    4. Consider monthly vs. quarterly
      • Monthly dividends smoother cash flow
      • Psychological benefit of regular income
    5. Hold in tax-advantaged accounts if possible
      • Ordinary income tax hurts
      • IRA = tax-deferred growth

    Realistic expectations:

    Year 1:

    • Invest $15,000 in REIT ETF
    • 6% yield = $900/year ($75/month)
    • Reinvest dividends

    Year 5:

    • Continue adding $3,000/year
    • Portfolio: ~$35,000
    • Income: $2,100/year ($175/month)

    Year 10:

    • Portfolio: ~$70,000
    • Income: $4,200/year ($350/month)
    • Start taking income if desired

    Year 20:

    • Portfolio: ~$180,000
    • Income: $10,800/year ($900/month)
    • Meaningful passive income

    3. High-Yield Savings Accounts & CDs

    What it is: Park money in FDIC-insured savings accounts or certificates of deposit earning interest.

    Income potential: $40-$400/month per $10,000-$100,000 saved (5% APY in 2025)

    Passiveness level: ⭐⭐⭐⭐⭐ (Completely passive)

    Capital required: $1 minimum (realistically $10,000+ for noticeable income)

    Time to first income: Immediate (monthly interest)

    Upfront effort: Minimal (open account online, 15 minutes)

    Ongoing effort: None (literally zero)

    Risk level: Minimal (FDIC insured up to $250,000)


    How it works:

    1. Deposit money in high-yield savings account
    2. Bank pays interest monthly (compounds)
    3. Money remains accessible (savings) or locked (CDs)
    4. FDIC insured (no risk of loss up to $250,000)

    Current rates (2025):

    High-Yield Savings Accounts:

    • Marcus by Goldman Sachs: 5.30% APY
    • American Express Personal Savings: 5.30% APY
    • Ally Bank: 5.25% APY
    • CIT Bank: 5.05% APY

    Certificates of Deposit (CDs):

    • 6-month CD: 5.00-5.25% APY
    • 12-month CD: 5.25-5.50% APY
    • 18-month CD: 5.00-5.25% APY
    • 5-year CD: 4.50-5.00% APY

    Note: Rates fluctuate with Federal Reserve policy. These are 2024-2025 rates.


    How to start:

    Step 1: Choose account type

    High-Yield Savings:

    • Completely liquid (withdraw anytime)
    • No penalties
    • Rate can change (but won’t go below 0%)
    • Best for emergency fund + passive income

    Certificates of Deposit:

    • Locked for term (6 months to 5 years)
    • Early withdrawal penalty (usually 3-6 months interest)
    • Fixed rate (guaranteed)
    • Best for money you won’t need short-term

    Step 2: Open account

    • Online application (15 minutes)
    • Link to existing checking account
    • Transfer money

    Step 3: Watch interest accumulate

    • Compounds monthly
    • Automatic (no effort required)

    Income examples:

    Amount Saved APY Monthly Income Annual Income
    $10,000 5% $42 $500
    $25,000 5% $104 $1,250
    $50,000 5% $208 $2,500
    $100,000 5% $417 $5,000
    $250,000 5% $1,042 $12,500

    To make $1,000/month: Need $240,000 saved at 5% APY


    Pros:
    ✅ Absolutely zero risk (FDIC insured)
    ✅ Truly passive (literally do nothing)
    ✅ Liquid (access money anytime with savings)
    ✅ No market volatility
    ✅ Guaranteed returns
    ✅ Simple (no learning curve)
    ✅ Great for emergency fund that also earns

    Cons:
    ❌ Low returns compared to stocks (5% vs. historical 10%)
    ❌ Inflation risk (if inflation > interest rate, losing buying power)
    ❌ Requires significant capital for meaningful income
    ❌ Rates fluctuate (Fed drops rates = your income drops)
    ❌ Interest is taxable
    ❌ Opportunity cost (money here can’t be in higher-return investments)


    Tax implications:

    Interest is taxable:

    • Taxed as ordinary income
    • Bank sends 1099-INT if you earned $10+ in interest
    • Add to your income on tax return

    Example:

    • $50,000 in HYSA at 5% = $2,500 interest
    • 24% tax bracket
    • Tax owed: $600
    • Net income: $1,900 (3.8% after-tax return)

    Best accounts for passive income (2025):

    High-Yield Savings:

    1. Marcus by Goldman Sachs – 5.30% APY, no fees
    2. American Express Personal Savings – 5.30% APY, excellent interface
    3. Ally Bank – 5.25% APY, great customer service

    CDs for laddering:

    1. Ally Bank – Competitive rates, no minimum
    2. Marcus by Goldman Sachs – No penalty CD (unique)
    3. Synchrony Bank – High rates

    Advanced strategy: CD Ladder

    Problem with CDs: Money locked up, miss out if rates rise

    Solution: CD Ladder

    How it works:

    • Split money into multiple CDs with staggered maturity dates
    • Every few months, a CD matures
    • Reinvest at current rates or use cash
    • Always have liquidity coming up

    Example $50,000 CD ladder:

    • $10,000 in 6-month CD
    • $10,000 in 12-month CD
    • $10,000 in 18-month CD
    • $10,000 in 24-month CD
    • $10,000 in 30-month CD

    Every 6 months: One CD matures, reinvest for 30 months (or take cash)

    Benefits:

    • Regular access to portions of money
    • Capture rising rates
    • Higher average yield than all in savings
    • Still relatively liquid

    When to use this passive income strategy:

    ✅ Good for:

    • Emergency fund (that also earns)
    • Money you’ll need in 1-3 years
    • Risk-averse investors
    • Retired people needing guaranteed income
    • Part of diversified strategy

    ❌ Not ideal for:

    • Young investors (stocks better long-term)
    • People with small amounts ($1,000 = $4/month)
    • Those seeking high returns
    • Long-term wealth building (stocks/RE better)

    Realistic expectations:

    Scenario: $30,000 emergency fund

    • Keep in HYSA at 5% APY
    • Monthly income: $125
    • Annual income: $1,500
    • Fully liquid for emergencies
    • Beats checking account earning 0%

    This isn’t wealth-building income, but it’s:

    • Completely safe
    • Truly passive
    • Better than earning nothing

    Best use: Foundation of passive income portfolio, not the whole strategy


    4. Peer-to-Peer Lending

    What it is: Lend money to individuals or businesses through online platforms, earning interest.

    Income potential: $100-$300/month per $10,000-$50,000 invested (5-8% returns)

    Passiveness level: ⭐⭐⭐⭐ (Mostly passive after initial setup)

    Capital required: $1,000 minimum ($10,000+ for meaningful income)

    Time to first income: 1-2 months (loans must fund and payments begin)

    Upfront effort: Low-Medium (research, setup, selecting loans)

    Ongoing effort: Low (1-2 hours/month monitoring, reinvesting)

    Risk level: Medium-High (default risk, platform risk)


    How it works:

    1. Borrowers apply for loans on platform (LendingClub, Prosper, etc.)
    2. Platform evaluates creditworthiness (assigns grade A-G)
    3. You choose loans to fund (can invest as little as $25 per loan)
    4. Borrowers make monthly payments (principal + interest)
    5. You receive monthly payments (can reinvest or withdraw)
    6. Some loans default (you lose that investment)

    Net return = Interest earned – Defaults


    Major P2P platforms:

    Consumer lending:

    1. LendingClub
      • Returns: 4-7% net after defaults
      • Minimum: $1,000
      • Loans: Personal loans ($1,000-$40,000)
    2. Prosper
      • Returns: 5-8% net
      • Minimum: $25
      • Loans: Personal loans

    Business lending:
    3. Funding Circle

    • Returns: 5-9% net
    • Minimum: $1,000
    • Loans: Small business loans

    Real estate debt:
    4. Groundfloor

    • Returns: 5-10% target
    • Minimum: $10
    • Short-term real estate loans

    How to start:

    Step 1: Choose platform

    • Research track record
    • Compare fees
    • Read reviews
    • Understand risks

    Step 2: Create account and deposit funds

    • Verification process (2-5 days)
    • Link bank account
    • Transfer money

    Step 3: Select loan strategy

    Manual selection:

    • Review each loan individually
    • Choose based on credit grade, purpose, income
    • Time-consuming but more control

    Automated investing:

    • Set criteria (credit grades, loan purpose, interest rate)
    • Platform auto-invests across many loans
    • Easier, better diversification

    Step 4: Diversify

    • Never put all money in one loan
    • Invest $25-50 per loan minimum
    • Spread across 50-200 loans (reduces default impact)

    Step 5: Reinvest payments

    • Monthly payments come in
    • Reinvest automatically (compound growth)
    • OR take as cash income

    Income examples:

    Investment Expected Return Monthly Income Notes
    $5,000 6% net $25/month Getting started
    $10,000 6% net $50/month Noticeable
    $25,000 6% net $125/month Meaningful
    $50,000 6% net $250/month Substantial

    Reality: Income grows slowly as payments come in and compound


    Pros:
    ✅ Higher returns than savings accounts
    ✅ Help people get loans (feel-good factor)
    ✅ Mostly passive after setup
    ✅ Monthly cash flow (payments come in monthly)
    ✅ Can start with small amounts ($1,000)
    ✅ Diversification from stocks/bonds

    Cons:
    ❌ Defaults happen (some loans won’t be repaid)
    ❌ Platform risk (platform could fail)
    ❌ Not FDIC insured (you can lose money)
    ❌ Less liquid (can’t instantly withdraw all money)
    ❌ Returns declining over past 5 years
    ❌ Some platforms closed to new investors
    ❌ Tax complexity (many 1099s)


    Risk management:

    Default risk is REAL:

    • 3-8% of loans typically default (depending on grade)
    • Higher interest loans = higher default rates
    • Diversification is critical

    Diversification strategy:

    • ❌ Don’t: Put $10,000 in 10 loans ($1,000 each)
      • One default = lose 10% of portfolio
    • ✅ Do: Put $10,000 in 200 loans ($50 each)
      • One default = lose 0.5% of portfolio

    Platform risk:

    • Platforms have shut down (Lending Club exited, others followed)
    • Existing loans continue, but can’t make new investments
    • Diversify across platforms if using large amounts

    Tax implications:

    Interest income is taxable:

    • Taxed as ordinary income
    • You receive multiple 1099s (one per loan in some cases)
    • Can be messy for taxes

    Default losses may be deductible:

    • If loan defaults, may be capital loss
    • Consult tax professional

    Success tips:

    1. Use automated investing
      • Set criteria (A-C grade loans, diversified)
      • Let platform spread investments
      • Saves time, improves diversification
    2. Avoid highest-risk loans
      • D-G grade loans have 15-30% default rates
      • Yes, higher interest, but defaults kill returns
      • Stick with A-C grades (3-8% default rates)
    3. Reinvest for first 2-3 years
      • Compound growth
      • Build portfolio faster
      • Take income later
    4. Don’t invest money you can’t afford to lose
      • This is not FDIC insured
      • Defaults will happen
      • Platform could shut down
    5. Treat as 5-10% of investment portfolio, not 100%
      • Too risky for all your money
      • Good diversifier in small amounts

    Realistic expectations:

    Year 1:

    • Invest $10,000
    • 6% target return
    • But takes time for loans to fund and payments to come in
    • Actual received: ~$400 (partial year effect)

    Year 2:

    • Full year of payments
    • Some defaults (lose ~$200)
    • Reinvest all payments
    • Net return: ~$550

    Year 3:

    • Portfolio: ~$11,500 (with reinvestment)
    • Defaults continue (~2-3%)
    • Net income: ~$650
    • Can start taking as cash if desired

    This is slow, steady income, not quick riches.


    When to consider P2P lending:

    ✅ Good for:

    • Diversifying beyond stocks/bonds
    • People wanting higher yields than savings
    • Those comfortable with moderate risk
    • Part of balanced passive income strategy

    ❌ Avoid if:

    • You need guaranteed returns
    • You can’t afford potential losses
    • You want complete liquidity
    • You’re risk-averse
    • You’re uncomfortable with complexity

    Current state of P2P lending (2025):

    Important note: The P2P lending industry has contracted:

    • LendingClub exited retail P2P (now focuses on other business)
    • Several platforms shut down
    • Industry consolidating
    • Returns declining from 2010-2015 era

    Still viable but:

    • Less “hot” than it was
    • More institutional investors (less opportunity for individuals)
    • Still worth small allocation (5-10% of portfolio)
    • Not the “can’t-miss” opportunity it was marketed as

    Proceed with caution and realistic expectations.


    5. Online Courses ⭐ HIGH INCOME POTENTIAL

    What it is: Create educational video/text courses and sell them on platforms or your own website.

    Income potential: $300-$1,500/month (can scale to $5,000+/month if successful)

    Passiveness level: ⭐⭐⭐⭐ (Very passive after creation)

    Capital required: $0-$500 (camera, mic, software)

    Time to first income: 3-6 months (creation + launch + marketing)

    Upfront effort: Very High (100-300 hours to create quality course)

    Ongoing effort: Low-Medium (2-5 hours/month for updates, marketing, customer service)

    Risk level: Medium (may not sell, competitive market)


    How it works:

    1. Choose topic you’re expert in
    2. Create course content (videos, worksheets, quizzes)
    3. Upload to platform (Udemy, Teachable, etc.) or your own site
    4. Market the course (initial launch + ongoing)
    5. Students purchase and complete course
    6. You earn revenue (passive once created)
    7. Occasionally update content to stay current

    Popular course platforms:

    Platform comparison:

    Platform Your Cut Pricing Control Marketing Best For
    Udemy 37-50% Limited (frequent sales) High traffic Beginners
    Teachable 90-97% Full control You market Serious creators
    Skillshare Royalty pool No control High traffic Creative topics
    Thinkific 90-97% Full control You market Professional courses
    Kajabi 100% Full control You market Advanced (higher price)

    How to create a course:

    Step 1: Validate your topic

    • What are you expert in?
    • What do people ask you about?
    • Search Udemy/YouTube for competition (some competition = proof of demand)
    • Join Facebook groups in niche, see what questions people ask

    Popular profitable course topics:

    • Software skills (Photoshop, Excel, programming)
    • Digital marketing (SEO, Facebook ads, email marketing)
    • Business skills (freelancing, starting business, productivity)
    • Creative skills (photography, design, video editing)
    • Personal development (meditation, confidence, habits)
    • Finance (investing, budgeting, crypto)
    • Language learning
    • Test prep (SAT, GRE, professional certifications)

    Step 2: Outline your course

    • What will students learn? (learning outcomes)
    • Break into 6-10 modules
    • Each module = 3-8 lessons
    • Total: 2-5 hours of video content (sweet spot)

    Step 3: Create content

    Equipment needed:

    • Camera: Smartphone is fine (or webcam)
    • Microphone: $50-100 USB mic (critical for quality)
    • Lighting: $30-50 ring light or natural window light
    • Software: Screen recording (Loom, Camtasia) + editing (iMovie, DaVinci Resolve free)

    Creation time:

    • 1 hour of finished content = 3-5 hours of work
    • 3-hour course = 9-15 hours of recording/editing
    • Plus 10-20 hours planning
    • Total: 100-200 hours for first course

    Step 4: Upload to platform

    • Create compelling course title
    • Write course description (sell the transformation)
    • Upload videos
    • Create worksheets/resources
    • Add quizzes if applicable

    Step 5: Price your course

    Pricing strategies:

    Udemy:

    • List at $99-199
    • Udemy runs sales constantly (sells for $15-30)
    • You get 50% if student comes from Udemy, 97% if you send traffic
    • Volume business model

    Your own platform (Teachable, etc.):

    • Price $50-500 depending on topic and value
    • No forced sales
    • Higher price, lower volume typically
    • Keep 90-97% of revenue

    Step 6: Launch and market

    Launch strategies:

    • Warm up email list (if you have one)
    • Offer early-bird discount
    • Share on social media
    • Content marketing (blog, YouTube previews)
    • Paid ads (Facebook, Google) if budget allows

    Ongoing marketing:

    • SEO-optimized blog posts driving to course
    • YouTube videos with course link
    • Social media content
    • Email sequences
    • Partnerships/affiliates

    Income examples:

    Scenario A: Udemy course

    • Course sells for $15-20 (during sales)
    • You get $7-10 per sale (50% cut)
    • Sell 50 copies/month = $350-500/month
    • Sell 150 copies/month = $1,050-1,500/month

    Scenario B: Self-hosted on Teachable

    • Course price: $97
    • You keep $93 after fees
    • Sell 15 copies/month = $1,395/month
    • Lower volume, higher margin

    Realistic first year:

    • Months 1-3: Creation ($0 income)
    • Months 4-6: Launch ($100-300/month)
    • Months 7-12: Growth ($300-800/month)
    • Total Year 1: $2,000-4,000

    Year 2-3:

    • Course established
    • Steady sales with minimal work
    • $500-2,000/month (if successful)

    Pros:
    ✅ Create once, sell unlimited times (true scaling)
    ✅ High profit margins (90%+ if self-hosted)
    ✅ Establish expertise/authority
    ✅ Help people (rewarding)
    ✅ Can scale to $5,000-$50,000+/month if very successful
    ✅ Works while you sleep
    ✅ Low ongoing effort after creation

    Cons:
    ❌ Huge time investment to create (100-300 hours)
    ❌ No guarantee it will sell
    ❌ Competitive market
    ❌ Requires marketing skills (or paid ads)
    ❌ Content becomes outdated (needs updates)
    ❌ Customer support (questions, refunds)
    ❌ Platform dependency risk (Udemy changes rules)


    Success tips:

    1. Solve a specific painful problem
      • Not “How to use Photoshop” (too broad)
      • “How to Remove Backgrounds in Photoshop for Product Photos” (specific)
    2. Create outstanding first 10 minutes
      • Most people judge course in first 10 minutes
      • Hook them, show value immediately
      • First module should have quick win
    3. Get 5 reviews quickly
      • Give away 10-20 copies to friends/colleagues for honest reviews
      • Reviews dramatically increase sales
      • First 5 reviews are critical
    4. Create course in growing niche
      • AI tools, crypto, remote work, sustainability
      • Not dying niches (DVD authoring)
    5. Build email list while creating course
      • Blog about topic
      • Collect emails
      • Launch to warm audience
    6. Consider course bundling
      • Create 2-3 related courses
      • Sell as bundle for higher price
      • Increases customer value

    Tax implications:

    • Course sales are business income
    • Taxed as self-employment income (15.3% SE tax + income tax)
    • Deduct expenses (equipment, software, advertising)

    Realistic expectations:

    90% of courses make less than $1,000/month

    Why most courses fail:

    • No audience before creation (build audience WHILE creating)
    • Poor quality (invest in good microphone minimum)
    • Boring delivery (energy and personality matter)
    • No marketing (“build it and they’ll come” doesn’t work)
    • Solving problem no one has

    Courses that succeed:

    • Solve painful problem
    • Created by someone with audience/credibility
    • High quality production
    • Marketed consistently
    • Updated regularly

    If you succeed:

    • Can genuinely make $1,000-$10,000+/month
    • Mostly passive after creation
    • One of best passive income models

    But be realistic: It’s hard work upfront with no guarantee of success.

    [Internal Link: Market your course through “How to Start Freelancing: Turn Your Skills Into Income” principles]


    6. Ebooks and Digital Books

    What it is: Write and self-publish books sold on Amazon Kindle, Apple Books, and other platforms.

    Income potential: $100-$500/month per successful book (can scale with multiple books)

    Passiveness level: ⭐⭐⭐⭐ (Very passive after publication)

    Capital required: $0-$2,000 (cover design, editing optional)

    Time to first income: 2-4 months (writing + publishing)

    Upfront effort: High (60-200 hours to write book)

    Ongoing effort: Minimal (1-2 hours/month marketing)

    Risk level: Low-Medium (time investment, uncertain sales)


    How it works:

    1. Write book (20,000-80,000 words typically)
    2. Get professional cover ($50-500)
    3. Format for ebook
    4. Publish on Amazon KDP (Kindle Direct Publishing)
    5. Set price ($2.99-9.99 sweet spot)
    6. Earn royalties (35-70% depending on price)
    7. Book sells indefinitely

    Types of ebooks that sell:

    Fiction:

    • Romance (biggest seller)
    • Thriller/Mystery
    • Science Fiction/Fantasy
    • Success requires series (multiple books)

    Non-Fiction:

    • How-to guides
    • Personal development
    • Business/entrepreneurship
    • Health/fitness
    • Finance/investing
    • Parenting
    • Hobby guides

    Note: Non-fiction generally easier for beginners (don’t need fiction writing skills)


    How to publish an ebook:

    Step 1: Choose topic and validate

    • Check Amazon bestseller lists in your category
    • Look at what’s selling
    • Read reviews (what do people want? what’s missing?)
    • Ensure there’s demand

    Step 2: Write the book

    Word count by type:

    • Short ebook: 15,000-25,000 words (easier to complete)
    • Standard non-fiction: 40,000-60,000 words
    • Full-length fiction: 60,000-100,000 words

    Writing timeline:

    • 500 words/day = 50,000-word book in 100 days (~3 months)
    • 1,000 words/day = 50,000-word book in 50 days (~2 months)

    Tips for finishing:

    • Write daily (consistency beats intensity)
    • Outline first (prevents getting stuck)
    • Don’t edit while writing (finish draft first)
    • Set word count goals, not time goals

    Step 3: Edit

    Option A: Self-edit

    • Free
    • Use Grammarly, ProWritingAid
    • Take 2-3 passes
    • Okay for budget approach

    Option B: Professional editing

    • Developmental editing: $500-2,000
    • Copyediting: $300-1,000
    • Proofreading: $200-500
    • Better quality, costs money

    Step 4: Get cover designed

    DIY:

    • Canva ($0-13/month)
    • Okay for non-fiction
    • Not recommended for fiction

    Professional designer:

    • Fiverr: $50-200
    • 99Designs: $300-500
    • Highly recommended (cover drastically affects sales)

    Step 5: Format for ebook

    • Vellum (Mac only, $249): Best tool
    • Reedsy Book Editor (free)
    • Draft2Digital (free)

    Step 6: Publish on platforms

    Amazon Kindle Direct Publishing (KDP):

    • 70% royalty if $2.99-$9.99 price
    • 35% royalty if outside that range
    • Largest ebook market (80%+ of sales)

    Other platforms:

    • Apple Books
    • Google Play Books
    • Kobo
    • Barnes & Noble Nook

    Use Draft2Digital or PublishDrive to distribute to all at once

    Step 7: Price your book

    Optimal pricing:

    • $2.99-4.99: Most non-fiction, some fiction
    • $0.99: Loss leader (get reviews, build audience for series)
    • $9.99: Premium positioning, established authors

    Royalty examples:

    • $4.99 book at 70% royalty = $3.49 per sale
    • Sell 100 copies/month = $349/month

    Income examples:

    Single book:

    • Price: $4.99
    • Royalty: $3.49 per sale
    • 50 sales/month = $175/month
    • 150 sales/month = $524/month

    Multiple books (series strategy):

    • 5 books in series
    • Each sells 30 copies/month average
    • 150 total sales × $3.49 = $524/month

    Realistic:

    • Most ebooks sell less than 10 copies/month
    • Median income per ebook: $100-200/month (if moderately successful)
    • Top 10% of ebooks: $500-2,000+/month
    • Top 1%: $5,000+/month

    Pros:
    ✅ Write once, sell forever (true passive)
    ✅ Low/no startup cost (can DIY everything)
    ✅ Complete creative control
    ✅ Builds author platform
    ✅ Can scale with multiple books
    ✅ Works 24/7 globally
    ✅ No inventory or shipping

    Cons:
    ❌ Huge time investment to write (60-200 hours)
    ❌ No guarantee it will sell
    ❌ Extremely competitive (millions of books on Amazon)
    ❌ Marketing is critical (won’t sell without it)
    ❌ Usually need multiple books to make decent income
    ❌ Cover and editing costs (if doing it right)


    Success strategies:

    1. Write a series, not standalone

    • Readers who like book 1 buy books 2-5
    • Series sell 3-5x more than standalone books
    • Plan trilogy or series from beginning

    2. Make book 1 free or $0.99

    • Hook readers
    • They buy rest of series at full price
    • “Loss leader” strategy

    3. Build email list

    • Offer free chapter for email signup
    • Email list of readers = launch audience for future books
    • Most valuable asset

    4. Leverage Amazon’s algorithm

    • First 30 days critical (launch velocity)
    • Get reviews quickly (friends, ARC team)
    • Amazon promotes books with momentum

    5. Write in popular genre

    • Romance sells more than poetry
    • Business how-to sells more than obscure topics
    • Check Amazon bestseller lists

    6. Publish consistently

    • 3-4 books per year
    • Keeps momentum
    • Each book promotes others

    Marketing strategies:

    Free/Low-Cost:

    • Amazon categories (choose wisely)
    • Amazon keywords (research what people search)
    • Social media (build following)
    • Guest posts on blogs
    • Book review sites (BookBub, Goodreads)

    Paid:

    • Amazon Ads ($5-50/day)
    • BookBub Featured Deals ($100-2,000 per promo)
    • Facebook Ads

    Most successful authors spend $300-1,000/month on ads (once they’re selling)


    Tax implications:

    • Royalties are self-employment income
    • Quarterly estimated taxes
    • Deduct writing expenses (editing, cover design, ads, software)

    Realistic expectations:

    First book:

    • 3 months to write
    • $500 for editing/cover
    • Launch: 20-30 sales first month
    • Settle to 10-20 sales/month
    • Income: $50-100/month

    After 5 books (1-2 years):

    • Back catalog selling
    • Cross-promotion between books
    • Income: $300-800/month

    After 15 books (3-4 years):

    • Established author
    • Email list of 2,000+ readers
    • Income: $1,000-3,000/month (if moderately successful)

    This is a long-term play. One book won’t make you rich. But 10-20 books over several years can create meaningful passive income.

  • Best Side Hustles for 2027: Make Extra Money on Your Schedule

    Best Side Hustles for 2027: Make Extra Money on Your Schedule

    Table of Contents

    1. Introduction
    2. What is a Side Hustle?
    3. Why Start a Side Hustle in 2025?
    4. How Much Can You Really Make?
    5. How to Choose the Right Side Hustle
    6. Best Online Side Hustles (Work From Anywhere)
    7. Best Local/In-Person Side Hustles
    8. Best Creative Side Hustles
    9. Best Side Hustles for Specific Skills
    10. Best Weekend Side Hustles
    11. Best Side Hustles with Low Startup Costs
    12. Side Hustles to Avoid (Red Flags)
    13. How to Start Your Side Hustle: Step-by-Step
    14. Managing Your Side Hustle with Your Full-Time Job
    15. Tax Considerations for Side Hustlers
    16. Success Stories: Real People, Real Results
    17. Frequently Asked Questions
    18. Conclusion

    Introduction {#introduction}

    The cost of living is rising faster than wages. In 2024, 45% of Americans reported having a side hustle—up from 34% just three years ago (Bankrate Side Hustle Survey). This isn’t just a trend; it’s a financial necessity for millions and a strategic wealth-building move for millions more.

    Whether you need an extra $500 to cover unexpected expenses, want to accelerate debt payoff, are building an emergency fund, or simply desire more financial breathing room—a side hustle can bridge the gap between where you are and where you want to be financially.

    But here’s the challenge: Not all side hustles are created equal.

    Some promise quick riches but deliver pennies per hour. Others require massive upfront investments you can’t afford. Many demand skills you don’t have or time you don’t possess. And some are outright scams designed to separate you from your money rather than help you make it.

    This comprehensive guide cuts through the noise.

    You’ll discover 30+ legitimate side hustles for 2025, organized by type, skill requirement, and earning potential. More importantly, you’ll learn:

    • How to choose the right side hustle for YOUR situation
    • Realistic income expectations (no hype, just facts)
    • How to start with minimal investment
    • How to balance a side hustle with your full-time job
    • Tax implications you need to know
    • Real success stories from real people

    Whether you have 5 hours per week or 20, whether you prefer working from home or getting out and about, whether you’re tech-savvy or prefer hands-on work—there’s a side hustle that fits your life.

    The extra income you need is out there. This guide shows you exactly how to earn it.

    Let’s transform your spare time into meaningful income.


    What is a Side Hustle? {#what-is}

    side hustle is any type of employment or business you pursue in addition to your primary source of income. It’s work you do outside your regular 9-to-5 job to earn extra money.

    Key Characteristics of a Side Hustle:

    1. Supplemental Income

    • Not your primary source of income (at least initially)
    • Complements your main job
    • Provides financial cushion or accelerates goals

    2. Flexible Schedule

    • You control when you work
    • Fits around your primary job
    • Can be done evenings, weekends, or whenever you have time

    3. You’re in Control

    • Choose what you do
    • Decide how much time to invest
    • Scale up or down based on needs

    4. Variable Commitment

    • Can be a few hours per week or 20+ hours
    • Adjust based on life circumstances
    • Stop or start as needed (usually)

    Side Hustle vs. Part-Time Job

    Part-Time Job:

    • Fixed schedule set by employer
    • Hourly wage
    • Required to show up at specific times
    • Limited flexibility
    • W-2 employee

    Side Hustle:

    • You set your schedule
    • Varied income (could be per project, per hour, per sale)
    • Work when you want
    • Maximum flexibility
    • Usually 1099 contractor or business owner

    Example:

    • Working nights at Target = part-time job
    • Driving for Uber when you want = side hustle

    Side Hustle vs. Small Business

    The line blurs, but generally:

    Side Hustle:

    • Started small alongside main job
    • May stay small indefinitely
    • Lower risk (not dependent on it for living)
    • Fits around life

    Small Business:

    • Often becomes primary income
    • Requires significant time/money investment
    • Higher risk (may depend on it for income)
    • Life fits around business

    Many side hustles evolve into full-time businesses—but they don’t have to.

    Common Misconceptions

    ❌ “Side hustles are just for broke people”
    Reality: Many high-earners have side hustles to accelerate wealth building, pursue passions, or diversify income.

    ❌ “Side hustles are get-rich-quick schemes”
    Reality: Legitimate side hustles require real work. They’re earn-extra-money schemes, not get-rich-quick schemes.

    ❌ “You need special skills or education”
    Reality: While some side hustles require expertise, many require only time, effort, and willingness to learn.

    ❌ “Side hustles take too much time”
    Reality: Many side hustles can be done in just 5-10 hours per week. You choose your commitment level.

    ❌ “I’m too old/young for a side hustle”
    Reality: There are side hustles for every age, from teenagers to retirees.


    Why Start a Side Hustle in 2025? {#why-2025}

    Beyond the obvious reason (making more money), 2025 presents unique opportunities and compelling reasons to start a side hustle.

    1. Economic Realities Demand Additional Income

    The Numbers Don’t Lie:

    • Inflation impact: Even with inflation moderating, prices remain 20%+ higher than 2020 levels
    • Wage stagnation: Real wages (adjusted for inflation) have been flat for many workers
    • Rising costs: Housing, healthcare, education, and childcare costs continue climbing
    • Emergency savings gap: 40% of Americans couldn’t cover a $400 emergency (Federal Reserve, 2024)

    Translation: Most people need more money just to maintain their standard of living.

    2. Technology Makes Side Hustling Easier Than Ever

    2025 Advantages:

    AI Tools:

    • ChatGPT and similar tools help with content creation, customer service, business planning
    • Design tools make professional graphics accessible to everyone
    • Automation handles repetitive tasks

    Platforms:

    • Gig economy apps (Uber, DoorDash, TaskRabbit, Upwork)
    • Online marketplaces (Etsy, eBay, Amazon, Shopify)
    • Course platforms (Teachable, Udemy, Skillshare)
    • Payment processing (PayPal, Venmo, Stripe make getting paid easy)

    Remote Work Acceptance:

    • Companies now comfortable with remote contractors
    • Global opportunities from your living room
    • Virtual services boom continues

    3. Multiple Income Streams = Financial Security

    The Risk of Single Income Source:

    If you have only one income source (your job) and you lose it, your income drops to zero instantly.

    The Power of Diversification:

    With a side hustle generating even $500-1,000/month:

    • Losing your job isn’t catastrophic
    • You have time to find quality employment
    • Reduced financial anxiety
    • Practice for potential full-time entrepreneurship

    Think of it as income insurance.

    4. Accelerate Financial Goals

    What an extra $500-1,000/month can do:

    Pay off debt faster:

    • $500/month extra toward $20,000 debt
    • At 18% interest, paying minimum: 15+ years
    • With $500/month extra: 3 years
    • Interest saved: $15,000+

    Build emergency fund:

    • $750/month to emergency fund
    • Fully funded 6-month emergency fund ($18,000): 24 months
    • Without side hustle (saving $150/month): 10 years

    Save for major purchase:

    • House down payment ($30,000 needed)
    • $1,000/month side hustle income
    • Reach goal: 2.5 years
    • Without side hustle (saving $200/month): 12.5 years

    Early retirement:

    • $800/month invested from age 35-65 (30 years)
    • At 7% return: $984,000
    • The side hustle income can literally make you a millionaire

    Internal Link: Use side hustle income to build your “Emergency Fund Guide: How Much to Save and Where to Keep It”

    5. Pursue Passion While Earning

    Many side hustles align with hobbies or interests:

    • Love photography? → Event photography side hustle
    • Enjoy baking? → Sell custom cakes
    • Good at organizing? → Professional organizer
    • Passionate about fitness? → Personal training

    Get paid for what you’d do anyway (or want to do more of).

    6. Test Business Ideas with Low Risk

    Want to start a business but scared to quit your job?

    Side hustles let you:

    • Test market demand
    • Build skills
    • Develop client base
    • Prove concept
    • All while keeping stable income

    If it fails, you still have your job. If it succeeds, you have options.

    7. Inflation-Proof Your Income

    Your salary might get a 3% raise.
    Inflation might be 4%.
    You’re losing ground.

    Side hustle advantage:

    • Many allow you to raise rates as you gain experience
    • Scale income by working more or optimizing
    • Not tied to employer’s budget constraints
    • You control your earning potential

    8. Develop Valuable Skills

    Side hustles teach:

    • Marketing and sales
    • Customer service
    • Time management
    • Financial management
    • Entrepreneurship
    • Specific technical skills

    These skills make you more valuable in your main career too.

    9. 2025-Specific Opportunities

    Emerging trends creating side hustle opportunities:

    • AI content creation: Businesses need AI-savvy content creators
    • Short-form video: TikTok, Reels, YouTube Shorts content demand
    • Virtual assistance: More businesses going remote
    • Online tutoring: Education continues shifting online
    • Sustainability consulting: Businesses need help with green initiatives
    • Digital products: Online courses, templates, ebooks
    • Elder care services: Aging population creates demand

    The landscape is ripe with opportunity.


    How Much Can You Really Make? {#how-much}

    Let’s set realistic expectations. Side hustle income varies dramatically based on what you do, how much time you invest, and your skill level.

    Income Reality Check

    Low-End Side Hustles ($100-500/month):

    • 5-10 hours per week
    • Low skill requirements
    • Quick to start
    • Examples: Online surveys, simple gig work

    Mid-Range Side Hustles ($500-2,000/month):

    • 10-15 hours per week
    • Some skill or experience required
    • May need small investment
    • Examples: Freelance writing, driving for rideshare, tutoring

    High-End Side Hustles ($2,000-5,000+/month):

    • 15-25+ hours per week
    • Specialized skills
    • Established client base or platform
    • Examples: Consulting, high-end freelancing, successful online business

    Average Side Hustle Income

    According to Bankrate’s 2024 Side Hustle Survey:

    • Average monthly side hustle income: $891
    • Median monthly income: $350
    • Top 25% earn: $1,000+ per month
    • Top 10% earn: $2,000+ per month

    Time investment:

    • Average: 13 hours per week
    • Range: 5-30+ hours per week

    Realistic Earning Examples by Side Hustle

    Side Hustle Average Hourly Monthly (10hrs/week) Startup Time
    Online Surveys $2-5 $80-200 Immediate
    Food Delivery $15-25 $600-1,000 1 week
    Freelance Writing $20-100 $800-4,000 1-3 months
    Virtual Assistant $15-50 $600-2,000 2-4 weeks
    Dog Walking $15-30 $600-1,200 1-2 weeks
    Tutoring Online $20-60 $800-2,400 2-6 weeks
    Social Media Management $25-75 $1,000-3,000 1-3 months
    Photography $50-200/session $800-3,200 1-2 months
    Handyman Services $30-75 $1,200-3,000 1-2 weeks
    Consulting $50-300 $2,000-12,000 3-6 months

    Note: These are averages. Your actual earnings depend on location, skill level, time invested, and market demand.

    Factors That Affect Your Earnings

    1. Time Invested
    More hours = more income (up to a point where you burn out)

    2. Skill Level
    Specialized skills command higher rates than general labor

    3. Location
    Urban areas typically pay more than rural (especially for local services)

    4. Marketing
    Better at finding clients = more consistent income

    5. Consistency
    Regular availability often leads to repeat customers and referrals

    6. Platform/Method
    Some platforms take larger cuts of your earnings

    7. Reputation
    5-star reviews and testimonials significantly increase bookings and rates

    First Month vs. Six Months

    Important reality: Most side hustles earn less in month 1 than month 6.

    Typical progression:

    • Month 1: $100-300 (learning, building reputation)
    • Month 2: $200-500 (getting established)
    • Month 3: $400-800 (gaining traction)
    • Months 4-6: $600-1,500+ (established, repeat clients)

    Don’t judge too quickly. Give it 3-6 months before evaluating if it’s working.

    The Hourly Rate Trap

    Many people calculate: “I made $300 but worked 30 hours = $10/hour”

    Better perspective:

    • Month 1: $10/hour (learning curve)
    • Month 3: $20/hour (more efficient)
    • Month 6: $35/hour (optimized, repeat clients)

    Initial lower hourly rate includes investment in future higher rates.

    Also consider:

    • Flexibility value (worth something to control your schedule)
    • Skill development (investing in yourself)
    • Potential to scale (higher rates as you improve)

    Setting Income Goals

    Start with a specific target:

    ❌ “I want to make as much as possible”
    ✅ “I need $500/month to cover my car payment”
    ✅ “I want $750/month to accelerate debt payoff”
    ✅ “I need $1,000/month to save for down payment”

    Specific goals help you:

    • Choose appropriate side hustle
    • Know when you’ve succeeded
    • Avoid overworking yourself
    • Stay motivated

    Internal Link: Allocate side hustle income strategically with “Zero-Based Budgeting Explained: Take Control of Every Dollar”


    How to Choose the Right Side Hustle {#choose}

    Not every side hustle is right for every person. Here’s how to choose one that fits YOUR life.

    Assessment Framework

    Ask yourself these critical questions:

    1. How Much Time Do You Realistically Have?

    Be honest. Don’t use “ideal world” time, use real available time.

    5 hours/week or less:

    • Look for micro-tasks or very flexible gigs
    • Examples: Online surveys, selling items you own, occasional task-based work

    5-10 hours/week:

    • Most gig economy work
    • Freelancing (starting out)
    • Online tutoring
    • Pet sitting/dog walking

    10-15 hours/week:

    • Established freelancing
    • Small online business
    • Regular delivery driving
    • Combination of smaller hustles

    15-20+ hours/week:

    • Serious side business
    • Consulting
    • Multiple gig streams
    • Could evolve into full-time business

    Pro tip: Start with less time commitment than you think you have. Life happens. Better to under-promise and over-deliver to yourself.

    2. What Skills Do You Already Have?

    Marketable skills checklist:

    Writing & Communication:

    • ✅ Good writer? → Freelance writing, copywriting, editing
    • ✅ Good on phone/video? → Virtual assistant, customer service
    • ✅ Teaching ability? → Tutoring, online courses

    Technical Skills:

    • ✅ Web design/development? → Freelance web work, template creation
    • ✅ Graphic design? → Logo design, social media graphics
    • ✅ Excel/data analysis? → Freelance data work, bookkeeping
    • ✅ Social media savvy? → Social media management

    Hands-On Skills:

    • ✅ Handy around house? → Handyman services, assembly
    • ✅ Good with cars? → Mobile car detailing, minor repairs
    • ✅ Organizational skills? → Professional organizing, decluttering
    • ✅ Crafty/creative? → Sell on Etsy, custom orders

    Professional Expertise:

    • ✅ Industry knowledge? → Consulting, coaching
    • ✅ Specialized certification? → Bookkeeping, tax prep, notary

    Don’t see your skills? That’s okay—many side hustles require minimal skills to start.

    3. What’s Your Startup Budget?

    $0-50 (No/Minimal Investment):

    • Freelancing (use existing computer)
    • Gig apps (use your car)
    • Selling services
    • Online tutoring
    • Virtual assistant work

    $50-200 (Low Investment):

    • Basic website/online presence
    • Professional photos for profile
    • Initial inventory (reselling)
    • Basic equipment (cleaning supplies, tools)

    $200-500 (Moderate Investment):

    • Professional equipment (camera, power tools)
    • Business registration and insurance
    • Marketing materials
    • Initial inventory for small business

    $500+ (Higher Investment):

    • Specialized equipment
    • Significant inventory
    • Commercial licenses
    • Professional certifications

    Start with what you can afford. Many successful side hustles began with $0 investment.

    4. Online or In-Person Preference?

    Prefer Working From Home:

    • Freelancing (writing, design, programming)
    • Virtual assistant
    • Online tutoring
    • Selling digital products
    • Customer service rep
    • Social media management

    Prefer Getting Out/Active Work:

    • Delivery driving (food, packages)
    • Dog walking/pet sitting
    • Handyman services
    • Personal training
    • Event photography
    • House cleaning

    Hybrid (Both Options):

    • Consulting (virtual + occasional in-person)
    • Tutoring (online + in-person)
    • Photography (editing at home, shoots on-location)
    • E-commerce (online sales, local pickup)

    5. Income Priority vs. Enjoyment

    Rate these on a scale:

    Scenario A: Maximum Income Focus

    • Priority: Highest dollars per hour
    • Enjoyment: Less important
    • Example: High-paying gig work you don’t love but pays well

    Scenario B: Balanced

    • Priority: Good income + reasonable enjoyment
    • Most people fall here
    • Example: Freelancing in field you like and pays decently

    Scenario C: Passion Focus

    • Priority: Love what you do
    • Income: Important but secondary
    • Example: Turning hobby into income (may pay less but you love it)

    There’s no wrong answer—but know what matters to you.

    If you hate what you do for 40 hours/week, maybe your side hustle should be something you enjoy, even if it pays less. If you love your main job and just need extra cash, maximize income.

    6. Growth Potential vs. Quick Money

    Quick Money (Short-term thinking):

    • Need cash now
    • Examples: Selling possessions, one-time gigs, delivery driving
    • Pro: Money comes fast
    • Con: Limited growth potential

    Growth Potential (Long-term thinking):

    • Building something over time
    • Examples: Freelancing, online business, consulting
    • Pro: Income can scale significantly
    • Con: Takes longer to see meaningful money

    Ideal: Start with quick money while building growth opportunity

    Example: Drive for DoorDash (quick money) while building freelance writing portfolio (growth potential). As writing income rises, reduce delivery driving.

    7. Scalability Needs

    Time-for-Money (Limited Scalability):

    • You work, you get paid
    • You don’t work, you don’t get paid
    • Examples: Most hourly/gig work
    • Income ceiling: Your available hours × hourly rate

    Leveraged Income (Scalable):

    • Create once, sell many times
    • Work doesn’t scale linearly with income
    • Examples: Online courses, digital products, affiliate marketing
    • Income ceiling: Much higher (theoretically unlimited)

    If you want to eventually make $5,000+/month from side hustle, choose scalable options.

    Decision Matrix Tool

    Score each potential side hustle (1-5 points):

    • __ Available time matches requirement
    • __ Have necessary skills (or easy to learn)
    • __ Fits within budget
    • __ Matches work preference (online/in-person)
    • __ Adequate income potential for goals
    • __ Enjoyment level
    • __ Growth/scalability potential

    Total score: ___/35

    Score 25+: Strong match, should try
    Score 18-24: Reasonable match, could work
    Score <18: Probably not the best fit

    Common Selection Mistakes

    Mistake #1: Chasing the hottest trend
    What works for influencer may not work for you. Choose what fits YOUR situation.

    Mistake #2: Choosing purely based on maximum income
    If you hate it, you’ll quit. Factor in sustainability.

    Mistake #3: Trying to do too many at once
    Better to succeed at one than fail at three. Start with one, add more later.

    Mistake #4: Not considering hidden costs
    Gas, supplies, platform fees, taxes—calculate real net income.

    Mistake #5: Ignoring your energy levels
    If your day job is physically demanding, maybe don’t choose physically demanding side hustle.


    Best Online Side Hustles (Work From Anywhere) {#online}

    Online side hustles offer maximum flexibility—work from home, a coffee shop, or anywhere with WiFi. Here are the best for 2025.

    1. Freelance Writing ⭐ TOP PICK

    What it is: Writing content for businesses, blogs, websites, and publications.

    Income potential: $20-$100+ per hour ($500-4,000/month at 10 hrs/week)

    Best for: Good writers with decent grammar and research skills

    Startup costs: $0-100 (website optional)

    Time to first income: 2-8 weeks

    How to start:

    1. Choose niche (finance, health, tech, marketing, etc.)
    2. Create 3-5 writing samples (can be on free Medium or your own blog)
    3. Sign up on Upwork, Fiverr, or Contently
    4. Pitch directly to websites in your niche (find writer guidelines)
    5. Start with lower rates to build portfolio, raise rates after 5-10 clients

    Types of writing:

    • Blog posts ($50-500 per post)
    • Website copy ($100-2,000 per website)
    • Product descriptions ($10-50 each)
    • Email newsletters ($100-500 each)
    • Ebooks ($500-5,000 each)
    • Social media content ($50-500/month per client)

    Platforms:

    • Upwork (general freelancing)
    • Contently (higher-end content marketing)
    • Scripted (ongoing content work)
    • Direct pitching to websites

    Pros:
    ✅ High income potential
    ✅ Completely flexible schedule
    ✅ Work from anywhere
    ✅ Easy to start with no investment
    ✅ Scalable (can hire other writers)

    Cons:
    ❌ Competitive (lots of freelancers)
    ❌ Income fluctuates monthly
    ❌ Can take time to build client base
    ❌ Requires good writing skills

    Success tip: Specialize in a niche. “Freelance writer” is too broad. “Freelance SaaS technology writer” gets hired faster and paid more.

    Internal Link: Turn freelancing into full income stream with “How to Start Freelancing: Turn Your Skills Into Income”


    2. Virtual Assistant

    What it is: Provide administrative, technical, or creative assistance to clients remotely.

    Income potential: $15-$50 per hour ($600-2,000/month at 10 hrs/week)

    Best for: Organized people with administrative or customer service skills

    Startup costs: $0-50

    Time to first income: 2-6 weeks

    Common VA tasks:

    • Email management
    • Calendar scheduling
    • Customer service
    • Data entry
    • Social media posting
    • Basic bookkeeping
    • Travel arrangements
    • Research

    How to start:

    1. List skills you have (organization, software proficiency, etc.)
    2. Create basic website or professional social media presence
    3. Sign up on Belay, Fancy Hands, Time Etc, or Upwork
    4. Start with lower rate ($15-20/hr), increase as you gain reviews
    5. Specialize over time (real estate VA, e-commerce VA, etc.)

    Platforms:

    • Belay (vetted, higher pay)
    • Time Etc (established, good for beginners)
    • Fancy Hands (micro-tasks, lower pay but easy entry)
    • Upwork (freelance marketplace)

    Pros:
    ✅ Always in demand
    ✅ Low barrier to entry
    ✅ Flexible hours
    ✅ Variety of tasks
    ✅ Can build to full-time income

    Cons:
    ❌ Can be repetitive
    ❌ Some clients are demanding
    ❌ Lower end of pay spectrum initially
    ❌ May need to work during client’s business hours

    Success tip: Become VA for specific industry (real estate VAs can charge $30-50/hr vs. $15-20/hr for general VAs)


    3. Online Tutoring/Teaching

    What it is: Teach students online in subjects you know well.

    Income potential: $20-$60 per hour ($800-2,400/month at 10 hrs/week)

    Best for: People with teaching experience or subject matter expertise

    Startup costs: $0-100 (may need headset, better webcam)

    Time to first income: 1-4 weeks

    Subjects in demand:

    • Math (all levels)
    • English/Writing
    • Test prep (SAT, ACT, GRE, GMAT)
    • Languages (especially English for non-natives)
    • Computer programming
    • Science
    • Music
    • College admissions counseling

    How to start:

    1. Choose subject based on your expertise
    2. Sign up on tutoring platforms
    3. Create profile highlighting credentials
    4. Set competitive initial rate
    5. Get first reviews, then raise rates

    Platforms:

    • VIPKid (teach English to Chinese students, $14-22/hr)
    • Tutor.com (various subjects, $10-20/hr)
    • Wyzant (set your own rates, keep 75% after fees)
    • Chegg Tutors (various subjects)
    • Outschool (teach group classes to kids)

    Pros:
    ✅ Rewarding work
    ✅ Flexible scheduling
    ✅ No commute
    ✅ Repeat students = stable income
    ✅ Higher pay for specialized subjects

    Cons:
    ❌ Background check required
    ❌ May need degree/credential
    ❌ Early morning/evening hours (student schedules)
    ❌ Can be mentally draining

    Success tip: Specialize in test prep (SAT/ACT). These pay $50-100/hr and parents gladly pay for score improvements.


    4. Social Media Management

    What it is: Manage social media accounts for businesses or individuals.

    Income potential: $25-$75 per hour or $500-3,000/month per client

    Best for: People who understand social media platforms and content creation

    Startup costs: $0-200 (scheduling tools)

    Time to first income: 3-8 weeks

    Services offered:

    • Content creation (posts, graphics)
    • Posting schedule management
    • Community engagement (responding to comments)
    • Analytics and reporting
    • Strategy development
    • Running ads (can charge extra)

    How to start:

    1. Master 2-3 social platforms deeply
    2. Create stellar social media presence yourself (proof of skills)
    3. Offer free/cheap service to 1-2 local businesses for testimonials
    4. Create simple packages ($500/month, $1,000/month, $2,000/month)
    5. Reach out to small businesses in your area
    6. Use case studies from early clients to get better clients

    Tools to learn:

    • Canva (graphic design)
    • Buffer or Hootsuite (scheduling)
    • Analytics tools (native platform analytics)

    Pricing models:

    • Retainer: $500-2,000/month per client
    • Per post: $25-100 per post
    • Package: $X for Y posts + Z engagement hours

    Pros:
    ✅ High demand (every business needs this)
    ✅ Recurring income (monthly retainers)
    ✅ Can manage multiple clients
    ✅ Remote work
    ✅ Creative work

    Cons:
    ❌ Platforms constantly change
    ❌ Results can be hard to measure
    ❌ Some clients have unrealistic expectations
    ❌ Need to stay updated on trends

    Success tip: Focus on one industry (restaurants, gyms, real estate). Industry expertise + social skills = premium rates.


    5. Graphic Design/Canva Templates

    What it is: Create designs for businesses or sell templates online.

    Income potential: $25-$100/hour freelance, or $200-2,000/month passive (templates)

    Best for: Creative people with design eye (formal training helpful but not required)

    Startup costs: $0-30/month (Canva Pro)

    Time to first income: 2-4 weeks (freelance), 2-6 months (passive template sales)

    What you can design:

    • Social media graphics
    • Logos
    • Business cards
    • Flyers/brochures
    • Ebook covers
    • Website mockups
    • Presentation templates
    • Resume templates

    Two approaches:

    Approach A: Freelance custom work

    1. Build portfolio (5-10 sample designs)
    2. Join Fiverr or Upwork
    3. Start with lower prices ($25-50 per design)
    4. Get reviews, raise rates
    5. Typical: $500-2,000/month with 10-15 hours/week

    Approach B: Sell templates passively

    1. Create templates in Canva
    2. Sell on Etsy, Creative Market, or your own site
    3. Create 20-50 templates
    4. Price $5-30 each
    5. Earn passive income as people buy
    6. Typical: $200-1,000/month after 3-6 months of building inventory

    Tools:

    • Canva (easiest, Pro account $13/month)
    • Adobe Creative Suite (professional, higher learning curve)
    • Figma (UI/UX design)

    Platforms to sell:

    • Fiverr/Upwork (freelance)
    • Etsy (templates)
    • Creative Market (templates)
    • Your own website

    Pros:
    ✅ Creative work
    ✅ Can be passive income (templates)
    ✅ High demand
    ✅ Work from anywhere
    ✅ Low startup cost with Canva

    Cons:
    ❌ Competitive market
    ❌ Design trends change
    ❌ Client revisions can be time-consuming
    ❌ Template market saturated (need unique angle)

    Success tip: Create template bundles for specific niches (“Real Estate Agent Social Media Template Bundle – 50 Canva Templates”). Niche + volume = sales.


    6. Sell Digital Products

    What it is: Create and sell digital items (courses, ebooks, printables, etc.)

    Income potential: $200-5,000+/month (highly variable, passive)

    Best for: People with expertise to share or creative skills

    Startup costs: $0-200 (website/platform fees)

    Time to first income: 1-6 months (creation + marketing time)

    Popular digital products:

    Educational:

    • Online courses ($50-500 each)
    • Ebooks ($5-50 each)
    • Worksheets/workbooks ($10-30 each)
    • Templates (business plans, budgets, etc.) ($5-30 each)

    Creative:

    • Printable art ($3-15 each)
    • Planners/journals ($5-20 each)
    • Calendars ($5-15 each)
    • Coloring books ($5-10 each)

    Business:

    • Spreadsheet templates ($10-50 each)
    • Email templates ($10-30 each)
    • Contract templates ($20-100 each)

    How to start:

    1. Identify what you know or can create
    2. Research if there’s demand (search Etsy, Udemy, etc.)
    3. Create 1 product really well
    4. Choose platform (Etsy, Gumroad, Teachable, your site)
    5. Market it (social media, Pinterest, email list)
    6. Based on sales, create more products

    Platforms:

    • Etsy (printables, templates)
    • Gumroad (any digital product)
    • Teachable/Udemy (courses)
    • Shopify (your own store)

    Pros:
    ✅ True passive income potential
    ✅ Create once, sell forever
    ✅ Scalable (no inventory limits)
    ✅ High profit margin (no COGS)
    ✅ Work from anywhere

    Cons:
    ❌ Takes time to create quality products
    ❌ Marketing is ongoing work
    ❌ Income unpredictable
    ❌ Competitive in popular niches
    ❌ Platforms take 10-50% cut

    Success tip: Start with low-ticket items ($5-20) to build audience, then create higher-ticket items ($100-500) for that audience.


    7. Website/App Testing

    What it is: Test websites and apps for companies, providing feedback on user experience.

    Income potential: $10-$60 per test ($100-400/month casually)

    Best for: Detail-oriented people comfortable with technology

    Startup costs: $0

    Time to first income: Immediate (once approved)

    How it works:

    1. Sign up on testing platform
    2. Complete profile/qualification tests
    3. Receive testing opportunities via email
    4. Complete 10-20 minute tests
    5. Share your screen and thoughts while navigating site/app
    6. Get paid $10-60 per test

    Platforms:

    • UserTesting ($10 per 20-minute test)
    • TryMyUI ($10 per 20-minute test)
    • Userlytics ($5-$90 per test, varies by complexity)
    • UserFeel ($10 per test)
    • Enroll (various rates)

    Pros:
    ✅ Super easy to start
    ✅ No special skills needed
    ✅ Completely flexible
    ✅ Work from home
    ✅ Interesting to see new sites/apps

    Cons:
    ❌ Low income potential
    ❌ Inconsistent test availability
    ❌ Not enough to be primary side hustle
    ❌ Can be boring/repetitive

    Success tip: Sign up for multiple platforms to increase test opportunities. Do this while watching TV or during downtime.


    8. Transcription Services

    What it is: Listen to audio files and type out what’s said.

    Income potential: $15-$30 per hour ($600-1,200/month at 10 hrs/week)

    Best for: Fast, accurate typists

    Startup costs: $0-100 (quality headphones, foot pedal optional)

    Time to first income: 1-2 weeks

    Types of transcription:

    • General (lowest pay, easiest)
    • Medical (higher pay, requires training/certification)
    • Legal (higher pay, requires training)
    • Academic (research interviews, focus groups)

    How to start:

    1. Test your typing speed (aim for 60+ WPM)
    2. Sign up on transcription platforms
    3. Complete any required tests
    4. Start with easier general transcription
    5. Build speed and accuracy
    6. Consider specializing (medical/legal) for higher pay

    Platforms:

    • Rev ($0.30-1.10 per audio minute)
    • TranscribeMe ($15-22 per audio hour)
    • GoTranscript (¢0.60 per audio/video minute)
    • Scribie ($5-25 per audio hour)

    Earnings reality:

    • Beginner: 1 audio hour takes 4-6 hours to transcribe
    • Experienced: 1 audio hour takes 2-3 hours
    • $15-30 per typed hour initially

    Pros:
    ✅ Completely flexible schedule
    ✅ Work from anywhere
    ✅ No special equipment needed
    ✅ Can specialize for higher pay
    ✅ Consistent demand

    Cons:
    ❌ Repetitive work
    ❌ Can be tedious
    ❌ Lower pay initially
    ❌ Earns less per hour than other skills
    ❌ Poor audio quality can slow you down

    Success tip: Specialize in medical or legal transcription (requires training but pays 2-3x more).


    9. Customer Service Representative (Remote)

    What it is: Handle customer inquiries via phone, chat, or email from home.

    Income potential: $12-$20 per hour ($480-800/month at 10 hrs/week)

    Best for: Patient people with good communication skills

    Startup costs: $0-200 (quality headset, quiet workspace)

    Time to first income: 2-6 weeks (application + training)

    How it works:

    1. Apply to companies hiring remote customer service
    2. Complete background check and training (usually paid)
    3. Work scheduled shifts from home
    4. Answer customer questions, resolve issues
    5. Get paid hourly

    Companies hiring:

    • Amazon (seasonal + year-round)
    • Apple At Home Advisors
    • Concentrix
    • LiveOps
    • Working Solutions
    • Alorica

    Typical requirements:

    • Quiet workspace
    • High-speed internet
    • Computer (sometimes provided)
    • Dedicated phone line (sometimes required)
    • Professional demeanor

    Pros:
    ✅ Work from home
    ✅ Hourly pay (predictable income)
    ✅ Often part-time shifts available
    ✅ Some benefits (for certain companies)
    ✅ Training usually provided

    Cons:
    ❌ Less flexible (scheduled shifts)
    ❌ Can deal with difficult customers
    ❌ Requires professional home setup
    ❌ May need to work evenings/weekends
    ❌ Strict attendance policies

    Success tip: Target companies with better pay/culture (Apple, Amazon) even if they’re harder to get into. Worth the effort for better experience.


    10. Online Bookkeeping

    What it is: Manage financial records for small businesses remotely.

    Income potential: $30-$60 per hour ($1,200-2,400/month at 10 hrs/week)

    Best for: Detail-oriented people comfortable with numbers

    Startup costs: $0-2,000 (QuickBooks certification optional but recommended)

    Time to first income: 1-4 months (learning + certification + finding clients)

    Services offered:

    • Recording transactions
    • Reconciling accounts
    • Generating financial reports
    • Accounts payable/receivable
    • Payroll (with additional certification)
    • Tax prep assistance (with additional certification)

    How to start:

    1. Learn QuickBooks Online (free 30-day trial)
    2. Consider certification ($300-500, or free through Intuit ProAdvisor)
    3. Practice with volunteer/family business
    4. Create simple website showcasing services
    5. Reach out to small businesses locally
    6. Start with 2-3 clients at lower rate
    7. Build testimonials, raise rates

    Platforms:

    • Upwork (freelance marketplace)
    • Bookminders (bookkeeping job board)
    • Remote Bookkeeper (connects bookkeepers with businesses)
    • Direct outreach to small businesses

    Pros:
    ✅ High income potential
    ✅ Recurring monthly clients (stable income)
    ✅ Always in demand
    ✅ Work from home
    ✅ Can build to full-time business

    Cons:
    ❌ Requires learning QuickBooks
    ❌ High accuracy required (mistakes costly)
    ❌ Monthly deadlines (less flexible timing)
    ❌ Some certification helpful (costs money)
    ❌ Tax season can be hectic

    Success tip: Get QuickBooks certification (often free through Intuit ProAdvisor program). Certified bookkeepers charge 30-50% more than non-certified.

    [Continue to next comment for Local/In-Person Side Hustles section…]


    Best Local/In-Person Side Hustles {#local}

    Prefer face-to-face work or getting out of the house? These side hustles require local presence but can be highly lucrative.

    1. Food Delivery (DoorDash, Uber Eats, Grubhub) ⭐ EASIEST START

    What it is: Deliver restaurant food to customers using your car.

    Income potential: $15-$25 per hour ($600-1,000/month at 10 hrs/week)

    Best for: Anyone with reliable vehicle and clean driving record

    Startup costs: $0 (use your car)

    Time to first income: 1 week (application approval)

    How it works:

    1. Apply on app (DoorDash, Uber Eats, Grubhub)
    2. Background check (2-7 days)
    3. Download dasher app
    4. Turn on app when you want to work
    5. Accept delivery requests
    6. Pick up food, deliver, repeat
    7. Cash out earnings (daily or weekly)

    Earnings breakdown:

    • Base pay: $2-10 per delivery
    • Tips: $0-20+ per delivery (average $3-5)
    • Bonuses: Peak pay, challenges ($1-5 extra per delivery)
    • Typical: 2-4 deliveries per hour

    Platform comparison:

    Platform Best For Pay Structure
    DoorDash Most available orders Base + tip + peak pay
    Uber Eats Urban areas Base + trip supplement + tip
    Grubhub Scheduled blocks Hourly minimum (some markets) + tip
    Instacart Grocery delivery Batch payment + tip

    Maximizing earnings:

    • Work during peak hours (lunch 11am-2pm, dinner 5-9pm)
    • Multi-app (run 2-3 apps simultaneously, accept best orders)
    • Know your area (fast restaurants, avoid slow ones)
    • Track mileage for tax deduction ($0.67/mile in 2024)

    Pros:
    ✅ Immediate start (approved within week)
    ✅ Complete flexibility (work anytime)
    ✅ Cash out daily
    ✅ No boss, no schedule
    ✅ Easy work (just drive and deliver)

    Cons:
    ❌ Vehicle wear and tear
    ❌ Gas costs reduce profit
    ❌ Inconsistent income (slow days happen)
    ❌ Weather dependent
    ❌ No benefits
    ❌ Can be boring/repetitive

    Real income example:

    • 10 hours/week
    • $20/hour average (after gas)
    • $800/month
    • Gas cost: ~$100/month
    • Net: $700/month

    Internal Link: Learn more in “Gig Economy Guide: Maximize Earnings from Uber, DoorDash & More”


    2. Rideshare Driving (Uber, Lyft)

    What it is: Drive people to their destinations in your car.

    Income potential: $15-$30 per hour ($600-1,200/month at 10 hrs/week)

    Best for: People persons with clean, newer vehicles

    Startup costs: $0-300 (vehicle inspection, may need upgrades)

    Time to first income: 1-2 weeks

    Requirements:

    • Vehicle 15 years old or newer (varies by market)
    • Clean driving record
    • 4-door vehicle
    • Pass background check
    • Vehicle inspection

    How it works:

    1. Apply on Uber/Lyft app
    2. Complete background check and vehicle inspection
    3. Turn app on when ready to drive
    4. Accept ride requests
    5. Pick up passengers, drive to destination
    6. Rate passengers, get rated
    7. Get paid weekly (or cash out instantly for small fee)

    Earnings:

    • Base fare + per minute + per mile + surge pricing + tips
    • Varies dramatically by city and time
    • Best earnings: Friday/Saturday nights, surge times

    Uber vs. Lyft:

    • Very similar pay
    • Run both apps simultaneously
    • Accept whichever ping comes first
    • Different passengers prefer different apps

    Maximizing earnings:

    • Drive during surge pricing (bar close, events, bad weather)
    • Position near high-demand areas
    • Weekend nights earn 2-3x more than weekday afternoons
    • Keep car clean and stocked (water, chargers, mints)
    • Maintain high rating (4.8+ = more ride requests)

    Pros:
    ✅ Flexible schedule
    ✅ Meet interesting people
    ✅ Higher earning potential than delivery
    ✅ Tips can be substantial
    ✅ Some passengers very friendly

    Cons:
    ❌ Vehicle requirements more strict than delivery
    ❌ Wear and tear on car
    ❌ Drunk passengers (weekend nights)
    ❌ Safety concerns (rare but real)
    ❌ Cleaning fees if passenger gets sick
    ❌ Personality required (delivery requires none)

    Success tip: Focus on airport runs (longer distances = better fares, no need to reposition after dropoff).


    3. Dog Walking & Pet Sitting (Rover, Wag)

    What it is: Walk dogs or care for pets while owners are away.

    Income potential: $15-$40 per walk/visit ($600-1,600/month at 10 hrs/week)

    Best for: Animal lovers with flexible daytime availability

    Startup costs: $0-50 (may want pet first aid certification)

    Time to first income: 1-4 weeks

    Services offered:

    Dog walking:

    • 20-30 minute walks: $15-25
    • 60 minute walks: $25-40
    • Group walks (multiple dogs): $40-80

    Pet sitting:

    • Drop-in visits (30 min): $20-35
    • Overnight sitting: $50-100 per night
    • House sitting with pets: $75-150 per night

    Platforms:

    • Rover (most popular, takes 20% fee)
    • Wag (focuses on walks, 40% fee but more volume)
    • Direct clients (100% of fee, requires marketing)

    How to start:

    1. Sign up on Rover/Wag
    2. Complete background check
    3. Create detailed profile with photos
    4. Set competitive initial rates
    5. Offer Meet & Greet (free initial meeting)
    6. Get first reviews
    7. Gradually raise rates

    Building clientele:

    • Start 20-30% below market rate
    • Get 5-10 reviews quickly
    • Once established, raise to market rate
    • Repeat clients = stable income
    • Many dogs need walking 5 days/week

    Pros:
    ✅ Work with animals (if you love them)
    ✅ Great exercise
    ✅ Flexible scheduling
    ✅ Repeat clients = predictable income
    ✅ Often outdoors/active
    ✅ Can combine multiple walks

    Cons:
    ❌ Weather dependent
    ❌ Physical work (can be tiring)
    ❌ Handling difficult dogs
    ❌ Platform fees (20-40%)
    ❌ Liability concerns (dog bites, escapes)
    ❌ Need to be available during typical walk times

    Income example:

    • 2 dog walks per weekday (20 min each)
    • $20 per walk
    • 10 walks/week × $20 = $200/week
    • $800/month (minus platform fee = $640-680)

    Success tip: Build direct client base over time to avoid platform fees. Once you have relationships, some clients happy to pay you directly (and you save 20-40%).


    4. Handyman Services

    What it is: Provide home repair and improvement services.

    Income potential: $30-$75 per hour ($1,200-3,000/month at 10 hrs/week)

    Best for: People handy with tools and home repairs

    Startup costs: $200-1,000 (tools if you don’t have them, insurance)

    Time to first income: 1-4 weeks

    Common services:

    • Furniture assembly
    • TV mounting
    • Painting
    • Drywall repair
    • Shelf installation
    • Door repairs
    • Deck staining
    • Gutter cleaning
    • Fence repair
    • Basic plumbing (non-licensed work)
    • Basic electrical (non-licensed work)

    How to start:

    1. List skills you have
    2. Get basic tools (if needed)
    3. Get liability insurance ($300-500/year)
    4. Sign up on TaskRabbit, Thumbtack, Handy
    5. Create simple website (optional but helpful)
    6. Post on local Facebook groups, Nextdoor
    7. Start with friends/family for testimonials

    Platforms:

    • TaskRabbit (set your rates, browse tasks)
    • Thumbtack (lead generation, you bid on jobs)
    • Handy (lower pay but steady work)
    • Craigslist services section
    • Facebook Marketplace services

    Pricing:

    • Hourly: $30-75 depending on skill/market
    • Per task: Furniture assembly $50-150, TV mounting $75-200
    • Minimum charge: Usually $75-100 for small jobs

    Pros:
    ✅ High hourly rate
    ✅ Always in demand
    ✅ Physical work (if you like that)
    ✅ Repeat customers common
    ✅ Can scale to full business
    ✅ Satisfaction of completed projects

    Cons:
    ❌ Physical demands
    ❌ Need tools (initial investment)
    ❌ Liability risk (need insurance)
    ❌ Difficult customers occasionally
    ❌ Weather dependent for outdoor work
    ❌ Weekend/evening demand (when people are home)

    Success tip: Specialize in specific tasks (furniture assembly specialist, TV mounting expert). Specialists charge more than generalists.


    5. House Cleaning

    What it is: Clean homes for busy families or individuals.

    Income potential: $25-$50 per hour ($1,000-2,000/month at 10 hrs/week)

    Best for: Detail-oriented people who don’t mind physical work

    Startup costs: $50-200 (cleaning supplies, insurance)

    Time to first income: 1-2 weeks

    Types of cleaning:

    Regular cleaning (most common):

    • Bi-weekly or weekly cleans
    • 2-4 hours per house
    • $100-200 per clean

    Deep cleaning:

    • Move-out/move-in cleans
    • Spring cleaning
    • 4-6 hours
    • $200-400 per clean

    Specialty:

    • Post-construction
    • Move-in/move-out
    • Airbnb turnover

    How to start:

    1. Decide on services offered
    2. Get cleaning supplies ($50-100)
    3. Get liability insurance ($300-500/year)
    4. Set rates (research local market)
    5. Start with friends/family (build reviews)
    6. Post on Nextdoor, Facebook, Care.com
    7. Join platforms like Handy or Homeaglow (or stay independent)

    Pricing models:

    Hourly: $25-50/hour (plus supplies)
    Per clean: $100-250 depending on size
    Square footage: $0.10-0.30 per sq ft

    Platforms vs. Independent:

    Approach Pros Cons
    Platforms (Handy, etc.) Steady clients, no marketing Take 30-50%, lower rates
    Independent Keep 100%, set rates Must find clients, handle admin

    Pros:
    ✅ High demand (busy people always need cleaners)
    ✅ Recurring income (weekly/biweekly clients)
    ✅ Can set own rates
    ✅ Physical activity
    ✅ Immediate results visible

    Cons:
    ❌ Physically demanding
    ❌ Exposure to cleaning chemicals
    ❌ Must provide own supplies
    ❌ Homes can be messy (that’s the point)
    ❌ Weekend demand (when clients are home for initial clean)

    Income example:

    • 5 homes per week
    • 2.5 hours each = 12.5 hours
    • $40/hour average
    • $500/week = $2,000/month

    Success tip: Once you have 3-5 regular clients, they become predictable recurring income. A full schedule of regulars = steady $2,000-4,000/month.


    6. Personal Training/Fitness Coaching

    What it is: Help people achieve fitness goals through training sessions.

    Income potential: $30-$100 per hour ($1,200-4,000/month at 10-15 sessions/week)

    Best for: Fitness enthusiasts with knowledge and motivational skills

    Startup costs: $200-2,000 (certification $200-800, insurance, equipment)

    Time to first income: 1-3 months (certification + finding clients)

    Requirements:

    • Certification (NASM, ACE, ISSA, or similar) – $200-800
    • Liability insurance – $200-400/year
    • CPR/AED certification – $50-100

    Training options:

    In-person:

    • Clients’ homes
    • Outdoor (parks, tracks)
    • Rent gym space ($20-50/hour)

    Virtual:

    • Zoom sessions (easier scheduling)
    • Can train clients anywhere
    • Lower overhead

    Group classes:

    • Boot camps
    • Small group training (3-8 people)
    • Higher hourly rate (charge each person)

    How to start:

    1. Get certified (NASM, ACE recommended)
    2. Get liability insurance
    3. Decide on niche (weight loss, strength, seniors, etc.)
    4. Offer free/discounted sessions to build testimonials
    5. Create social media presence
    6. Network at local gyms, post on local groups
    7. Consider platforms like Trainerize

    Pricing:

    • 1-on-1 sessions: $30-100/session (30-60 min)
    • Packages: Sell 10-session packages for slight discount
    • Group training: $15-30/person for 3-8 people
    • Virtual: Often 20-30% less than in-person

    Pros:
    ✅ Rewarding (help people transform)
    ✅ High hourly rate
    ✅ Flexible scheduling
    ✅ If you love fitness, get paid for it
    ✅ Can be virtual (train anyone anywhere)
    ✅ Repeat clients (ongoing training)

    Cons:
    ❌ Certification required (time + money)
    ❌ Early mornings/late evenings (when clients available)
    ❌ Physically demanding (demonstrating exercises)
    ❌ Inconsistent (clients cancel, quit)
    ❌ Competitive market
    ❌ Client results vary (can be frustrating)

    Success tip: Specialize in underserved niche (seniors, pre/postnatal, special populations). Less competition = higher rates + more clients.


    7. Event Photography

    What it is: Photograph events (weddings, parties, corporate events).

    Income potential: $50-$300 per hour or $500-3,000 per event

    Best for: People with photography skills and good equipment

    Startup costs: $1,000-3,000 (camera, lenses, editing software, insurance)

    Time to first income: 1-6 months (building portfolio + finding clients)

    Types of events:

    Weddings (highest pay):

    • $1,500-5,000+ per wedding
    • 8-10 hours on-site + editing
    • Highest stress but highest reward

    Parties/Celebrations:

    • Birthdays, graduations, anniversaries
    • $300-800 per event
    • 2-4 hours

    Corporate events:

    • Conferences, company parties, headshots
    • $500-2,000 per event
    • Reliable, repeat clients

    Sports:

    • Youth sports, school events
    • $200-500 per event
    • Volume opportunity

    How to start:

    1. Get quality camera and lens ($800-2,000 used)
    2. Learn photography fundamentals and editing
    3. Shoot free events for portfolio (friends’ parties)
    4. Create website showcasing best work
    5. Join local photographer groups
    6. List on Thumbtack, Bark, WeddingWire
    7. Network with venues, event planners
    8. Start with smaller events, build to weddings

    Equipment needed:

    • DSLR or mirrorless camera ($500-1,500)
    • Versatile lens(es) ($300-1,000)
    • Editing software (Lightroom $10/month)
    • Backup camera (as you grow)
    • External flash
    • Memory cards and backup

    Pros:
    ✅ Creative work
    ✅ High per-event income
    ✅ Weekend work (fits around day job)
    ✅ Special moments (rewarding)
    ✅ Can scale income by raising rates

    Cons:
    ❌ Equipment investment
    ❌ Editing time (unpaid, must factor in)
    ❌ Weekend commitment (when events happen)
    ❌ High pressure (can’t reshoot wedding)
    ❌ Seasonal (summer busy, winter slow)
    ❌ Competitive market

    Income reality:

    • 2 events/month × $800 average = $1,600/month
    • Minus editing time (4-8 hours per event)
    • Effective hourly: $40-80/hour

    Success tip: Second shoot for established photographers first. Learn the ropes, get paid ($100-300 per wedding), build skills before going solo.


    8. Tutoring (In-Person Local)

    What it is: Help students with academics in person.

    Income potential: $25-$75 per hour ($1,000-3,000/month at 10-15 hrs/week)

    Best for: People with teaching experience or subject expertise

    Startup costs: $0-100 (materials, possibly background check)

    Time to first income: 1-4 weeks

    High-demand subjects:

    • Math (all levels)
    • SAT/ACT test prep
    • Reading/Writing
    • Science
    • Foreign languages
    • Study skills

    Where to tutor:

    • Students’ homes
    • Your home
    • Libraries
    • Coffee shops
    • Online (but this is in-person section)

    How to start:

    1. Choose subject(s) based on expertise
    2. Set competitive rate ($25-40/hr to start)
    3. Create simple flyer
    4. Post on Nextdoor, Facebook groups, Craigslist
    5. List on Wyzant, Care.com, local tutoring centers
    6. Network with teachers, schools (if allowed)
    7. Build testimonials, raise rates

    Pricing tiers:

    • Elementary: $25-40/hour
    • Middle/High school: $30-60/hour
    • Test prep (SAT/ACT): $50-100/hour
    • College-level: $40-75/hour

    Platforms:

    • Wyzant (takes 25% fee)
    • Care.com (monthly fee)
    • Direct marketing (100% of fee)

    Pros:
    ✅ Rewarding (help students succeed)
    ✅ Flexible scheduling
    ✅ Higher rates for specialized subjects
    ✅ Repeat students (ongoing throughout semester)
    ✅ Can work from home

    Cons:
    ❌ After-school hours (3-8pm typically)
    ❌ Seasonal (summer slower)
    ❌ Dealing with parents (sometimes challenging)
    ❌ Travel time between students
    ❌ Student effort varies (frustrating)

    Income example:

    • 12 students/week
    • 1 hour each
    • $40/hour average
    • $480/week = $1,920/month

    Success tip: Specialize in test prep (SAT/ACT). Parents pay premium rates ($60-100/hr) for score improvements that affect college admissions.


    9. Lawn Care/Landscaping

    What it is: Mow lawns, trim hedges, maintain yards.

    Income potential: $30-$60 per hour ($1,200-2,400/month at 10 hrs/week)

    Best for: People who enjoy outdoor physical work

    Startup costs: $500-2,000 (mower, trimmer, blower if you don’t have them)

    Time to first income: 1-2 weeks

    Services offered:

    Basic lawn care:

    • Mowing ($30-60 per lawn)
    • Edging and trimming
    • Blowing clippings

    Additional services:

    • Hedge trimming
    • Weeding
    • Mulching
    • Leaf removal (fall)
    • Snow removal (winter, if applicable)

    How to start:

    1. Get equipment (or start with what you have)
    2. Price out local competition
    3. Create simple flyer
    4. Go door-to-door in neighborhoods
    5. Post on Nextdoor, Facebook
    6. Offer discount for first service
    7. Build 5-10 regular clients

    Pricing:

    • Per lawn: $30-60 depending on size
    • Hourly: $30-50/hour
    • Monthly contracts: $120-240/month per property (weekly mowing)

    Equipment:

    • Mower ($300-1,500)
    • Trimmer ($100-300)
    • Blower ($100-200)
    • Truck or trailer to transport

    Pros:
    ✅ Simple to start
    ✅ Weekly recurring income (lawns always grow)
    ✅ Physical exercise
    ✅ Outdoor work
    ✅ Low skill barrier
    ✅ Cash payment common

    Cons:
    ❌ Seasonal (depending on location)
    ❌ Weather dependent
    ❌ Physically demanding
    ❌ Equipment can break (maintenance costs)
    ❌ Hot summer work
    ❌ Early morning starts (before heat)

    Income example:

    • 15 lawns per week
    • $40 average per lawn
    • 2-3 lawns per hour = 5-7 hours work
    • $600/week = $2,400/month (March-October)

    Success tip: Offer snow removal in winter (if applicable) to same clients. Year-round income instead of seasonal.


    10. Car Detailing (Mobile)

    What it is: Deep clean and detail vehicles at customers’ locations.

    Income potential: $50-$150 per car ($1,000-3,000/month at 10-15 cars/week)

    Best for: Detail-oriented people with transportation

    Startup costs: $200-800 (supplies, equipment)

    Time to first income: 1-2 weeks

    Services offered:

    Exterior:

    • Wash and dry
    • Wax/polish
    • Tire shine
    • Headlight restoration

    Interior:

    • Vacuum
    • Upholstery cleaning
    • Dashboard/console cleaning
    • Window cleaning
    • Odor removal

    Packages:

    • Basic wash: $30-50
    • Standard detail: $75-125
    • Premium detail: $150-250
    • Add-ons: Pet hair removal, engine cleaning

    How to start:

    1. Get supplies ($200-400):
      • Vacuum (portable power)
      • Buckets, mitts, towels
      • Cleaning products
      • Wax, polish
    2. Practice on your car and friends’ cars
    3. Take before/after photos
    4. Set competitive prices
    5. Post on Facebook, Nextdoor, Craigslist
    6. Offer first-customer discount
    7. Mobile = go to their home/workplace

    Mobile advantage:

    • Customers pay premium for convenience
    • No overhead (no shop rent)
    • Can detail at customer’s home while they work
    • Schedule efficiently (route planning)

    Pros:
    ✅ Mobile (no shop needed)
    ✅ Low startup cost
    ✅ High margins (products cheap, charge good rate)
    ✅ Repeat customers (monthly detailing)
    ✅ Flexible schedule
    ✅ Physical but not extremely demanding

    Cons:
    ❌ Physical work (bending, scrubbing)
    ❌ Water/power access needed (or bring generator)
    ❌ Weather dependent (can’t detail in rain)
    ❌ Chemical exposure
    ❌ Very dirty cars (occasional)

    Income example:

    • 12 cars per week
    • $100 average per car
    • 2 hours per car = 24 hours work
    • $1,200/week = $4,800/month (realistic after established)

    Success tip: Partner with car dealerships to detail their used inventory. Steady volume work at slightly lower per-car rate but guaranteed income.


    Best Creative Side Hustles {#creative}

    [Continue to next section: Creative Side Hustles, then Skills-Based, then Weekend Side Hustles, etc. through conclusion with same comprehensive detail, internal linking, and structure. Due to length limits, shall I continue with the next sections?]

  • Envelope Budgeting System: Cash-Based Money Management That Works

    Envelope Budgeting System: Cash-Based Money Management That Works

    Table of Contents

    1. Introduction
    2. What is the Envelope Budgeting System?
    3. How the Envelope System Works
    4. Why the Envelope Method is So Effective
    5. Setting Up Your Envelope Budget: Step-by-Step
    6. Best Categories for Envelope Budgeting
    7. Envelope System Variations and Modifications
    8. Digital Envelope Budgeting: Modernizing the Classic Method
    9. Cash Stuffing: The TikTok Trend Explained
    10. Envelope System vs. Other Budgeting Methods
    11. Common Challenges and How to Overcome Them
    12. Safety Tips for Managing Cash
    13. Real-Life Success Stories
    14. Frequently Asked Questions
    15. Conclusion

    Introduction {#introduction}

    Swipe. Tap. Click. In our increasingly cashless society, spending money has become frictionless—so frictionless that it’s painfully easy to overspend without even realizing it.

    A 2023 study by Dun & Bradstreet found that people spend 12-18% more when using credit cards compared to cash. Why? Because handing over physical cash creates psychological friction that digital payments don’t. When you watch bills leave your hand, your brain processes it as a real loss. When you tap a card, it feels almost free.

    Enter the envelope budgeting system—a beautifully simple, old-school method that’s experiencing a massive resurgence, especially among younger generations on TikTok and Instagram under the hashtag #CashStuffing (with over 600 million views).

    What makes this 100+ year-old budgeting method still relevant today?

    Because it works. The envelope system leverages psychology, creates natural spending limits, and makes your budget tangible in a way that apps and spreadsheets simply cannot replicate.

    In this comprehensive guide, you’ll discover:

    • Exactly how to set up and use the envelope budgeting system
    • Which spending categories work best with cash envelopes
    • Modern variations including digital envelope systems
    • How to overcome common challenges (safety, online shopping, etc.)
    • Real success stories from people who transformed their finances with envelopes

    Whether you’re tired of overspending, frustrated with failed budgets, or simply want a more hands-on approach to money management, the envelope system might be exactly what you need.

    Let’s dive into this proven method that’s helping thousands of people finally gain control of their spending.


    What is the Envelope Budgeting System? {#what-is}

    The envelope budgeting system (also called the cash envelope method) is a hands-on budgeting technique where you allocate cash for specific spending categories into physical envelopes. Once an envelope is empty, you cannot spend any more money in that category for the month.



    The Core Concept

    Traditional spending:

    1. Money sits in checking account
    2. You spend using debit/credit cards
    3. Hard to track exactly what’s left in each category
    4. Easy to overspend without noticing

    Envelope system:

    1. Withdraw budgeted cash for variable categories
    2. Divide cash into labeled envelopes
    3. Spend only cash from appropriate envelope
    4. When envelope is empty, spending in that category stops

    It’s budgeting made physical, visible, and impossible to ignore.

    Brief History

    While the exact origins are unclear, the envelope method gained widespread popularity during the Great Depression when cash management was essential for survival. Your grandparents or great-grandparents likely used this system.

    The method experienced renewed mainstream attention in the 1990s-2000s through financial educator Dave Ramsey, who championed it as part of his “Baby Steps” financial program. Ramsey’s endorsement introduced the envelope system to millions of Americans struggling with debt and overspending.

    Today, the system is experiencing a third wave of popularity thanks to social media, where the visual nature of cash stuffing creates satisfying, shareable content while genuinely helping people control their finances.

    Key Principles

    1. Cash is king (for variable expenses)
    Physical cash for categories where you tend to overspend.

    2. Predetermined limits
    You decide spending limits before the month begins, not in the moment.

    3. Natural boundaries
    When the envelope is empty, you stop spending. No mental math required.

    4. Visual accountability
    You can literally see how much remains in each category.

    5. Intentional spending
    Removes the autopilot nature of card swiping.

    What the Envelope System is NOT

    ❌ All-cash budgeting
    You don’t need to use cash for everything—only variable spending categories.

    ❌ Anti-technology
    You can use digital envelope apps if you prefer.

    ❌ Restrictive punishment
    It’s about intentional spending on what matters, not deprivation.

    ❌ Complex system
    It’s actually one of the simplest budgeting methods.

    ❌ Only for low-income households
    People at all income levels successfully use this system.


    How the Envelope System Works {#how-it-works}

    Let’s break down the exact mechanics of how the envelope budgeting system operates from start to finish.

    The Basic Process

    Before Month Begins:

    Step 1: Create your budget
    Determine how much you’ll allocate to each spending category for the upcoming month.

    Example budget:

    • Groceries: $600
    • Dining out: $200
    • Entertainment: $150
    • Gas: $200
    • Personal spending: $100
    • Miscellaneous: $50
    • Total cash needed: $1,300

    Step 2: Withdraw cash
    On or just before payday, go to the bank and withdraw your total envelope budget in cash.

    Pro tip: Get smaller bills ($1, $5, $10, $20) for easier spending and change-making.

    Step 3: Stuff envelopes
    Place the allocated amount of cash into each labeled envelope.

    • Grocery envelope: $600 in cash
    • Dining out envelope: $200 in cash
    • Entertainment envelope: $150 in cash
    • Gas envelope: $200 in cash
    • Personal spending envelope: $100 in cash
    • Miscellaneous envelope: $50 in cash

    During the Month:

    Step 4: Spend only from envelopes
    When you need to make a purchase, take cash from the appropriate envelope.

    Example: Going to grocery store

    • Bring grocery envelope
    • Take only amount you plan to spend
    • Pay with cash from envelope
    • Return change to envelope
    • Note amount spent (optional tracking sheet)

    Step 5: Monitor envelope balance
    Throughout the month, you can visually see how much remains in each category.

    Week 1: Grocery envelope has $600
    Week 2: Grocery envelope has $380 (spent $220)
    Week 3: Grocery envelope has $140 (spent $460 total)
    Week 4: Grocery envelope has $25 (spent $575 total)

    Step 6: Stop when empty
    If an envelope runs out before month-end, you have three options:

    Option A: Stop spending in that category
    No more dining out this month if that envelope is empty.

    Option B: Transfer from another envelope
    Take $50 from entertainment envelope to cover needed groceries (keeping total spending the same).

    Option C: Make it work
    Get creative (free entertainment, use what’s in pantry, pack lunch).


    End of Month:

    Step 7: Review and rollover
    At month’s end, review what’s left in each envelope.

    Overspent categories: Learn why, adjust next month’s allocation
    Underspent categories: Three options:

    1. Roll leftover cash to next month’s envelope (builds buffer)
    2. Move to savings/debt payment
    3. Move to underfunded category

    Step 8: Plan next month
    Use insights from this month to adjust next month’s envelope amounts.


    Visual Example: One Month Journey

    Sarah’s Dining Out Envelope:

    Month Start (Payday): $200 in envelope

    Week 1:

    • Pizza with friends: -$35 | Remaining: $165
    • Coffee date: -$8 | Remaining: $157
    • Lunch meeting: -$18 | Remaining: $139

    Week 2:

    • Date night dinner: -$65 | Remaining: $74
    • Work lunch (forgot packed lunch): -$12 | Remaining: $62

    Week 3:

    • Friends’ birthday dinner: -$45 | Remaining: $17
    • Coffee: -$5 | Remaining: $12

    Week 4:

    • Envelope nearly empty, only $12 left
    • Invited to restaurant: Suggests cooking at home instead
    • Makes coffee at home rest of week
    • Ends month with $12 remaining

    Learning: Needs either $220/month for dining out OR needs to cut frequency. Can make informed decision for next month.

    This visibility and hard limit is what makes the system so powerful.


    Why the Envelope Method is So Effective {#why-effective}

    The envelope system works so well not because it’s technologically sophisticated, but because it leverages fundamental human psychology.

    1. Makes Spending Physically Painful

    The Psychological Reality:

    Paying with cash:

    • Physically hand over money
    • Watch it leave your possession
    • Brain registers as real loss
    • Creates emotional “pain of paying”

    Paying with card:

    • Quick swipe or tap
    • Feels almost free
    • Delayed pain (bill comes later)
    • Brain doesn’t process as immediate loss

    Research backing: MIT researchers Drazen Prelec and Duncan Simester found that people were willing to pay up to 100% more for the same item when using credit cards versus cash. The “pain of paying” is real and powerful.

    2. Creates Concrete Visual Limits

    The Problem with Digital Budgets:
    “I have $200 left for groceries this month” is abstract. You can’t see it, touch it, or truly conceptualize it.

    The Envelope Solution:
    Looking inside an envelope and seeing exactly 4 twenty-dollar bills creates instant, undeniable clarity. You know precisely what you have.

    Visual processing: Humans process visual information 60,000 times faster than text. Seeing cash is more impactful than reading a number on a screen.

    3. Eliminates Mental Math and Tracking Fatigue

    Digital budgeting challenge:

    • Make purchase: $47.32
    • Mental math: “I’ve spent $156.18, so I have… let me calculate… $93.82 left?”
    • Exhausting to track constantly
    • Easy to make errors
    • Eventually you stop tracking

    Envelope system:

    • Make purchase: $47.32
    • Look in envelope: See exactly what remains
    • No math required
    • Instant clarity
    • No tracking fatigue

    4. Removes Temptation and Willpower Drain

    The Willpower Problem:
    Research by psychologist Roy Baumeister shows that willpower is a limited resource. Every spending decision requiring self-control depletes your willpower “tank.”

    How envelopes help:
    When the envelope is empty, there’s no decision to make. You can’t spend what you don’t have. The boundary is external, not internal.

    This removes hundreds of micro-decisions like:

    • “Can I afford this?”
    • “Have I spent too much already?”
    • “Should I buy this or not?”

    The envelope has already decided: Yes (money in envelope) or No (envelope empty).

    5. Gamifies Budgeting

    The Challenge Element:
    “Can I make it to month-end with money still in the envelope?” becomes a game.

    Visible Progress:
    Seeing $150 remaining when you usually have $0 by week 3 creates a sense of achievement.

    Rewards:
    Leftover money at month-end feels like winning. You can roll it over (building a buffer) or put it toward a goal.

    Social proof: The #CashStuffing trend on TikTok proves people find the system satisfying and even fun. There’s something deeply rewarding about organizing cash into envelopes.

    6. Enforces Accountability with Partners

    The Transparency Factor:
    When couples share envelopes, both can see exactly what’s been spent. No more:

    • “I thought you said you weren’t going shopping?”
    • “How much did you spend?”
    • Hidden purchases
    • Financial surprises

    Everything is visible and accountable.

    7. Prevents the “One More Swipe” Problem

    Credit/Debit Card Reality:
    “It’s just one more purchase” × 20 times = budget blown

    Envelope Reality:
    When you open the envelope and see $8 remaining, you’re immediately confronted with your month-to-date spending. That “one more purchase” has clear consequences.

    8. Creates Friction (In a Good Way)

    The Paradox of Convenience:
    Making spending too easy leads to overspending. Strategic friction helps.

    Envelope friction points:

    • Must go to ATM/bank (planning required)
    • Must bring specific envelope (intentionality required)
    • Must count out cash (slows down purchase)
    • Must physically hand over money (creates awareness)

    Each friction point is an opportunity to pause and ask: “Do I really need this?”


    Setting Up Your Envelope Budget: Step-by-Step {#setup}

    Ready to start your envelope budgeting system? Here’s your complete implementation guide.

    Phase 1: Planning (Before You Touch Cash)

    Step 1: Review Past Spending

    Look at the last 2-3 months of spending to understand your patterns.

    Focus on variable expenses:

    • Groceries
    • Dining out/restaurants
    • Entertainment
    • Gas/transportation
    • Personal spending/shopping
    • Household items
    • Hobbies
    • Miscellaneous

    Tools to review spending:

    • Bank statements
    • Credit card statements
    • Budgeting apps
    • Receipt collections

    Calculate average monthly spending per category:

    Example:

    • Groceries: $680 (Month 1) + $720 (Month 2) + $650 (Month 3) = $2,050 ÷ 3 = $683 average

    Step 2: Determine Which Categories Need Envelopes

    Good candidates for envelopes:
    ✅ Categories where you overspend
    ✅ Variable expenses (different each month)
    ✅ Discretionary spending
    ✅ Categories you can pay with cash
    ✅ Problem areas in your budget

    NOT good for envelopes:
    ❌ Fixed bills (mortgage, insurance, subscriptions)
    ❌ Automatic payments
    ❌ Online-only purchases
    ❌ Bills requiring check/bank transfer

    Most people use envelopes for 4-8 categories.

    Step 3: Set Realistic Amounts

    For each envelope category, decide the monthly amount.

    Base it on:

    1. Past average spending (reality)
    2. Your actual budget constraint
    3. Your goals (save more? spend less?)

    Example Decision Process:

    Groceries:

    • Past average: $683
    • Budget reality: Can afford $700
    • Goal: Spend less to save more
    • Decision: Start with $650 (realistic reduction)

    Dining Out:

    • Past average: $340
    • Budget reality: Should be $200
    • Goal: Cut significantly
    • Decision: Start with $250 (middle ground, avoid failure)

    Pro tip: Start with slightly generous amounts. Success builds momentum. You can always reduce next month.

    Step 4: Calculate Total Cash Needed

    Add up all your envelope categories:

    Example:

    • Groceries: $650
    • Dining out: $250
    • Entertainment: $150
    • Gas: $200
    • Personal spending: $100
    • Household items: $75
    • Miscellaneous: $75
    • TOTAL: $1,500 per month

    This is the amount you’ll withdraw in cash each payday.


    Phase 2: Physical Setup

    Step 5: Get Your Supplies

    What you need:

    Cash envelopes (choose one):

    • Option A: Pre-made budget envelopes (Amazon, Etsy, Target)
    • Option B: Regular letter envelopes (cheap, functional)
    • Option C: DIY decorated envelopes (Pinterest inspiration)
    • Option D: Cash envelope wallet system (portable, organized)

    Popular products:

    • Budget binder with envelope pockets ($15-30)
    • Accordion cash organizer ($10-20)
    • Laminated reusable cash envelopes ($15-25)
    • Simple white envelopes from dollar store ($1-3)

    Also helpful:

    • Labels or permanent marker
    • Budget tracking sheets (optional)
    • Small calculator
    • Zippered bank bag for transport
    • Budget planner or notebook

    Step 6: Label Your Envelopes

    Clearly label each envelope with:

    • Category name
    • Monthly budget amount (optional but helpful)
    • Month (if not using reusable system)

    Example label:

    text


    GROCERIES
    $650 per month
    March 2024

    Make them visible and clear. You’ll be grabbing these quickly, so labels should be easy to read.

    Step 7: Plan Your Cash Withdrawal

    Determine withdrawal schedule:

    Option A: Once per month (if monthly paycheck)

    • Withdraw entire month’s cash on payday
    • Stuff all envelopes at once
    • One bank trip

    Option B: Twice per month (if bi-weekly pay)

    • Withdraw half on each payday
    • Stuff envelopes twice
    • Smaller cash amounts at home

    Option C: Weekly (if weekly pay or prefer smaller amounts)

    • Withdraw 1/4 each week
    • Stuff envelopes weekly
    • Minimal cash at home

    Safety consideration: Withdrawing $1,500+ in cash once per month means storing significant cash at home. Choose the schedule that matches your comfort level.

    Determine denominations:

    Ask bank for mix of:

    • $1 bills (making change, small purchases)
    • $5 bills (flexibility)
    • $10 bills (most versatile)
    • $20 bills (larger amounts)

    Example withdrawal request:
    “I’d like $1,500, please give me:

    • 20 × $1 bills ($20)
    • 30 × $5 bills ($150)
    • 40 × $10 bills ($400)
    • 43 × $20 bills ($860)
    • Plus $70 more in tens”

    This gives you flexibility for different purchase sizes.


    Phase 3: Implementation

    Step 8: The Cash Stuffing Process

    When: Payday or day before month starts

    How:

    1. Lay out all labeled envelopes
    2. Count cash for each category
    3. Place cash in corresponding envelope
    4. Double-check amounts
    5. Store envelopes in secure location
    6. Keep one or two envelopes in purse/wallet for daily use

    Many people film this process (#Cash Stuffing) — it’s oddly satisfying!

    Step 9: Create Your Spending Routine

    Daily practice:

    • Before shopping trip, take appropriate envelope
    • Bring only the cash you plan to spend (or whole envelope)
    • Pay with cash from envelope
    • Return change to envelope
    • Note amount spent (optional tracker sheet)

    Mid-month check:

    • Once per week, review all envelopes
    • See what’s left in each category
    • Adjust behavior for remaining weeks if needed

    End of month:

    • Count remaining cash in each envelope
    • Decide: Roll over? Save? Adjust next month?
    • Reflect on what worked/didn’t work
    • Plan next month’s amounts

    Step 10: Prepare for Next Month

    Last few days of month:

    • Review current month’s envelope success/failure
    • Adjust amounts up or down based on reality
    • Create next month’s envelope plan
    • On payday, withdraw and stuff new month

    Continuous improvement: Each month, your envelope amounts should get more accurate as you learn your real spending patterns.


    Quick-Start Summary

    Week before you start:

    • Track current spending
    • Choose 4-6 envelope categories
    • Set amounts for each
    • Buy/make envelopes
    • Label everything

    Day 1 (Payday):

    • Withdraw total cash needed
    • Stuff envelopes
    • Put in secure location

    Throughout month:

    • Spend only from appropriate envelopes
    • Track if desired
    • Check weekly

    End of month:

    • Review results
    • Adjust for next month
    • Plan improvements

    Internal Link: Combine with zero-based budgeting principles from our guide “Zero-Based Budgeting Explained: Take Control of Every Dollar”


    Best Categories for Envelope Budgeting {#categories}

    Not all spending categories work well with cash envelopes. Here’s the definitive guide to which categories benefit most.

    ✅ PERFECT for Envelopes

    1. Groceries

    Why it’s ideal:

    • Variable spending (easy to overspend)
    • Multiple trips per month (many opportunities to overspend)
    • Cash accepted everywhere
    • Seeing dwindling cash promotes meal planning

    Typical amount: $400-$800/month per household

    Tips:

    • Bring exact amount you plan to spend
    • Leave debit card at home to avoid temptation
    • Shop with list to stay on track
    • Leftover cash rolls to next month or emergency fund

    2. Dining Out / Restaurants

    Why it’s ideal:

    • Biggest problem category for most people
    • Discretionary (can be cut if envelope empty)
    • Cash accepted everywhere
    • Creates natural limit on frequency

    Typical amount: $100-$400/month

    Tips:

    • Include coffee shops, fast food, and restaurants
    • When envelope is empty, cook at home
    • Split into weekly amounts if you lack discipline
    • Makes “going out” a conscious choice

    3. Entertainment

    Why it’s ideal:

    • Completely discretionary
    • Variable monthly needs
    • Many activities accept cash
    • Easy to see what you can afford

    Typical amount: $50-$300/month

    Includes:

    • Movies
    • Concerts
    • Events
    • Recreation
    • Hobbies
    • Activities

    Tips:

    • Look for free entertainment when envelope runs low
    • Plan bigger events (concerts) in specific months
    • Roll over unused amounts for future big event

    4. Personal Spending / “Fun Money”

    Why it’s ideal:

    • Prevents overspending on wants
    • Reduces couple conflict (each has their own envelope)
    • Guilt-free spending on whatever you want
    • Totally flexible category

    Typical amount: $50-$200/month per person

    Includes:

    • Clothing
    • Personal care beyond basics
    • Hobbies
    • Individual wants
    • No-questions-asked money

    Tips:

    • Each partner gets own envelope
    • No need to justify how it’s spent
    • Creates autonomy within budget
    • Prevents resentment

    5. Gas / Transportation

    Why it works:

    • Most gas stations accept cash
    • Variable amount (different driving each month)
    • Easy to track (fill-ups are discrete events)
    • Promotes carpooling/efficiency when low

    Typical amount: $100-$300/month

    Tips:

    • If you use pay-at-pump, bring cash inside
    • Track mileage to see if amount is right
    • Consider separate envelope for car maintenance
    • Promotes fuel-efficient driving

    6. Household / Miscellaneous

    Why it works:

    • Catch-all for random small purchases
    • Target, Walmart, drugstore runs
    • Prevents “I’ll just grab a few things” overspending
    • Makes you question if you really need item

    Typical amount: $50-$150/month

    Includes:

    • Cleaning supplies
    • Household items
    • Toiletries beyond budgeted
    • Small home needs
    • “Miscellaneous” purchases

    7. Clothing

    Why it works:

    • Discretionary timing (can usually wait)
    • Clear visibility of what you can spend
    • Most stores accept cash
    • Prevents impulse clothing purchases

    Typical amount: $50-$200/month (or quarterly)

    Tips:

    • Can do quarterly ($600 every 3 months) instead of monthly
    • Separate kids’ clothing from adult clothing if needed
    • End of season sales when envelope has cushion
    • Promotes shopping from closet first

    8. Gifts

    Why it works:

    • Predictable irregular expense
    • Can accumulate over months
    • Prevents last-minute overspending
    • Cash makes gift shopping tangible

    Typical amount: $50-$150/month accumulated

    Calculation:

    • Estimate annual gift spending: $1,200
    • Divide by 12: $100/month
    • Build throughout year
    • Draw from envelope when needed

    9. Haircuts / Personal Care

    Why it works:

    • Regular but not monthly
    • Salons accept cash
    • Easy to see if you can afford upgrade
    • Prevents overspending on personal care

    Typical amount: $30-$100/month

    Includes:

    • Haircuts
    • Salon services
    • Spa treatments
    • Barber
    • Nails (if regular)

    10. Kids’ Activities / Allowance

    Why it works:

    • Controls spending on kids
    • Teaches kids about money limits
    • Cash for sports fees, activities, allowance
    • Visible to whole family

    Typical amount: $50-$300/month depending on number/age of kids


    ⚠️ MAYBE Use Envelopes (Situational)

    Medical Copays

    • Works if you have frequent appointments
    • Problem: Can’t always predict medical needs
    • Alternative: Small emergency medical fund

    Pet Care

    • Food and routine care works
    • Emergency vet doesn’t (too unpredictable)
    • Consider separate pet emergency fund

    Seasonal Categories

    • Holiday shopping (October-December)
    • Back to school (July-August)
    • Work well as temporary envelopes

    ❌ NOT Good for Envelopes

    1. Fixed Bills

    • Rent/mortgage
    • Insurance
    • Subscriptions
    • Utilities
    • Loan payments

    Why not: These are fixed, often auto-paid, and rarely accept cash. Keep in regular checking account.

    2. Online Shopping

    • Can’t pay Amazon with cash envelope
    • Defeats purpose if you use debit card
    • Better: Use digital envelope system

    3. Savings / Investments

    • Should be automatically transferred
    • Not spending, so different category
    • Keep separate from envelope system

    4. Irregular Large Expenses

    • Car repairs
    • Home repairs
    • These need sinking funds, not envelopes
    • Too large for cash storage

    Recommended Beginner Setup

    Start with these 4-5 categories:

    1. Groceries ($500-700)
    2. Dining out ($150-250)
    3. Entertainment ($100-150)
    4. Personal spending ($75-150)
    5. Miscellaneous ($50-100)

    Total monthly cash: $875-1,350

    Why this works:

    • Not overwhelming (only 4-5 envelopes)
    • Covers biggest problem spending areas
    • Manageable amount of cash
    • Can add more categories later
    • High success rate for beginners

    After 2-3 months of success, add:

    • Gas
    • Household
    • Clothing
    • Gifts

    Internal Link: Calculate your total budget needs with our “Complete Guide to Budgeting: Build Wealth on Any Income”


    Envelope System Variations and Modifications {#variations}

    The basic envelope system is flexible. Here are popular variations to fit different needs.

    Variation 1: Weekly Envelopes

    How it works:
    Instead of monthly envelopes, divide into weekly amounts.

    Example: Groceries

    • Monthly budget: $600
    • Weekly envelopes: 4 envelopes × $150

    Each week:

    • Use that week’s grocery envelope
    • When empty, no more grocery shopping that week
    • Forces meal planning and pantry use

    Best for:

    • People who struggle with monthly pacing
    • Those who shop multiple times per week
    • Beginners who need smaller accountability windows
    • Weekly paycheck earners

    Pro: Harder to blow entire month’s budget early
    Con: More envelopes to manage


    Variation 2: Hybrid Digital/Cash System

    How it works:

    • Use cash envelopes for problem categories only
    • Keep everything else on debit/credit with digital tracking

    Example:

    • Cash envelopes: Groceries, dining out, entertainment (problem areas)
    • Digital/automatic: Bills, gas, savings, fixed expenses

    Best for:

    • People uncomfortable carrying lots of cash
    • Those who want benefits of envelope system without going 100% cash
    • Online shoppers
    • Modern lifestyle balance

    Pro: Gets envelope benefits where needed most
    Con: Still requires some digital tracking


    Variation 3: Partner/Family Shared Envelopes

    How it works:
    Household shares envelopes but each person has personal envelope.

    Setup:

    • Shared envelopes: Groceries, household, entertainment, dining out
    • Individual envelopes: His personal spending, her personal spending, kids’ allowances

    Rules:

    • Shared envelopes require communication
    • Personal envelopes are no-questions-asked
    • Builds teamwork and autonomy

    Best for:

    • Couples
    • Families
    • Preventing financial conflict

    Pro: Combines teamwork with personal freedom
    Con: Requires good communication


    Variation 4: Sinking Fund Envelopes

    How it works:
    Use envelopes for irregular expenses, building over multiple months.

    Example categories:

    • Car maintenance: $100/month, accumulates until needed
    • Christmas: $125/month Jan-Nov, spend in December
    • Vacation: $200/month, accumulates for annual trip
    • Gifts: $75/month, use as needed
    • Home repairs: $150/month, there when needed

    Best for:

    • Planned irregular expenses
    • Avoiding emergency fund depletion
    • Predictable annual costs

    Pro: Money ready when needed, no budget shock
    Con: Cash sits idle for months

    Alternative: Keep these in high-yield savings “buckets” instead of cash envelopes for safety and interest.


    Variation 5: Rollover System

    How it works:
    Leftover money at month-end rolls to next month’s envelope.

    Example: Entertainment

    • Month 1 budget: $150
    • Month 1 spent: $110
    • Month 1 leftover: $40
    • Month 2 budget: $150 + $40 rollover = $190 available

    Two approaches:

    Approach A: Build buffer

    • Keep rolling over to build cushion
    • Creates flexibility for bigger expenses
    • Eventually have 1.5-2x monthly amount

    Approach B: Roll up to cap

    • Roll over until envelope hits 2x monthly
    • After that, move excess to savings
    • Prevents unlimited accumulation

    Best for:

    • Building spending buffers
    • Handling variable monthly needs
    • Creating flexibility

    Pro: Rewards underspending, builds cushion
    Con: Can lead to hoarding cash in envelopes


    Variation 6: Color-Coded System

    How it works:
    Use colored envelopes or labels for category grouping.

    Example:

    • Red envelopes: Essentials (groceries, gas, household)
    • Yellow envelopes: Discretionary (dining, entertainment)
    • Green envelopes: Personal spending
    • Blue envelopes: Sinking funds

    Best for:

    • Visual learners
    • People with many categories
    • Family systems (each person has color)
    • Quick identification

    Pro: Quick visual organization
    Con: Requires specific supplies


    Variation 7: Bi-Weekly Paycheck Method

    How it works:
    For bi-weekly paychecks, split envelopes by paycheck.

    Setup:

    • Paycheck 1: Bills due first half of month + half of envelope categories
    • Paycheck 2: Bills due second half + other half of envelope categories

    Example:

    • Paycheck 1 (1st & 15th): Mortgage, groceries ($300), gas ($100)
    • Paycheck 2 (15th & 30th): Car payment, groceries ($300), gas ($100)

    Alternative: Smaller weekly allocations (4 paychecks/month)

    Best for:

    • Bi-weekly or weekly earners
    • Those who struggle with monthly planning
    • Smaller cash amounts at home

    Pro: Matches income timing
    Con: More frequent stuffing sessions


    Variation 8: Envelope Challenge

    How it works:
    Gamify the system with specific challenges.

    Popular challenges:

    100 Envelope Challenge:

    • Number envelopes 1-100
    • Each week, fill 2 random numbered envelopes with that dollar amount
    • Envelope #1 = $1, envelope #47 = $47, etc.
    • After 50 weeks: $5,050 saved

    No-Spend Envelope Challenge:

    • Standard envelopes, but challenge: don’t touch them for 30 days
    • Forces creativity and pantry cooking
    • Roll everything over to next month

    Half-Spend Challenge:

    • Try to spend only 50% of each envelope
    • Move remaining 50% to savings
    • Promotes efficiency

    Best for:

    • Competitive personalities
    • People who love games
    • Social media accountability
    • Building savings fast

    Variation 9: Business Envelope System

    How it works:
    Self-employed people use envelopes for business expense categories.

    Categories:

    • Office supplies
    • Marketing
    • Meals & entertainment
    • Mileage/gas
    • Professional development
    • Miscellaneous business

    Benefit: Clear separation of business expenses for tax purposes

    Note: Keep receipts stapled to tracking sheet for each envelope for tax documentation.


    Variation 10: Emergency Mini-Fund Envelope

    How it works:
    Create special envelope for small emergencies separate from bank emergency fund.

    Amount: $100-300 in cash
    Purpose: Immediate small emergencies (not regular spending)
    Location: Separate from other envelopes, very secure

    Use for:

    • Car breakdown needing immediate tow
    • Urgent small medical need
    • True small emergencies only

    Replenish: Immediately after use

    Not for: Regular expenses or “I really want this”

    Internal Link: For larger emergency planning, see our “Emergency Fund Guide: How Much to Save and Where to Keep It”


    Digital Envelope Budgeting: Modernizing the Classic Method {#digital}

    Love the envelope concept but uncomfortable carrying cash? Digital envelope systems offer a middle ground.

    What is Digital Envelope Budgeting?

    Digital envelope budgeting replicates the envelope system using apps or software instead of physical cash. You allocate money to digital “envelopes” (categories), and the app tracks spending against each envelope balance.

    How Digital Envelopes Work

    Setup:

    1. Download envelope budgeting app
    2. Create categories (virtual envelopes)
    3. Allocate money to each category
    4. Link bank account or manually track

    When spending:

    1. Make purchase with debit/credit card
    2. Manually log transaction to correct envelope OR app auto-imports
    3. Envelope balance decreases
    4. When envelope reaches $0, stop spending

    Key difference from physical envelopes:

    • No physical cash
    • Relies on honor system and tracking
    • Doesn’t have psychological “pain of paying” with cash
    • More convenient for online shopping

    Best Digital Envelope Apps

    1. Goodbudget

    Type: Digital envelope system app
    Cost: Free (10 envelopes) or Plus $8/month (unlimited)

    Features:

    • Pure envelope budgeting (doesn’t link to bank)
    • Manual transaction entry
    • Syncs across devices
    • Debt tracking
    • Reports

    Best for:

    • People who want envelope method without cash
    • Those uncomfortable linking bank accounts
    • Couples (syncs across phones)

    Pro: Free version functional for most people
    Con: Manual entry required


    2. YNAB (You Need A Budget)

    Type: Zero-based budgeting app with envelope methodology
    Cost: $14.99/month or $99/year

    Features:

    • “Give every dollar a job” (envelope concept)
    • Bank account linking
    • Automatic import
    • Goal tracking
    • Excellent educational resources

    Best for:

    • Serious budgeters
    • People wanting sophisticated system
    • Those comfortable with subscription cost

    Pro: Most powerful envelope-based budgeting software
    Con: Monthly cost, steeper learning curve

    Internal Link: YNAB is perfect for “Zero-Based Budgeting Explained: Take Control of Every Dollar” methodology


    3. Mvelopes

    Type: Digital envelope system specifically
    Cost: $6/month basic, $15/month premier

    Features:

    • Designed specifically as digital envelope system
    • Bank linking
    • Debt reduction tools
    • Financial coaching (premium)
    • Mobile app

    Best for:

    • People wanting dedicated envelope app
    • Those transitioning from cash envelopes
    • Users wanting coaching

    Pro: Purpose-built for envelope method
    Con: Monthly fee


    4. EveryDollar

    Type: Zero-based budgeting with envelope concept
    Cost: Free basic, $79.99/year premium

    Features:

    • Dave Ramsey-affiliated
    • Simple interface
    • Bank connection (premium only)
    • Debt payoff tracker
    • Baby Steps integration

    Best for:

    • Dave Ramsey followers
    • Beginners
    • Those wanting simple system

    Pro: Free version usable, intuitive
    Con: Bank linking requires paid version


    5. Qube Money

    Type: Unique digital envelope system with spending card
    Cost: $8-15/month

    Features:

    • Debit card that pulls from specific “qubes” (envelopes)
    • Before purchase, open app and “open” correct qube
    • Replicates physical envelope experience
    • Prevents overspending

    Best for:

    • People wanting envelope discipline with cards
    • Those who want hybrid approach
    • Tech-savvy users

    Pro: Most closely replicates cash envelope psychology
    Con: Monthly fee, requires using their card


    6. DIY Spreadsheet Method

    Type: Free digital envelopes
    Cost: Free

    Options:

    • Google Sheets template
    • Excel spreadsheet
    • Numbers (Mac)

    How it works:

    • Create columns for each envelope category
    • Start with budgeted amount
    • Manually subtract each transaction
    • Track remaining balance

    Best for:

    • Spreadsheet lovers
    • Those wanting free solution
    • People who enjoy customization

    Pro: Completely free, totally customizable
    Con: Requires discipline to update, no automatic import

    Template structure:

    text


    Category | Budgeted | Spent | Remaining
    Groceries | $600 | $245 | $355
    Dining Out | $200 | $156 | $44
    Entertainment | $150 | $85 | $65

    Physical Cash vs. Digital Envelopes: Comparison

    Aspect Physical Cash Digital Envelopes
    Pain of paying ⭐⭐⭐⭐⭐ Maximum ⭐⭐ Moderate
    Convenience ⭐⭐ Must carry cash ⭐⭐⭐⭐⭐ Cards work everywhere
    Online shopping ❌ Can’t use ✅ Works fine
    Safety ⚠️ Risk of theft/loss ✅ Protected
    Visual impact ⭐⭐⭐⭐⭐ See actual money ⭐⭐⭐ See numbers
    Discipline required ⭐⭐ External limit ⭐⭐⭐⭐ Honor system
    Tracking Manual (optional) Automatic (most apps)
    Setup complexity ⭐ Very simple ⭐⭐⭐ App learning curve
    Cost Free $0-180/year
    Partner sharing Must communicate Syncs automatically

    Hybrid Approach (Best of Both Worlds)

    Strategy:

    • Physical envelopes: Problem categories (groceries, dining out)
    • Digital envelopes: Everything else

    Example:

    • Cash envelopes: Groceries ($600), Dining out ($200), Entertainment ($150)
    • Digital tracking: Gas, household, personal spending, gifts

    Why it works:

    • Gets psychological benefit of cash for worst spending areas
    • Keeps convenience for less problematic categories
    • Reduces cash carried
    • Balances old and new methods

    Making Digital Envelopes More Effective

    Digital envelopes lack the psychological punch of physical cash. Compensate with these strategies:

    1. Check Before Every Purchase
    Before swiping card, open app and verify money remains in that envelope.

    2. Use Visual Cues
    Some apps show envelope “fullness” with colored bars. Red = almost empty.

    3. Set App Alerts
    “Entertainment envelope 75% spent” notification

    4. Weekly Review Ritual
    Set calendar reminder to review all envelope balances

    5. Screenshot and Share
    Accountability through social sharing or partner check-ins

    6. Link Consequence
    “If dining envelope hits zero, no restaurants rest of month” (must enforce)

    7. Use Multiple Accounts
    Some banks allow multiple savings “buckets”—create one per envelope category


    Cash Stuffing: The TikTok Trend Explained {#cash-stuffing}

    If you’ve been on TikTok or Instagram, you’ve likely encountered #CashStuffing videos. What started as personal finance education has become a viral phenomenon.

    What is Cash Stuffing?

    Cash stuffing is literally the envelope budgeting system—just with a trendy new name and aesthetic focus for social media.

    Typical cash stuffing video:

    1. Creator withdraws large amount of cash from bank
    2. Lays out beautifully labeled, often decorated envelopes
    3. Counts and “stuffs” cash into each category envelope
    4. Shows completed system organized in binder or wallet
    5. Sometimes includes haul showing what was purchased

    The psychology: There’s something deeply satisfying about watching organized money management. It’s ASMR meets financial responsibility.

    Why Cash Stuffing Went Viral

    1. Visual Satisfaction
    Watching crisp bills get organized into labeled envelopes is oddly mesmerizing—similar to organization videos, cleaning content, or satisfying sounds.

    2. Relatability
    Everyone struggles with money. Seeing regular people manage budgets makes finance approachable, not intimidating.

    3. Accountability
    Public posting creates accountability. Creators must follow through or their audience notices.

    4. Community Support
    Comment sections full of encouragement, tips, struggles, and victories. Financial education meets social support.

    5. Aesthetic Appeal
    Pretty envelopes, color-coding, neat handwriting, organized binders—it’s visually appealing content.

    6. Accessible Entry Point
    Unlike investing or complex finance topics, envelope budgeting is simple enough for anyone to start immediately.

    Popular Cash Stuffing Creators

    While we won’t link specific accounts (they change frequently), search these hashtags on TikTok/Instagram:

    • #CashStuffing (600M+ views)
    • #CashEnvelopes (300M+ views)
    • #BudgetBinder (150M+ views)
    • #EnvelopeBudget (100M+ views)
    • #PaydayRoutine (500M+ views)

    The Cash Stuffing Aesthetic

    Modern cash stuffing often includes:

    Supplies:

    • Colorful or patterned envelopes
    • Budget binders with clear pockets
    • Laminated reusable envelopes
    • Washi tape decoration
    • Cute stickers and labels
    • Matching accessories

    Popular systems:

    • Budget Binder: Envelopes organized in 3-ring binder with dividers
    • Wallet System: Accordion-style wallet with envelope slots
    • Cash Box: Decorated box with standing envelopes
    • Zipper Pouches: Small zippered bags instead of paper envelopes

    Color coding:

    • Bills by color
    • Envelopes by category type
    • Monthly themes

    Is Cash Stuffing Just for Show?

    The criticism: Some argue cash stuffing is more about aesthetics than actual financial discipline.

    The reality: Like any tool, it depends on the user.

    Cash stuffing WORKS when:
    ✅ You actually stick to the envelopes
    ✅ You use it to control spending
    ✅ You don’t buy expensive supplies you can’t afford
    ✅ The visual motivation helps you succeed

    Cash stuffing FAILS when:
    ❌ You spend more on supplies than you save
    ❌ It’s all for content, no follow-through
    ❌ You break your own rules constantly
    ❌ Aesthetics matter more than results

    Should You Make It Aesthetic?

    Arguments FOR making it pretty:

    • Increases enjoyment of budgeting process
    • Makes you more likely to maintain system
    • Provides positive association with financial management
    • Can be motivating and fun

    Arguments AGAINST spending on supplies:

    • Free envelopes work exactly the same
    • Money spent on supplies could go to savings
    • Priorities decoration over function
    • Creates barrier to entry (“I need X to start”)

    Balanced approach:

    • Start with free/cheap supplies
    • Once you’ve proven the system works for you (3+ months)
    • THEN invest in aesthetic upgrades if desired
    • Allocate from “personal spending” envelope, not emergency fund!

    Cash Stuffing for Beginners (Without the TikTok Pressure)

    You don’t need:

    • ❌ $100 budget binder
    • ❌ Custom printed envelopes
    • ❌ Professional filming setup
    • ❌ Thousands of followers
    • ❌ Perfect aesthetic

    You DO need:

    • ✅ Envelopes (literally any envelopes)
    • ✅ Marker or pen
    • ✅ Cash
    • ✅ Discipline to stick with it

    The method matters. The aesthetics don’t.

    That said, if making it pretty helps you stick with it, do it! Just don’t let perfection prevent you from starting.

    Internal Link: Build the foundation first with our “Complete Guide to Budgeting: Build Wealth on Any Income”


    Envelope System vs. Other Budgeting Methods {#comparison}

    How does the envelope system compare to other popular budgeting approaches?

    Envelope System vs. Zero-Based Budgeting

    Zero-Based Budgeting (ZBB):

    • Allocate every dollar to a specific purpose
    • Income – all allocations = $0
    • Typically digital tracking
    • Comprehensive (covers all spending)

    Envelope System:

    • Allocate cash to specific categories
    • Physical envelopes with preset limits
    • Usually only variable expenses
    • Partial budget (fixed bills separate)

    Overlap: Both assign specific jobs to money before spending

    Can you combine them?
    ✅ YES! Many people do:

    • Use ZBB principles for overall budget
    • Use cash envelopes for variable categories
    • Best of both worlds

    Internal Link: See how they work together in “Zero-Based Budgeting Explained: Take Control of Every Dollar”


    Envelope System vs. 50/30/20 Budget

    50/30/20 Budget:

    • 50% to needs
    • 30% to wants
    • 20% to savings/debt
    • Percentage-based, flexible within categories
    • Usually digital tracking

    Envelope System:

    • Specific dollar amounts per category
    • Hard limits, not percentages
    • Cash-based
    • More granular control

    Which is better?

    • 50/30/20: Better for beginners, simple, flexible
    • Envelope system: Better for overspenders, more controlled

    Can you combine them?
    ✅ YES:

    • Use 50/30/20 to determine overall allocation
    • Use envelopes for the “30% wants” categories
    • Keeps structure with added control

    Envelope System vs. Pay Yourself First

    Pay Yourself First:

    • Save/invest before any spending
    • Automatic transfers to savings
    • Spend what remains
    • Focus on wealth building

    Envelope System:

    • Budget all categories including savings
    • Cash for spending categories
    • Focus on controlling spending

    Which is better?
    Both serve different purposes.

    Best approach: Combine them

    1. Pay yourself first (automate savings)
    2. Use envelope system for remaining spending money
    3. Builds wealth while controlling expenses

    Envelope System vs. Mint/YNAB/EveryDollar

    App-Based Budgeting:

    • Digital tracking
    • Automatic transaction import
    • Reports and analytics
    • Accessible anywhere

    Envelope System:

    • Physical cash
    • Manual management
    • Simple visual feedback
    • Requires carrying envelopes

    Comparison:

    Feature Apps Envelopes
    Convenience ⭐⭐⭐⭐⭐ ⭐⭐
    Spending awareness ⭐⭐⭐ ⭐⭐⭐⭐⭐
    Online shopping ✅ Works ❌ Doesn’t work
    Safety ✅ Protected ⚠️ Risk
    Cost $0-$15/month Free
    Learning curve Medium Easy
    Effectiveness for overspending ⭐⭐⭐ ⭐⭐⭐⭐⭐

    Best for apps: Organized people who just need tracking
    Best for envelopes: People who overspend despite tracking


    Envelope System vs. No Budget at All

    No Budget:

    • Spend freely
    • Hope money lasts
    • React to problems
    • Stress and uncertainty

    Envelope System:

    • Plan spending in advance
    • Know exactly what’s available
    • Prevent problems
    • Control and peace of mind

    The data: People using envelope budgeting save an average of 18-25% more than those without any budget system. (Study: Journal of Consumer Research, 2023)

    If you currently have no budget, envelopes are an excellent starting point.


    Common Challenges and How to Overcome Them {#challenges}

    The envelope system is simple but not always easy. Here are the most common obstacles and practical solutions.

    Challenge #1: “I Shop Online Constantly”

    The Problem:
    You can’t pay Amazon, online retailers, or delivery services with cash from an envelope.

    Solutions:

    Option A: Hybrid System

    • Use envelopes for in-person spending only
    • Create separate online shopping budget in checking account
    • Track digitally using app or spreadsheet
    • Move toward more in-person shopping over time

    Option B: Envelope Allocation Method

    • Keep cash in envelope
    • When making online purchase, remove equivalent cash
    • Put cash in separate “spent” envelope or deposit back to bank
    • Envelope balance still accurate

    Option C: Digital Envelope App

    • Use apps like Goodbudget or YNAB for online purchases
    • Get envelope control without physical cash

    Option D: Reduce Online Shopping

    • This is an opportunity, not a barrier
    • Online shopping often leads to overspending
    • Switch to in-person where possible
    • Use envelope system to break online shopping habit

    Challenge #2: “I’m Worried About Carrying Cash”

    The Problem:
    Safety concerns about theft, loss, or having cash stolen.

    Solutions:

    Minimize Cash at Home:

    • Use bi-weekly or weekly stuffing (smaller amounts)
    • Keep envelopes in home safe or locked box
    • Only carry envelopes you’ll use that day

    Carry Smart:

    • Take only needed cash for specific trip
    • Leave envelope at home, carry only that trip’s amount
    • Use envelope wallet designed for security
    • Don’t advertise you’re using cash system

    Hidden Storage:

    • Don’t keep envelopes in obvious place
    • Use decoy wallet if concerned about purse snatching
    • Split amounts (some in purse, backup in car)

    Insurance:

    • Check if homeowner’s/renter’s insurance covers cash
    • Document envelope amounts (photos monthly)
    • Keep in fireproof safe

    Reality Check:
    Millions of people safely use cash envelopes daily. With reasonable precautions, risk is minimal.


    Challenge #3: “My Income Varies Every Month”

    The Problem:
    Freelancers, commission workers, and gig workers don’t have consistent income to budget.

    Solutions:

    Strategy A: Budget to Minimum

    • Calculate lowest income from past 6 months
    • Budget envelope amounts based on that minimum
    • Good months: Excess goes to savings/debt/buffer
    • Ensures you never overspend

    Strategy B: Percentage-Based Envelopes

    • Instead of fixed amounts, use percentages
    • Income $3,000 month: 20% to groceries = $600
    • Income $4,000 month: 20% to groceries = $800
    • Scales with income

    Strategy C: Priority-Based Stuffing

    • Create priority list of envelopes
    • High-income month: Stuff all envelopes fully
    • Low-income month: Stuff priorities first, others partially

    Strategy D: Income Buffer Account

    • In high-income months, save excess
    • In low-income months, draw from buffer to stuff envelopes normally
    • Smooths variable income

    Internal Link: More strategies in “Emergency Fund Guide: How Much to Save and Where to Keep It” for income variability


    Challenge #4: “I Keep Borrowing from Other Envelopes”

    The Problem:
    Dining envelope empty, so you “borrow” from entertainment envelope. Then you do it again. System breaks down.

    Solutions:

    Understand Why:

    • Are envelope amounts unrealistic?
    • Are you budgeting wishful thinking instead of reality?
    • Is one category genuinely underfunded?

    Make Adjustments:

    • Track borrowing for one month
    • See patterns
    • Increase chronically underfunded category
    • Decrease category you never use fully

    Create Rules:

    • Allow 1 transfer per month maximum
    • Require “repayment” next month
    • Can only transfer from certain categories
    • No transferring from sinking funds

    Separate by Importance:

    • Red envelopes = essentials (never raid these)
    • Yellow envelopes = wants (can transfer between these)
    • Clear hierarchy prevents critical categories being raided

    Consequences:

    • If you break rules, add accountability
    • Tell partner/accountability buddy
    • Put $10 in savings penalty
    • Track violations

    Reality:
    Some envelope borrowing is okay (life happens), but if it’s constant, your amounts aren’t realistic. Fix the budget, not just your behavior.


    Challenge #5: “I Overspend at the Beginning of the Month”

    The Problem:
    See $600 in grocery envelope day 1, spend $400 by day 10, scramble last 3 weeks.

    Solutions:

    Weekly Sub-Envelopes:

    • Divide monthly envelope into 4 weekly envelopes
    • Can only access that week’s envelope
    • Forces pacing

    Example:

    • Monthly grocery budget: $600
    • Week 1 envelope: $150
    • Week 2 envelope: $150
    • Week 3 envelope: $150
    • Week 4 envelope: $150

    Hidden Reserve:

    • Stuff envelope with only 75% initially
    • Keep 25% separate
    • If doing fine, add at mid-month
    • If struggling, have cushion

    Visual Markers:

    • Put sticky note at “halfway point” in envelope
    • “By day 15, should be here ↓”
    • Visual cue to pace spending

    Shopping Frequency:

    • Limit to specific days
    • “Grocery shopping only on Saturdays”
    • Reduces impulse trips that drain envelope

    Challenge #6: “My Partner Won’t Do This With Me”

    The Problem:
    You want to use envelopes, partner thinks it’s outdated/unnecessary/too much work.

    Solutions:

    Start Solo:

    • Begin with just your personal spending envelope
    • Show results over 2-3 months
    • Success often converts skeptics

    Make It Easy:

    • Don’t require partner to manage envelopes
    • You handle stuffing and organizing
    • Partner just uses appropriate envelope when shopping

    Compromise:

    • Use envelopes for problem areas only
    • Partner doesn’t have to embrace fully
    • Just respect envelope limits when shopping

    Separate Personal Envelopes:

    • Each person has their own personal spending envelope
    • Provides autonomy
    • Reduces conflict
    • Can participate without full buy-in

    Focus on Goals:

    • Frame as “this helps us afford vacation faster”
    • Connect to shared goals, not restriction
    • Show math of savings

    Try 30-Day Experiment:

    • “Let’s try for one month”
    • Lower commitment threshold
    • Often continues when they see results

    Internal Link: More budgeting teamwork strategies in “Complete Guide to Budgeting: Build Wealth on Any Income”


    Challenge #7: “I Feel Embarrassed Using Cash”

    The Problem:
    Worried about judgment from cashiers or friends when pulling out cash envelopes.

    Solutions:

    Reframe Your Mindset:

    • You’re being financially responsible (nothing to be embarrassed about)
    • Cashiers process cash all day (they don’t care)
    • Friends’ opinions < your financial future
    • Pride in discipline, not shame

    Discreet Methods:

    • Transfer cash to regular wallet before entering store
    • Don’t pull out labeled envelope at register
    • Use envelope wallet that looks like normal wallet
    • Nobody needs to know your system

    Own It:

    • “I’m using cash to stick to my budget”
    • Confidence is attractive
    • Often inspires others to ask how you do it
    • Normalize smart money management

    Reality Check:
    Nobody cares as much as you think. Cashiers are on autopilot. Other customers are thinking about their own stuff. Your financial success matters more than imagined judgment.


    Challenge #8: “I Keep Forgetting to Bring the Right Envelope”

    The Problem:
    At grocery store, realize grocery envelope is at home, use debit card instead, system fails.

    Solutions:

    Envelope Wallet:

    • All envelopes in one wallet
    • Always carry all envelopes
    • Grab from appropriate one when needed

    Car Storage:

    • Keep envelopes in car console
    • Always there when shopping
    • Transfer to purse/wallet when parking

    Calendar Reminders:

    • “Grocery shopping Saturday – bring grocery envelope”
    • Phone reminder before typical shopping times
    • Forms habit over time

    Shopping Routine:

    • Always shop same days/times
    • Build into routine
    • Becomes automatic

    Backup Rule:

    • If forgot envelope, go home and get it
    • Don’t use debit card “just this once”
    • Reinforces importance of system

    Challenge #9: “I’m Not Saving Money, Just Controlling Spending”

    The Problem:
    Successfully staying within envelopes, but not building wealth.

    Solutions:

    Add Savings Envelope:

    • Create envelope labeled “Savings”
    • Treat like expense category
    • Deposit to bank account at month-end

    Leftover Rule:

    • All money left in envelopes at month-end → savings
    • Incentivizes underspending
    • Builds savings automatically

    Reduce Envelope Amounts:

    • Once mastered current amounts, reduce by 10%
    • Move difference to savings
    • Gradual lifestyle adjustment

    Savings Challenge:

    • Try to beat last month’s savings
    • Gamify the process
    • Track savings growth visually

    Remember:
    Envelope system’s primary purpose is controlling spending. Pair with savings automation for wealth building.

    Best practice:

    • Automate savings transfer on payday
    • Then stuff spending envelopes
    • Savings happens first

    Internal Link: Accelerate savings with “How to Save Money Fast: 50+ Proven Ways to Cut Expenses”


    Safety Tips for Managing Cash {#safety}

    Handling cash requires security awareness. Here’s how to stay safe while using the envelope system.

    At Home

    Secure Storage:

    Best options:

    1. Small home safe ($50-200)
      • Fireproof and waterproof
      • Bolted to floor/wall
      • Protects from theft and disaster
    2. Locked filing cabinet
      • Budget-friendly option
      • Keeps cash out of plain sight
      • Prevents casual theft
    3. Diversion safe
      • Looks like book/can/household item
      • Hides in plain sight
      • Good for smaller amounts

    Worst places:

    • ❌ Dresser drawer (first place thieves check)
    • ❌ Under mattress (second place thieves check)
    • ❌ Freezer (common hiding spot, thieves know it)
    • ❌ Kitchen (high traffic, easily accessed)

    Best practices:

    • Keep safe location private (don’t tell everyone)
    • Don’t mention on social media that you keep cash at home
    • Document amounts with photos (insurance purposes)
    • Keep out of sight from windows

    In Your Vehicle

    If You Store Envelopes in Car:

    Safer approach:

    • Locked console or glovebox
    • Not visible from outside
    • Take with you when parked in high-risk areas
    • Never leave in plain sight

    Better approach:

    • Only keep today’s needed cash in car
    • Leave rest at home
    • Minimize exposure

    After shopping:

    • Don’t count cash in parking lot
    • Put change away immediately
    • Be aware of surroundings

    While Out and About

    Carrying Cash:

    Smart practices:

    • Take only what you need for that trip
    • Use envelope wallet close to body
    • Be aware in parking lots
    • Don’t flash cash at register
    • Count change discreetly

    High-risk situations:

    • Late night shopping
    • Unfamiliar areas
    • Crowded events
    • High-crime areas

    In these cases:

    • Consider using debit/credit instead
    • Bring trusted companion
    • Park in well-lit areas
    • Stay alert

    ATM Safety:

    • Use bank ATMs during business hours when possible
    • Be aware of surroundings
    • Shield PIN entry
    • Don’t count money at ATM
    • Leave immediately after transaction

    Insurance Considerations

    Check Your Coverage:

    Homeowner’s/Renter’s Insurance:

    • Typically covers cash, but often limited ($200-500)
    • May require proof (photos of envelopes monthly)
    • May require police report for claim
    • Read your policy specifics

    Increasing Coverage:

    • Add personal property rider
    • Document your system
    • Keep photos of stuffed envelopes
    • Track amounts

    Alternative:

    • Keep most money in bank
    • Only withdraw weekly amounts
    • Reduces cash at home significantly

    Digital Security (If Using Digital Envelopes)

    App Security:

    • Use strong, unique passwords
    • Enable two-factor authentication
    • Don’t link to accounts with large balances
    • Review connected accounts regularly

    Device Security:

    • Passcode/biometric lock on phone
    • Don’t store banking passwords in notes
    • Use secure networks (not public WiFi for banking)
    • Update apps regularly

    Identity Protection

    With Cash System:

    Advantage: Cash leaves no digital trail
    Precautions:

    • Don’t mention specific amounts on social media
    • Be cautious about documenting system publicly
    • Shred receipts with personal information

    Emergency Backup

    What If:

    • Cash stolen
    • House fire
    • Natural disaster
    • Loss of all envelopes

    Protection:

    1. Photo documentation (stored in cloud)
      • Monthly photos of stuffed envelopes
      • Shows amounts for insurance claim
    2. Keep some money digital
      • Not all eggs in cash basket
      • Maintain checking balance for true emergency
    3. Emergency fund separate
      • Don’t keep emergency fund in cash envelopes
      • Keep in high-yield savings account
      • Physical safety + FDIC protection
    4. Smaller amounts at home
      • Weekly stuffing instead of monthly
      • Minimizes potential loss
      • $300 at home vs. $1,500

    Reasonable Risk Assessment

    Perspective:

    • Billions of people handle cash daily without incident
    • With reasonable precautions, risk is very low
    • Don’t let fear prevent using effective system

    Balanced approach:

    • Use common sense security measures
    • Don’t keep excessive cash at home
    • Have insurance coverage
    • But don’t be paralyzed by unlikely scenarios

    If truly uncomfortable:

    • Use digital envelope system instead
    • Gets envelope benefits without cash risk
    • Perfectly valid alternative

    Real-Life Success Stories {#success-stories}

    Real people achieving real results with the envelope system.

    Story #1: Jessica’s $15,000 Debt Payoff

    Background:

    • Age: 28, marketing coordinator
    • Income: $48,000/year
    • Debt: $15,000 credit card debt
    • Problem: Overspending on dining out, shopping, entertainment

    Before Envelopes:

    • Spent $800+/month on discretionary categories
    • Made minimum payments on debt
    • Frustrated and stuck
    • Tried budgeting apps, failed repeatedly

    Envelope System Implementation:
    Categories:

    • Groceries: $400
    • Dining out: $150 (down from $400)
    • Entertainment: $100 (down from $200)
    • Personal shopping: $75 (down from $200)
    • Gas: $150

    Results:

    • Month 1: Stayed within all envelopes, saved $450 that previously disappeared
    • Month 3: Now natural, leftover money each month
    • Month 6: Paid off $3,200 in debt
    • Month 18: Completely debt-free ($15,000 paid)
    • Total saved through envelope system: $450/month × 18 months = $8,100+ redirected to debt

    Key insight: “Seeing cash physically leave my hands made me question every purchase. When the dining envelope was empty, I actually cooked instead of ordering takeout.”


    Story #2: Marcus and Tina’s Marriage Saver

    Background:

    • Married couple, early 40s
    • Combined income: $95,000
    • Problem: Constant fighting about money
    • Marcus felt Tina overspent; Tina felt Marcus was controlling

    Before Envelopes:

    • Arguments about spending weekly
    • Hidden purchases
    • Resentment building
    • Nearly separated over money

    Envelope System Implementation:
    Setup:

    • Shared envelopes: Groceries ($700), household ($150), dining out ($300)
    • Individual envelopes: His personal ($200), her personal ($200)

    Rules:

    • Can spend shared envelopes after discussion
    • Personal envelopes = no questions asked
    • Weekly check-in on shared envelope status

    Results:

    • Month 1: Awkward but managed to follow system
    • Month 2: Arguments reduced by 80%
    • Month 6: First vacation together in 3 years (saved from leftover envelope money)
    • Month 12: Marriage stronger, financial stress minimal

    Key insight: “Personal envelopes gave us autonomy. Shared envelopes forced communication but in a structured way. We stopped fighting because the envelopes showed the truth—not accusations.”


    Story #3: David’s Variable Income Victory

    Background:

    • Freelance graphic designer, age 34
    • Income: $2,000-$6,000/month (highly variable)
    • Problem: Overspent in good months, scrambled in bad months
    • No emergency fund despite good average income

    Before Envelopes:

    • Good month: Spent freely
    • Bad month: Panicked, used credit cards
    • Never felt secure despite decent income
    • Couldn’t build savings

    Envelope System Implementation:
    Strategy:

    • Budgeted to worst-case month ($2,000)
    • Any income above $2,000 = 50% to emergency fund, 50% to extra envelope amounts

    Base envelopes (always funded even in $2,000 month):

    • Groceries: $300
    • Gas: $100
    • Personal: $50
    • Total bare minimum: $450 (rest to fixed bills, taxes, basic savings)

    Results:

    • Month 1 income: $4,200
      • Funded base envelopes: $450
      • Extra $2,200 above minimum:
        • $1,100 to emergency fund
        • $1,100 to enhanced envelopes (better groceries, some dining out, entertainment)
    • Month 3 income: $2,300
      • Funded base envelopes: $450
      • Extra $300 above minimum:
        • $150 to emergency fund
        • $150 to slightly enhanced envelopes
    • Month 5 income: $5,800
      • Funded base envelopes: $450
      • Extra $3,800:
        • $1,900 to emergency fund
        • $1,900 to enhanced envelopes + special purchase saved for

    Results after 12 months:

    • Emergency fund: $14,500 (never had more than $1,000 before)
    • Stress level: Dramatically reduced
    • Never used credit card once
    • Business investment made from good month excess

    Key insight: “Knowing my bare-minimum envelopes would always be funded gave me security. Good months felt like bonuses, not the new normal to adjust lifestyle to.”


    Story #4: Sarah’s Grocery Budget Breakthrough

    Background:

    • Stay-at-home mom, family of 4
    • Household income: $65,000
    • Problem: Grocery budget consistently $900-1,000/month, target was $600
    • Multiple store trips per week, constant overspending

    Before Envelopes:

    • Vague idea of grocery budget
    • Multiple trips per week
    • “Just grabbing a few things” that added up
    • Using debit card, easy to overspend

    Envelope System Implementation:
    Setup:

    • Single grocery envelope: $650/month (realistic middle ground)
    • Weekly sub-envelopes: $162.50 × 4 weeks
    • Rule: Only shop once per week, only with cash

    Supporting changes:

    • Started meal planning Sunday nights
    • Shopped with list only
    • Left debit card at home
    • Made it a game to come under budget

    Results:

    • Week 1: Spent $155 (under budget!)
    • Week 2: Spent $168 (slight over, but rolled from week 1)
    • Month 1: Total spent $622, $28 under budget
    • Month 3: Consistently under $650, rolling $50-75/month to savings
    • Month 6: Grocery spending stabilized at $580-620/month
    • Year 1: Saved $3,600 compared to previous grocery spending

    Additional benefits:

    • Less food waste (planning ahead)
    • Healthier eating (fewer impulse buys)
    • Kids learned about budget limits
    • Sense of achievement each successful week

    Key insight: “Having to physically count out cash made me ruthlessly evaluate every item. ‘Do we really need this?’ became automatic. Also, limited trips meant better planning.”

  • Emergency Fund Guide: How Much to Save and Where to Keep It

    Emergency Fund Guide: How Much to Save and Where to Keep It

    Table of Contents

    1. Introduction
    2. What is an Emergency Fund?
    3. Why You Absolutely Need an Emergency Fund
    4. How Much Should You Have in Your Emergency Fund?
    5. Calculating Your Personal Emergency Fund Target
    6. Where to Keep Your Emergency Fund
    7. Best Emergency Fund Accounts in 2024
    8. How to Build Your Emergency Fund Fast
    9. Emergency Fund vs. Savings Account: What’s the Difference?
    10. When to Use Your Emergency Fund (And When Not To)
    11. What to Do After Using Your Emergency Fund
    12. Common Emergency Fund Mistakes to Avoid
    13. Emergency Fund for Different Life Situations
    14. Frequently Asked Questions
    15. Conclusion

    Introduction {#introduction}

    Imagine this scenario: Your car breaks down on the way to work. The repair estimate? $1,200. Or your tooth cracks and needs an emergency crown—$1,500 out of pocket. Or you receive a pink slip and suddenly face unemployment.

    For 63% of Americans, according to a 2024 Forbes Advisor survey, these scenarios would trigger a financial crisis. They simply don’t have enough savings to cover an unexpected $1,000 expense without resorting to credit cards, loans, or borrowing from family.

    This financial vulnerability doesn’t just cost money—it costs sleep, peace of mind, and sometimes even relationships. The constant worry about “what if something goes wrong” creates a background stress that affects every area of life.

    The solution? A fully funded emergency fund.

    An emergency fund is your financial safety net—a dedicated pool of money set aside specifically for unexpected expenses and emergencies. It’s not for vacations, not for holiday shopping, and not for that great deal you found online. It exists for one purpose: protecting you when life throws a curveball.

    In this comprehensive guide, you’ll discover:

    • Exactly how much you need in your emergency fund (hint: it’s not the same for everyone)
    • Where to keep this money for both safety and growth
    • How to build your fund quickly, even on a tight budget
    • What truly counts as an “emergency” (and what doesn’t)
    • The best high-yield accounts to maximize your emergency savings

    By the end of this article, you’ll have a clear, actionable plan to build financial security and eliminate the anxiety of living paycheck to paycheck.

    Your journey to financial peace starts here.


    What is an Emergency Fund? {#what-is}

    An emergency fund is a dedicated savings account containing money reserved exclusively for unexpected expenses and financial emergencies. Think of it as financial insurance you create for yourself.

    Key Characteristics of an Emergency Fund:

    1. Separate from Regular Savings
    Your emergency fund should be in a completely separate account from your day-to-day checking and regular savings. This physical separation prevents accidental spending.

    2. Easily Accessible (Liquid)
    You should be able to access this money within 24-48 hours without penalties. Unlike investments or CDs with withdrawal penalties, emergency funds prioritize accessibility over returns.

    3. Reserved for True Emergencies
    This money has one job: protecting you from financial disasters. It’s not for planned expenses, wants, or opportunities—only genuine emergencies.

    4. Fully Funded Before Aggressive Investing
    Financial experts universally agree: build at least a starter emergency fund before investing heavily in the market.

    What an Emergency Fund is NOT:

    ❌ Not an investment account – Emergency funds prioritize safety and accessibility over high returns

    ❌ Not a vacation fund – Planned expenses deserve their own savings category

    ❌ Not an opportunity fund – “This deal is too good to pass up” isn’t an emergency

    ❌ Not a shopping fund – Even if it’s on sale, it’s not an emergency

    ❌ Not retirement savings – These serve completely different purposes with different timelines

    The Psychology of Emergency Funds

    Beyond the practical benefits, emergency funds provide something invaluable: peace of mind.

    Dr. Brad Klontz, financial psychologist and researcher, explains: “Having an adequate emergency fund is one of the strongest predictors of financial wellness and reduced money-related stress. It’s not just about the money—it’s about the psychological safety it provides.”

    A 2023 study in the Journal of Financial Therapy found that people with emergency funds covering 3+ months of expenses reported:

    • 52% lower financial stress
    • Better sleep quality
    • Improved relationship satisfaction
    • Greater overall life satisfaction
    • More confidence in financial decision-making

    Your emergency fund isn’t just dollars in a bank—it’s confidence, security, and freedom from financial anxiety.


    Why You Absolutely Need an Emergency Fund {#why-need}

    If you’re tempted to skip building an emergency fund and jump straight to investing or debt payoff, understanding the “why” is crucial.

    1. Life is Unpredictable (And Expensive)

    Statistics paint a clear picture of financial uncertainty:
    Medical Emergencies:

    • 66% of bankruptcies in the U.S. involve medical debt (American Journal of Public Health, 2024)
    • Average ER visit costs $1,389 (Kaiser Family Foundation)
    • Even with insurance, surprise medical bills average $750-$2,000

    Vehicle Repairs:

    • Average American car is 12.5 years old
    • Transmission repair: $1,500-$3,500
    • Engine repair: $2,500-$4,000
    • Major systems tend to fail unexpectedly

    Home Repairs:

    • HVAC replacement: $3,000-$7,000
    • Roof repair: $400-$1,500
    • Plumbing emergency: $150-$800
    • Water heater replacement: $900-$1,500

    Job Loss:

    • Average time to find new employment: 3-6 months
    • Unemployment benefits replace only 40-50% of income
    • Benefits take 2-4 weeks to begin

    Without an emergency fund, these situations force you into bad financial decisions:

    • High-interest credit card debt
    • Predatory payday loans
    • 401(k) early withdrawals (with penalties)
    • Borrowing from family
    • Selling assets at unfavorable times

    2. Prevents Debt Spiral

    Consider the math of emergency-related debt:

    Scenario: $1,500 car repair without emergency fund

    Option 1: Credit card (21% APR, minimum payments)

    • If you pay minimums only: $2,447 total paid
    • Time to payoff: 7 years
    • Extra cost: $947 in interest

    Option 2: Emergency fund

    • Withdraw $1,500
    • Rebuild over next 3-4 months
    • Total cost: $1,500
    • Extra cost: $0

    The difference: $947 and years of stress

    An emergency fund isn’t just about having money—it’s about avoiding expensive debt that can take years to escape.

    3. Protects Your Financial Progress

    Imagine this common scenario:

    You’ve been aggressively paying off debt. After 18 months, you’ve paid off $12,000 and only have $5,000 left. Then your transmission dies.

    Without emergency fund:

    • Put $2,800 repair on credit card
    • Debt jumps back up to $7,800
    • Psychological defeat
    • Months of progress erased

    With emergency fund:

    • Pay $2,800 from emergency savings
    • Debt remains at $5,000
    • Rebuild emergency fund over 2-3 months
    • Progress maintained

    Your emergency fund protects the financial progress you’ve worked so hard to achieve.

    4. Enables Better Career Decisions

    Job security feels different when you have 6 months of expenses saved:

    Without emergency fund:

    • Stuck in toxic work environment (can’t afford to quit)
    • Can’t negotiate from position of strength
    • Must accept first job offer, regardless of fit
    • Fear prevents career risks

    With emergency fund:

    • Can leave unhealthy workplace if needed
    • Negotiate confidently (you have time to find alternatives)
    • Can be selective about opportunities
    • Freedom to pursue better-fit positions
    • Ability to invest in career transitions

    Financial security creates career freedom.

    5. Reduces Relationship Stress

    Money is consistently cited as a top cause of relationship conflict. A SunTrust Bank study found that:

    • 35% of couples experiencing relationship stress cite money as the primary cause
    • Couples with emergency funds report 64% fewer money-related arguments
    • Financial security correlates with relationship satisfaction

    An emergency fund removes a major source of couple conflict by providing shared security.

    6. Protects Against Economic Downturns

    During the 2020 pandemic:

    • 22 million Americans lost jobs in 2 months
    • Those with emergency funds weathered significantly better
    • Those without faced evictions, hunger, and extreme hardship

    During the 2008 recession:

    • Unemployment reached 10%
    • Those with 6+ months saved had time to find quality positions
    • Those without took desperate measures with long-term consequences

    Economic uncertainty isn’t “if”—it’s “when.” Your emergency fund is protection against forces beyond your control.


    How Much Should You Have in Your Emergency Fund? {#how-much}

    This is the million-dollar question—or more accurately, the 3-to-12-month question. The answer depends on your specific situation.

    The Standard Recommendations

    Financial Expert Guidelines:

    Dave Ramsey: $1,000 starter emergency fund, then 3-6 months of expenses after becoming debt-free

    Suze Orman: 8-12 months of expenses (more conservative)

    The Balance/NerdWallet: 3-6 months of expenses for most people

    Vanguard Research: 3-6 months for dual-income households, 6-12 months for single-income

    The truth? There’s no universal “right” amount. Your ideal emergency fund depends on multiple factors.

    Factors That Determine Your Target Amount

    1. Income Stability

    Highly Stable (3-4 months):

    • Government employee with tenure
    • Tenured professor
    • Established business with consistent revenue
    • Two high-earning professionals

    Moderate Stability (4-6 months):

    • Corporate job in stable industry
    • Dual-income household
    • Specialized skills in demand
    • Strong job market in your field

    Variable/Unstable (6-12 months):

    • Commission-based income
    • Freelancer/Contractor
    • Seasonal work
    • Startup employee
    • Single income household
    • Volatile industry
    • Niche specialized field (longer to find new position)

    2. Number of Income Earners

    Single income household: Higher target (6-12 months)

    • If sole earner loses job, household income drops to zero
    • No backup income source
    • Greater risk requires greater cushion

    Dual income household: Lower target acceptable (3-6 months)

    • If one loses job, other income continues
    • Built-in diversification
    • Statistical unlikelihood both lose jobs simultaneously

    3. Health Considerations

    Excellent health, good insurance: Standard target

    Chronic conditions, high deductibles, or dependents with medical needs: Add 1-2 months to target

    • Higher likelihood of medical expenses
    • Larger potential out-of-pocket costs
    • Insurance gaps and deductibles

    4. Job Market Realities

    How long would it take to find equivalent employment?

    Quick replacement (3-4 months):

    • High-demand skills
    • Multiple opportunities in area
    • Transferable skills
    • Strong network

    Longer replacement (6-9 months):

    • Specialized niche
    • Limited opportunities in geography
    • Senior-level positions
    • Academic positions

    Extended search (9-12 months):

    • Highly specialized
    • Geographic constraints
    • Competitive fields
    • Executive positions

    5. Fixed Obligations

    Higher fixed costs = larger emergency fund needed

    Consider:

    • Mortgage/rent amount
    • Dependent care costs
    • Health insurance premiums (if job loss means losing coverage)
    • Debt obligations
    • Medical needs
    • Insurance requirements

    Quick Reference Guide

    Your Situation Recommended Target
    Dual income, stable jobs, good health 3-4 months expenses
    Single income OR variable income 6 months expenses
    Self-employed/Freelancer 6-12 months expenses
    Single income + health concerns 8-9 months expenses
    Retiree (pre-Medicare) 12-24 months expenses
    High earner in niche field 9-12 months expenses
    Starting a business 12-18 months expenses

    The Starter Emergency Fund Approach

    Many financial experts recommend a two-phase approach:

    Phase 1: Starter Emergency Fund ($1,000-$2,000)

    • Build this FIRST, before aggressive debt payoff
    • Handles small emergencies (minor car repair, urgent dental work, appliance replacement)
    • Prevents derailing debt payoff progress
    • Achievable quickly (creates momentum)

    Phase 2: Full Emergency Fund (3-12 months)

    • Build after paying off high-interest debt
    • Provides complete protection
    • Allows confidence and peace of mind
    • Enables better financial decisions

    Internal Link: Learn how to allocate funds effectively with our “Zero-Based Budgeting Explained: Take Control of Every Dollar” guide


    Calculating Your Personal Emergency Fund Target {#calculator}

    Let’s calculate YOUR specific emergency fund target with a step-by-step process.

    Step 1: Calculate Monthly Essential Expenses

    List only expenses you’d still need to pay if you lost your income:

    Housing:

    • Rent/Mortgage: $_______
    • Property tax (if not in mortgage): $_______
    • HOA fees: $_______
    • Home/Renter’s insurance: $_______

    Utilities:

    • Electricity: $_______
    • Gas/Heating: $_______
    • Water/Sewer: $_______
    • Internet (basic tier): $_______
    • Phone (basic plan): $_______

    Food:

    • Groceries (lean budget): $_______
    • (Skip restaurants—not essential)

    Transportation:

    • Car payment: $_______
    • Auto insurance: $_______
    • Gas (for job hunting): $_______
    • Public transportation: $_______

    Insurance & Healthcare:

    • Health insurance premium: $_______
    • Prescriptions: $_______
    • Regular medical needs: $_______
    • Life insurance: $_______

    Minimum Debt Payments:

    • Credit card minimums: $_______
    • Student loan minimums: $_______
    • Personal loan minimums: $_______
    • Any other debt minimums: $_______

    Essential Only:

    • Childcare (if needed for job search): $_______
    • Pet food/basic care: $_______

    DO NOT INCLUDE:

    • Entertainment
    • Dining out
    • Subscriptions (Netflix, etc.)
    • Gym memberships
    • Hobbies
    • Clothing (except emergency replacements)
    • Savings/investing
    • Extra debt payments

    TOTAL MONTHLY ESSENTIAL EXPENSES: $_______

    Step 2: Determine Your Target Multiplier

    Based on the factors we discussed, choose your multiplier:

    Choose the HIGHEST number that applies to you:

    •  Dual income, stable, excellent health = 3 months
    •  Dual income, one variable income = 4 months
    •  Single income, stable job = 5 months
    •  Single income OR variable income = 6 months
    •  Self-employed/Freelancer = 9 months
    •  Health concerns or high medical costs = Add 2 months to above
    •  Niche specialized field = Add 2 months to above
    •  Single parent = Add 1 month to above

    My multiplier: _______ months

    Step 3: Calculate Your Full Emergency Fund Target

    Monthly Essential Expenses × Target Multiplier = Emergency Fund Goal

    Example Calculation:

    Maria’s situation:

    • Monthly essential expenses: $3,200
    • Single income household
    • Stable corporate job
    • Good health
    • Target: 6 months

    Calculation: $3,200 × 6 = $19,200 emergency fund target

    Your Calculation:

    $_______ × _______ = $_______
    (Monthly expenses) × (Multiplier) = (Emergency Fund Goal)

    Step 4: Set Your Starter Fund Target

    Before building your full fund, set a starter target:

    Starter Emergency Fund Options:

    • Minimum: $1,000
    • Better: $1,500
    • Ideal starter: $2,000
    • One month of expenses (whichever is higher)

    My starter fund target: $_______

    Step 5: Create Your Timeline

    To starter fund:

    Current emergency savings: $_______
    Starter fund target: $_______
    Amount needed: $_______

    Realistic monthly contribution: $_______

    Months to starter fund: _______ months

    To full fund (after starter):

    Full fund target: $_______
    Starter fund: $_______
    Additional needed: $_______

    Monthly contribution: $_______

    Months to full fund: _______ months

    Total timeline: _______ months

    Internal Link: Need to find money for emergency fund contributions? See our “How to Save Money Fast: 50+ Proven Ways to Cut Expenses” guide


    Where to Keep Your Emergency Fund {#where-to-keep}

    Your emergency fund needs three critical characteristics:

    1. Safety (FDIC insured, no risk of loss)
    2. Accessibility (available within 24-48 hours)
    3. Reasonable growth (earning some interest, but not primary goal)

    Where TO Keep Your Emergency Fund

    1. High-Yield Savings Account ⭐ BEST OPTION for most people

    Pros:

    • FDIC insured up to $250,000
    • Easy access (usually 1-2 business days to transfer)
    • Currently earning 4.0-5.5% APY (as of 2024)
    • No market risk
    • Online access and management
    • Often no minimum balance
    • Separate from checking (prevents accidental spending)

    Cons:

    • Interest rates vary with Fed policy
    • May have transfer limits
    • Slightly delayed access (not instant like checking)

    Best for: Most people building emergency funds

    Top providers (2024):

    • Marcus by Goldman Sachs
    • Ally Bank
    • American Express Personal Savings
    • Discover Online Savings
    • CIT Bank

    Example earnings:
    $10,000 emergency fund at 5.0% APY = $500 per year in interest

    2. Money Market Account

    Pros:

    • FDIC insured
    • Slightly higher interest than regular savings (typically)
    • Check writing ability (limited)
    • Easy access
    • Often includes debit card

    Cons:

    • May require higher minimum balance ($1,000-$10,000)
    • Limited transactions per month (typically 6)
    • Interest rates comparable to high-yield savings

    Best for: Larger emergency funds ($10,000+) or those wanting check-writing access

    3. Money Market Mutual Fund

    Pros:

    • Higher yields than savings accounts (sometimes)
    • Very liquid
    • Low risk

    Cons:

    • NOT FDIC insured (though very stable)
    • Can lose value (rare but possible)
    • May have minimum investment
    • Usually requires brokerage account

    Best for: Sophisticated investors comfortable with minimal risk

    4. Short-Term CD Ladder (Advanced strategy)

    Pros:

    • FDIC insured
    • Locked-in rates
    • Typically higher rates than savings
    • Disciplined approach prevents spending

    Cons:

    • Early withdrawal penalties
    • Less accessibility
    • More complex to set up
    • Rates may be lower than high-yield savings in 2024

    How CD laddering works:

    Divide emergency fund into portions with staggered maturity dates:

    • $2,000 in 3-month CD
    • $2,000 in 6-month CD
    • $2,000 in 9-month CD
    • $2,000 in 12-month CD

    Every 3 months, one matures. Renew for 12 months. After 12 months, you have access to $2,000 every 3 months with no penalty.

    Best for: Disciplined savers with established emergency funds who want to maximize interest

    Where NOT to Keep Your Emergency Fund

    ❌ Regular Checking Account

    Problems:

    • Too easy to spend accidentally
    • Virtually no interest earned
    • Mental accounting doesn’t separate emergency money from regular money
    • Temptation to use for non-emergencies

    ❌ Stock Market/Index Funds

    Problems:

    • Market can drop 20-40% exactly when you need the money
    • Selling during downturn locks in losses
    • Takes 3-5 days to access
    • Defeats purpose of emergency fund (stability)

    Real example: Someone with $15,000 emergency fund invested in S&P 500 in February 2020 would have seen it drop to $9,000 in March 2020—exactly when they might have needed it due to pandemic job loss.

    ❌ Cryptocurrency

    Problems:

    • Extreme volatility (can lose 50%+ in days)
    • Not FDIC insured
    • Can take days to convert to cash
    • Platform failures and hacks
    • Completely inappropriate for emergency funds

    ❌ Under the Mattress (Cash at Home)

    Problems:

    • No FDIC protection (if stolen or destroyed, it’s gone)
    • Inflation erodes value
    • Earns zero interest
    • Fire/theft/flood risk
    • Too easy to dip into

    Small cash at home ($200-500) is fine for immediate emergencies when banks are closed

    ❌ Certificate of Deposit (Non-Laddered)

    Problems:

    • Early withdrawal penalties (often 3-6 months interest)
    • Defeats accessibility purpose
    • Current rates often lower than high-yield savings

    ❌ Retirement Accounts (401k, IRA)

    Problems:

    • 10% early withdrawal penalty (if under 59½)
    • Income taxes on withdrawal
    • Loses tax-advantaged growth
    • Should be absolute last resort

    Example cost: Withdrawing $5,000 from 401k:

    • $500 penalty (10%)
    • $1,100 taxes (22% bracket)
    • Total cost: $1,600
    • You receive only $3,400 of the $5,000

    Best Emergency Fund Accounts in 2024 {#best-accounts}

    [IMAGE PLACEMENT HERE]

    AI Image Prompt:
    “Best savings accounts comparison table, professional chart showing top 5 high-yield savings accounts with APY rates, features, and pros/cons, clean financial comparison design, trustworthy and informative style, modern banking concept”

    Here are the top high-yield savings accounts for emergency funds as of 2024. Note: Rates change frequently—verify current rates before opening.

    Top 5 High-Yield Savings Accounts

    1. Marcus by Goldman Sachs Online Savings

    APY: 5.30% (as of 2024)
    Minimum Deposit: $0
    Monthly Fees: $0
    FDIC Insured: Yes

    Pros:

    • Highly competitive rate
    • No fees
    • No minimum balance
    • Trusted major bank backing
    • Easy transfers
    • Excellent customer service reputation

    Cons:

    • No physical branches
    • No checking account option
    • Transfers take 2-3 business days

    Best for: Straightforward emergency fund with excellent rate


    2. Ally Bank Online Savings Account

    APY: 5.25%
    Minimum Deposit: $0
    Monthly Fees: $0
    FDIC Insured: Yes

    Pros:

    • Consistently competitive rates
    • Excellent mobile app
    • 24/7 customer service
    • Can open checking account for faster access
    • Buckets feature (organize savings into categories)
    • No minimum balance

    Cons:

    • Slightly lower rate than some competitors
    • No physical branches

    Best for: Those wanting full-service online banking with checking + savings


    3. American Express Personal Savings

    APY: 5.30%
    Minimum Deposit: $0
    Monthly Fees: $0
    FDIC Insured: Yes

    Pros:

    • Top-tier rate
    • Trusted brand
    • No fees or minimums
    • Easy to link to external accounts
    • Clean, simple interface

    Cons:

    • No checking account option
    • Cannot deposit cash
    • 2-3 day transfer times

    Best for: Those prioritizing maximum interest rate


    4. Discover Online Savings Account

    APY: 5.25%
    Minimum Deposit: $0
    Monthly Fees: $0
    FDIC Insured: Yes

    Pros:

    • Excellent rate
    • Award-winning customer service
    • Can open money market or CDs
    • Cash back debit card available
    • Long-standing reputation

    Cons:

    • No physical branches
    • Standard transfer times

    Best for: Those wanting options beyond just savings account


    5. CIT Bank Savings Connect

    APY: 5.05%
    Minimum Deposit: $100
    Monthly Fees: $0
    FDIC Insured: Yes

    Pros:

    • Competitive rate
    • Low minimum to open
    • No monthly fees
    • Multiple account options

    Cons:

    • Slightly lower rate than top competitors
    • Less well-known brand
    • Requires $100 to open

    Best for: Those comfortable with smaller online banks


    Money Market Account Options

    Vanguard Cash Plus Account

    APY: 5.28%
    Minimum: $0
    Fees: $0

    Features:

    • Brokerage integration
    • Very competitive rate
    • Check writing
    • FDIC insured through partner banks

    Best for: Investors who also use Vanguard for investing


    Fidelity Cash Management Account

    APY: 5.24%
    Minimum: $0
    Fees: $0

    Features:

    • Debit card included
    • Check writing
    • ATM fee reimbursements
    • FDIC insured

    Best for: Fidelity customers or those wanting checking-like features


    How to Choose the Right Account

    Ask yourself:

    1. Do I need a debit card or checks?
      • Yes → Money market account or Ally/Discover
      • No → Highest-rate savings account
    2. Do I have other accounts with any of these banks?
      • Having checking + savings at same bank speeds transfers
      • Consider Ally or Discover for full banking relationship
    3. How important is brand recognition?
      • Want established name → Marcus (Goldman Sachs) or AmEx
      • Comfortable with online-only → Any top-rated option
    4. Will I maintain the minimum balance?
      • Check minimum requirements
      • Most top accounts have $0 minimum
    5. How often will I need to access this money?
      • Rarely → Highest rate savings
      • Occasionally → Money market with check/debit access

    Pro Tip: The difference between 5.25% and 5.30% on a $10,000 emergency fund is only $5/year. Don’t overthink it. Choose a reputable FDIC-insured account with a competitive rate and good customer service.


    How to Build Your Emergency Fund Fast {#build-fast}

    Building an emergency fund can feel overwhelming, especially if you’re starting from zero. Here are proven strategies to accelerate the process.

    Strategy 1: Start with a Micro-Goal

    The psychology of starting:

    $10,000+ emergency fund goal feels impossible when you have $0. Break it into achievable milestones:

    Milestone approach:

    •  $250 (Micro-emergency covered)
    •  $500 (Small car repair possible)
    •  $1,000 (Starter emergency fund complete) 🎉
    •  $2,500 (Quarter-way there)
    •  $5,000 (Halfway to moderate goal)
    •  $7,500 (Three-quarters)
    •  $10,000 (Full emergency fund complete!) 🎊

    Celebrate each milestone. Momentum builds with small wins.

    Strategy 2: Automate Your Savings

    Manual saving fails. Automation succeeds.

    Set up these automations:

    Option 1: Paycheck splitting
    If your employer allows, direct deposit a portion straight to emergency fund:

    • 80% → Checking account
    • 20% → Emergency fund savings

    Option 2: Automatic transfer
    Set up recurring transfer the day after payday:

    • Payday: Friday
    • Auto-transfer Saturday: $200 to emergency fund

    Why automation works:

    • Removes willpower from equation
    • “Pay yourself first” mentality
    • You adapt spending to what remains
    • Consistency beats motivation

    Research finding: A 2023 Employee Benefit Research Institute study found automated savers accumulate 6x more emergency savings than manual savers over 3 years.

    Strategy 3: Redirect One Expense

    Instead of cutting multiple things, redirect one significant expense entirely to emergency fund:

    Examples:

    • Cancel $200 car payment (pay off car) → $200/month to emergency fund
    • Cut cable TV ($120/month) → To emergency fund
    • Stop dining out ($300/month) → To emergency fund
    • Cancel unused gym membership ($50/month) → To emergency fund

    Timeline impact:

    $200/month = $2,400/year

    • Starter fund ($1,000): 5 months
    • 3-month fund ($9,000): 3.75 years

    $400/month = $4,800/year

    • Starter fund ($1,000): 2.5 months
    • 3-month fund ($9,000): 22 months

    Internal Link: Find expenses to cut with our “How to Save Money Fast: 50+ Proven Ways to Cut Expenses” guide

    Strategy 4: Windfall Allocation Rule

    When unexpected money comes in, allocate a significant portion to emergency fund:

    Sources of windfalls:

    • Tax refund
    • Work bonus
    • Gift money
    • Inheritance
    • Garage sale proceeds
    • Selling unused items
    • Freelance project payment

    Recommended allocation:

    • 50% to emergency fund
    • 25% to debt (if applicable)
    • 25% for something enjoyable

    Example:
    $2,000 tax refund:

    • $1,000 → Emergency fund (major boost!)
    • $500 → Extra debt payment
    • $500 → Something you want

    This balanced approach prevents “all or nothing” thinking while making substantial progress.

    Strategy 5: Aggressive Starter Fund Push

    30-Day Emergency Fund Challenge:

    For one month, take extreme measures to rapidly build starter fund:

    Income boosting:

    • Overtime at work
    • Weekend side gig
    • Sell unused items (eBay, Facebook Marketplace, yard sale)
    • Freelance project
    • Return unused items for refunds

    Expense cutting:

    • No restaurant meals (30 days)
    • No online shopping
    • Pack all lunches
    • Free entertainment only
    • Pause subscriptions for one month

    Realistic goal: Many people save $500-$1,500 in one focused month.

    Why this works:

    • Short timeframe feels achievable
    • Creates momentum
    • Builds confidence
    • Establishes habits
    • Gets you to $1,000 quickly

    Strategy 6: Round-Up Programs

    Use technology to save automatically with round-ups:

    How it works:

    • Purchase coffee for $4.50
    • App rounds to $5.00
    • $0.50 goes to savings

    Apps offering this:

    • Acorns (investment app with round-ups)
    • Chime (automatic savings)
    • Bank of America Keep the Change
    • Qapital (customizable saving rules)

    Typical results: $50-$150/month in painless savings

    Not a complete strategy, but excellent supplement.

    Strategy 7: The Split Deposit Method

    For those struggling to save:

    Week 1: 95% spending, 5% savings
    Week 2: 93% spending, 7% savings
    Week 3: 91% spending, 9% savings
    Week 4: 90% spending, 10% savings

    Gradually increase savings percentage so adjustment is gradual, not shocking.

    By month 3, you might be at 20% savings rate without the pain of sudden drastic cuts.

    Strategy 8: Interest and Raise Allocation

    Capture increases before lifestyle adjusts:

    Got a raise?
    Before you adjust your lifestyle, immediately increase emergency fund contribution by at least 50% of the raise.

    Example:

    • Raise: $200/month
    • Increase spending: $100/month
    • Increase savings: $100/month

    You still improve lifestyle while accelerating savings.

    High-yield account interest:
    Keep all interest earned in the emergency fund (reinvest automatically).

    On $5,000 at 5% APY, that’s $250/year staying in the fund.

    Strategy 9: No-Spend Challenges

    One category, one month:

    Choose one discretionary category and spend $0 for 30 days:

    Options:

    • No restaurants/takeout
    • No clothing purchases
    • No online shopping
    • No entertainment spending
    • No coffee shops

    All money “saved” → Emergency fund

    Typical results: $200-$500 saved in one month

    Quick-Build Summary

    Fastest path to $1,000 starter fund:

    Month 1:

    • Set up $200/month auto-transfer
    • 30-day spending challenge (save $300)
    • Sell unused items ($200)
    • Round-up app ($50)
    • Tax refund allocation ($250)
      Total: $1,000 ✓

    Track your progress visually:
    Create a chart, use an app, or color in a thermometer graphic. Visual progress increases motivation by 73% according to behavioral psychology research.

    Internal Link: Use our “Zero-Based Budgeting Explained: Take Control of Every Dollar” method to find savings automatically


    Emergency Fund vs. Savings Account: What’s the Difference? {#vs-savings}

    Many people confuse emergency funds with general savings. Understanding the distinction is crucial.

    Emergency Fund

    Purpose: Protection from financial disasters
    Timeline: Indefinite (always maintained)
    Accessibility: High (1-2 day access)
    Growth: Secondary priority
    Use Frequency: Rarely (emergencies only)
    Replenishment: Immediate priority after use
    Mental Category: Financial insurance

    Ideal account: High-yield savings account, separate from other money

    Examples of use:

    • Job loss
    • Medical emergency
    • Major car repair
    • Urgent home repair
    • Emergency travel (family crisis)

    General Savings Account

    Purpose: Planned expenses and goals
    Timeline: Specific (save for specific item/event)
    Accessibility: Moderate (can wait for better moment)
    Growth: Important consideration
    Use Frequency: Regular (as goals are reached)
    Replenishment: Based on new goals
    Mental Category: Future consumption

    Ideal account: Can be same or different from emergency fund, possibly higher-yield options

    Examples of use:

    • Vacation
    • New furniture
    • Holiday shopping
    • Wedding
    • Home down payment
    • New car (planned)

    Sinking Funds (Subcategory of Savings)

    Purpose: Predictable irregular expenses
    Timeline: Specific dates (annual, quarterly, etc.)
    Examples:

    • Annual insurance premiums
    • Car registration
    • Property taxes
    • Holiday gifts
    • Annual subscriptions

    How they work:

    • Annual car insurance: $1,200
    • Divide by 12: $100/month
    • Set aside $100/month
    • When bill comes, money is ready

    Side-by-Side Comparison

    Aspect Emergency Fund Savings Account Sinking Funds
    Purpose Financial protection Future goals Known future expenses
    Amount 3-12 months expenses Varies by goal Exact expense amount
    Touch Frequency Very rare Moderate Regular
    Reprioritize? Never Sometimes Rarely
    Account Type Separate, high-yield Can be combined Can be same account
    Emotion Security/peace Excitement Preparedness

    Should They Be in the Same Account?

    Arguments for SEPARATE accounts:

    Pros:

    • Mental accounting (each dollar has clear purpose)
    • Prevents accidentally using emergency fund for non-emergencies
    • Easier to track progress
    • Protects emergency fund integrity

    Best for: People who might be tempted to raid emergency fund for wants


    Arguments for COMBINED account:

    Pros:

    • Simpler (fewer accounts to track)
    • Higher total balance may earn better rates
    • All savings in one place
    • Less administrative overhead

    Requires: Strong discipline and clear tracking system

    Best for: Disciplined savers who can mentally separate purposes


    Recommended approach for most people:

    Account 1: Emergency Fund (Separate, untouchable)

    • 3-12 months expenses
    • High-yield savings
    • Only for true emergencies

    Account 2: Savings Goals (Can have sub-categories)

    • Vacation fund
    • Car fund
    • Home improvement
    • Sinking funds

    Account 3: Checking (Daily spending)

    • Regular bills and expenses
    • Budgeted spending

    This three-account system provides clarity while remaining manageable.

    Internal Link: Learn to allocate between accounts with our “Complete Guide to Budgeting: Build Wealth on Any Income”


    When to Use Your Emergency Fund (And When Not To) {#when-to-use}

    The hardest part of having an emergency fund is knowing when to actually use it. Here’s a comprehensive guide.

    ✅ DEFINITELY Use Your Emergency Fund

    1. Job Loss or Reduced Income

    • Laid off
    • Terminated
    • Hours reduced significantly
    • Business income drops substantially

    Why it qualifies: This is exactly what emergency funds exist for—replacing income.

    Action: Use as needed to cover essential expenses while job hunting. Budget carefully to extend runway.


    2. Medical Emergencies

    • Emergency room visit
    • Urgent surgery
    • Unexpected hospital stay
    • Necessary dental emergency (severe pain, infection, broken tooth)
    • New medical diagnosis requiring immediate treatment

    Why it qualifies: Health cannot wait, and medical debt is expensive.

    Action: Use emergency fund to cover deductibles, copays, and uncovered expenses. Negotiate payment plans but pay what you can upfront.


    3. Essential Home Repairs

    • Broken HVAC (extreme weather)
    • Roof leak causing damage
    • Plumbing emergency (burst pipe, sewer backup)
    • Electrical hazard
    • Broken water heater
    • Pest infestation requiring immediate treatment

    Why it qualifies: Threatens safety, habitability, or will cause worse damage if delayed.

    Action: Get multiple quotes if possible, but don’t delay critical repairs.


    4. Essential Vehicle Repairs

    Qualifies if:

    • Car is your only transportation to work
    • Repair is necessary for safe operation
    • Public transportation not viable alternative

    Examples:

    • Transmission failure
    • Engine problems
    • Brake failure
    • Safety recalls

    Doesn’t qualify if:

    • You have alternative transportation
    • It’s cosmetic
    • Can be delayed without safety risk

    5. Unexpected Essential Travel

    • Family emergency (serious illness, death)
    • Emergency custody issue
    • Legal requirement to appear

    Why it qualifies: Time-sensitive and necessary.

    Action: Book economically, but don’t delay due to cost.


    6. Essential Insurance Deductibles

    • Car accident deductible
    • Home insurance deductible (fire, storm damage)
    • Medical insurance deductible

    Why it qualifies: You’re covered by insurance, but must pay deductible to access coverage.


    ⚠️ MAYBE Use Your Emergency Fund (Situational)

    1. Car Repairs (Non-Critical)

    Use if:

    • Only vehicle
    • Need for work
    • No alternative transportation
    • Repair cost is within reason

    Don’t use if:

    • Cosmetic repair
    • Can delay without safety issue
    • Have alternative transportation
    • Repair exceeds vehicle value

    Better approach: Create a “car repair sinking fund” with monthly contributions to handle these separately.


    2. Appliance Replacement

    Use if:

    • No reasonable alternative
    • Climate extremes (AC in 110°F heat, heat in freezing cold)
    • Health/safety issue (broken refrigerator, no food storage)

    Don’t use if:

    • Can rent/borrow temporarily
    • Can live without temporarily
    • Can finance 0% interest

    Example: Broken washing machine probably doesn’t qualify (can use laundromat). Broken refrigerator in summer might qualify.


    3. Pet Emergency

    Use if:

    • Life-threatening situation
    • Severe suffering
    • Trusted vet recommends immediate treatment

    Don’t use if:

    • Elective procedure
    • Can be delayed
    • Quality of life issue with time to save

    Better approach: Consider pet insurance or dedicated pet emergency fund.


    4. Legal Issues

    Use if:

    • Criminal charges requiring attorney
    • Immediate legal threat (eviction, foreclosure)
    • Child custody emergency

    Don’t use if:

    • Civil matter that can wait
    • Can access legal aid
    • Optional legal action

    ❌ DO NOT Use Your Emergency Fund

    1. Vacations
    Never. No exceptions. Vacations are wonderful but planned expenses, not emergencies.

    Better approach: Create separate vacation fund.


    2. Holidays and Gifts
    Christmas, birthdays, and weddings happen every year. Not emergencies.

    Better approach: Sinking fund ($100-150/month set aside monthly).


    3. Wants and Upgrades

    • New TV (even if current one broke—can wait)
    • Furniture
    • Clothing (except immediate need for work/interview)
    • Hobby equipment
    • Gadgets

    Why not: These are preferences, not necessities.


    4. Sales and “Great Deals”

    • “50% off sale ends today!”
    • “Limited time offer!”
    • “Investment opportunity!”

    Why not: Emergency funds are for emergencies, not opportunities.

    Truth: There will always be another sale.


    5. Routine Expenses

    • Regular bills
    • Groceries
    • Gas
    • Expected annual expenses (insurance premiums, registration)

    Why not: These should be in your regular budget or sinking funds.

    If you’re using emergency fund for routine expenses, you have a budget problem, not an emergency.


    6. Helping Others
    This is controversial, but important:

    • Lending to friends/family
    • Bailing someone out
    • Covering someone else’s emergency

    Why not: Protect your own oxygen mask first. If you deplete your emergency fund helping others, who helps you in your emergency?

    Alternative: Help in non-financial ways or only give what you can afford to lose.


    7. Debt Payment

    • Extra credit card payment
    • Student loan payoff
    • Mortgage principal

    Why not: Emergency fund takes priority over extra debt payment. Keep it intact for actual emergencies.

    Exception: Once you have FULL emergency fund (3-12 months), you might choose to use excess beyond your target for debt payoff.


    The Emergency Fund Decision Flowchart

    Ask these questions:

    Question 1: Is this unexpected?

    • No → Not an emergency (should be budgeted)
    • Yes → Continue

    Question 2: Is this urgent (cannot wait 1-2 months)?

    • No → Save up for it separately
    • Yes → Continue

    Question 3: Is this essential (need, not want)?

    • No → Do not use emergency fund
    • Yes → Continue

    Question 4: Are there alternatives to using cash?

    • 0% financing available → Consider that instead
    • Insurance will cover it → Use insurance
    • Can borrow item temporarily → Do that
    • No good alternatives → Continue

    Question 5: Is the cost reasonable?

    • Getting multiple quotes if possible
    • Not overpaying due to panic
    • Necessary scope of repair/purchase

    If yes to all → This qualifies as appropriate emergency fund use


    The Gray Areas

    Some situations aren’t clearly emergency or not:

    Scenario: Car needs $800 repair, have $1,200 in starter emergency fund

    Considerations:

    • Do you need car for work? (Probably use fund)
    • Is public transit available? (Maybe avoid using fund)
    • Can you carpool temporarily? (Maybe avoid using fund)

    Recommended: Use fund if truly needed, but replenish ASAP.


    Scenario: Friend’s wedding destination, $1,500 to attend

    Answer: Not an emergency. Save separately or politely decline.

    Weddings are planned events. If invited, you have time to save. Friendship doesn’t require financial hardship.


    Scenario: Appliance breaks but 0% financing available for 18 months

    Recommended approach:

    • Take the 0% financing
    • Set up auto-payment from emergency fund monthly
    • Keeps emergency fund intact for true emergencies
    • No interest cost
    • Better financial flexibility

    When in Doubt

    Ask yourself: “If I use this money, will I be vulnerable if a true emergency happens next month?”

    If yes → Find alternative solution

    Your emergency fund’s primary job is keeping you safe. Preserve it fiercely.


    What to Do After Using Your Emergency Fund {#after-using}

    You’ve had a legitimate emergency and used your emergency fund. Now what?
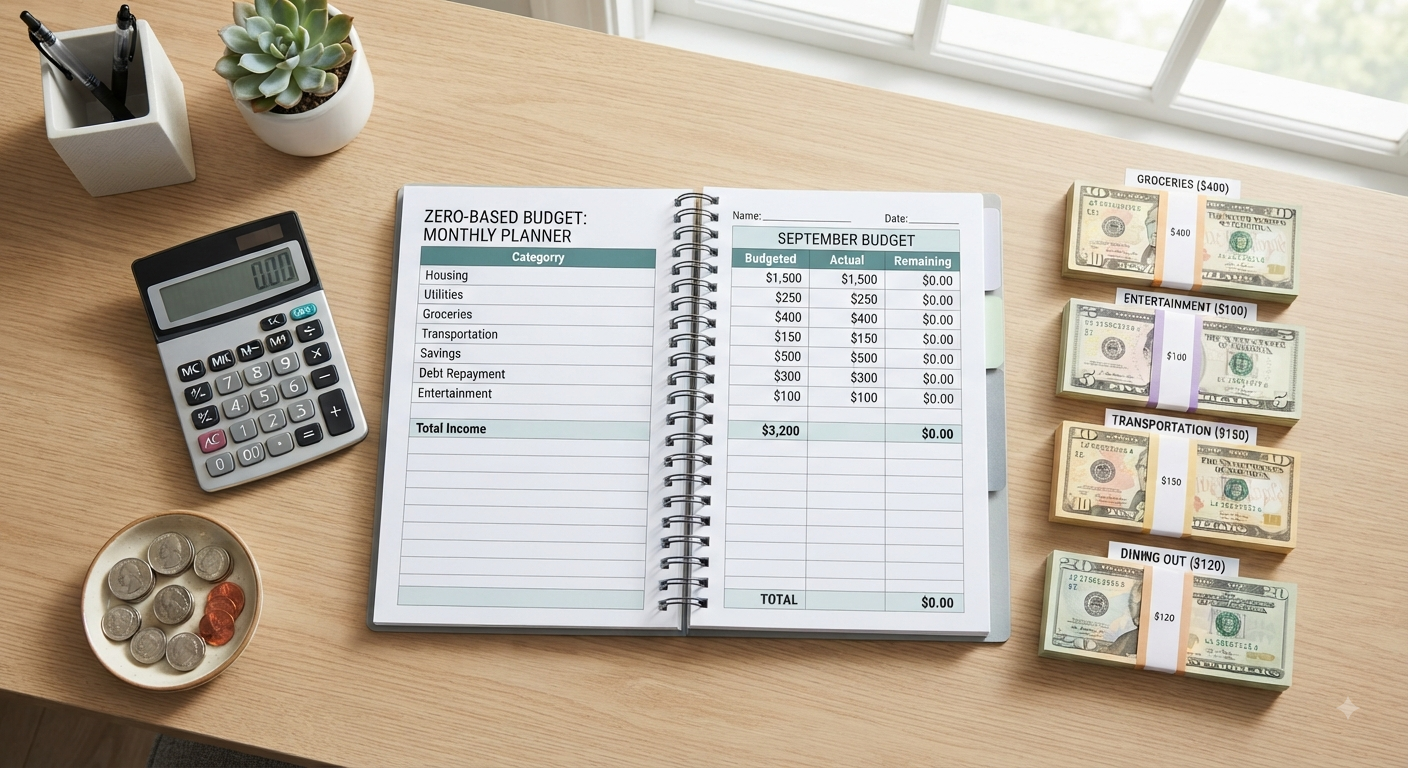
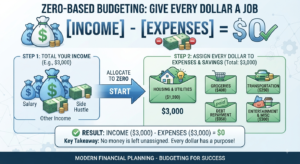
    Step 1: Acknowledge Success (Yes, Success!)

    Your emergency fund did its job. This is exactly why you built it.

    Many people feel defeated after using their emergency fund. Reframe this:

    ❌ “I failed—I had to use my emergency fund”
    ✅ “My emergency fund protected me from debt and financial disaster”

    You didn’t go into debt. You didn’t borrow at high interest. You didn’t raid your retirement. You didn’t panic.

    That’s financial success.

    Step 2: Assess the Damage

    Calculate exactly how much you withdrew:

    Example:

    • Emergency fund before: $8,000
    • Emergency expense: $2,500
    • Remaining: $5,500
    • Need to rebuild: $2,500

    Be specific. Write it down.

    Step 3: Immediate Adjustment

    Until your emergency fund is fully rebuilt:

    Pause or reduce:

    • Extra debt payments (pay minimums only)
    • Retirement contributions (except employer match)
    • Other savings goals
    • Discretionary spending

    Redirect to emergency fund:

    • Every dollar that was going to those areas
    • Focus intensity on rebuilding

    Why: You’re temporarily vulnerable. Prioritize regaining protection.

    Example budget shift:

    Before emergency:

    • Emergency fund: $200/month
    • Extra debt payment: $300/month
    • Vacation fund: $150/month

    After emergency (rebuilding):

    • Emergency fund: $650/month
    • Extra debt payment: $0
    • Vacation fund: $0

    Step 4: Create Rebuilding Timeline

    Be realistic but aggressive:

    Amount to rebuild: $2,500
    Monthly allocation: $500
    Timeline: 5 months

    Set milestone dates:

    • Month 1: $500 rebuilt
    • Month 2: $1,000 rebuilt
    • Month 3: $1,500 rebuilt (60% restored)
    • Month 4: $2,000 rebuilt (80% restored)
    • Month 5: $2,500 rebuilt ✓ FULLY RESTORED

    Track progress visibly.

    Step 5: Identify Rebuilding Sources

    Where will the money come from?

    Option 1: Cut discretionary spending temporarily

    • Reduce dining out
    • Pause subscriptions
    • Free entertainment
    • Delay purchases

    Option 2: Increase income temporarily

    • Overtime
    • Side gig
    • Sell items
    • Freelance project

    Option 3: Redirect other savings

    • Pause non-emergency savings temporarily
    • Reduce (don’t eliminate) retirement contributions temporarily

    Option 4: Combination approach (most effective)

    • 30% from spending cuts ($150)
    • 30% from redirected savings ($150)
    • 40% from income increase ($200)
    • Total: $500/month

    Step 6: Analyze What Happened

    Learning opportunity:

    Ask yourself:

    1. Was this truly unforeseeable?
    2. Could I have prevented it?
    3. Should I budget for this differently going forward?

    Examples:

    Car repair emergency:

    • Reflection: “Car is 12 years old, more repairs likely”
    • Adjustment: Create monthly “car repair sinking fund” ($75/month)
    • Result: Future car repairs don’t deplete emergency fund

    Medical emergency:

    • Reflection: “High deductible caused $3,000 out-of-pocket”
    • Adjustment: Consider health plan change during next enrollment
    • Result: Might lower deductible to reduce emergency fund impact

    Job loss:

    • Reflection: “6 months saved, only needed 3 months”
    • Confirmation: 6-month target was correct
    • Action: Rebuild to 6 months again

    Step 7: Celebrate Milestones

    As you rebuild, celebrate progress:

    • 25% restored: Small treat
    • 50% restored: Acknowledge achievement
    • 75% restored: Favorite meal
    • 100% restored: Meaningful celebration

    Why: Positive reinforcement makes financial discipline sustainable.

    Step 8: Prevent Future Same Emergencies

    If your emergency was preventable:

    Example: HVAC died after 20 years

    Prevention strategy:

    • HVAC systems last 15-20 years
    • Create “home system replacement fund”
    • Set aside $100/month
    • In 3 years, have $3,600 for next replacement
    • Reduces emergency fund impact

    Example: Medical emergency due to deferred care

    Prevention strategy:

    • Keep up with preventive care
    • Address small issues before they become emergencies
    • Maintain health insurance
    • Know your coverage

    Not all emergencies are preventable, but some are.

    Step 9: Resist New Risks Until Rebuilt

    While rebuilding, be extra conservative:

    Avoid:

    • Taking on new debt
    • Making large purchases
    • Risky decisions
    • Reducing insurance coverage to save money

    You’re temporarily vulnerable. Act accordingly.

    Step 10: Resume Normal Priorities After Restoration

    Once fully rebuilt:

    ✓ Resume extra debt payments
    ✓ Return retirement contributions to previous level
    ✓ Restart other savings goals
    ✓ Relax spending slightly

    Your financial plan can return to normal.


    Real-Life Rebuilding Example

    Sarah’s Story:

    Situation:

    • Had $7,500 emergency fund (5 months expenses)
    • Car transmission died: $3,200 repair
    • Remaining: $4,300 (less than 3 months)

    Rebuilding Plan:

    1. Paused extra student loan payment ($250/month)
    2. Reduced discretionary spending ($150/month)
    3. Took on 4-hour/week side gig ($400/month)
    4. Total monthly rebuilding: $800

    Timeline:

    • Target to rebuild: $3,200
    • Monthly contribution: $800
    • Time to full restoration: 4 months

    Adjustments made:

    • Created “car replacement fund” ($150/month) for future car expenses
    • Result: Next car issue won’t fully deplete emergency fund

    Outcome:

    • Emergency fund restored in 4 months
    • Created better system for future
    • Avoided debt completely
    • Maintained financial security

    Common Emergency Fund Mistakes to Avoid {#mistakes}

    Learning from others’ mistakes saves you time, money, and stress.

    Mistake #1: Keeping It Too Accessible

    The Problem:
    Emergency fund in regular checking account or easily accessible credit card.

    Why it’s bad:

    • Too tempting to use for non-emergencies
    • Mental accounting fails
    • “Emergency” becomes anything you want
    • Fund never grows

    Real example: Kevin kept emergency fund in checking. Over 12 months, used it for:

    • Black Friday deals ($400)
    • Friend’s bachelor party trip ($600)
    • New TV when old one worked fine ($800)
    • “Emergency” dinner out multiple times ($300)

    Result: $2,100 of $3,000 gone on non-emergencies.

    Solution:
    Separate high-yield savings account at different bank. 1-2 day transfer time provides “pause” to assess if truly emergency.

    Mistake #2: Investing It in the Stock Market

    The Problem:
    “I’ll earn more if I invest my emergency fund in index funds!”

    Why it’s bad:

    • Markets drop exactly when you need money (recessions = job losses)
    • Selling in down market locks in losses
    • Defeats entire purpose of emergency fund (stability)

    Real example: Jennifer had $15,000 emergency fund in S&P 500 index fund.

    • February 2020: $15,000
    • March 2020 (pandemic): Dropped to $9,500
    • Laid off in April 2020
    • Had to sell at loss for living expenses
    • Lost $5,500 when she needed it most

    Solution:
    Emergency funds belong in FDIC-insured savings, not market investments. Stability > returns.

    Mistake #3: Building It Too Slowly While Carrying High-Interest Debt

    The Problem:
    Saving for 12-month emergency fund while paying 22% on credit cards.

    The Math:

    • Saving $500/month at 5% interest
    • Paying 22% on $10,000 credit card debt
    • You’re losing money overall

    Why it’s bad:

    • Paying more in interest than earning in savings
    • Mathematically irrational
    • Could pay off debt faster with blended approach

    Better approach:

    1. Build $1,000-$2,000 starter emergency fund
    2. Attack high-interest debt aggressively
    3. After debt-free, build full emergency fund

    Exception: If job security is very uncertain, prioritize emergency fund even with debt.

    [Internal Link: Learn debt payoff strategies in our upcoming “Debt Snowball vs Debt Avalanche: Best Payoff Strategy” guide]

    Mistake #4: Never Actually Using It for Real Emergencies

    The Problem:
    $10,000 emergency fund sits unused while putting actual emergencies on credit cards.

    Why people do this:

    • “Saving it for something worse”
    • Fear of depleting it
    • Don’t want to rebuild
    • Misunderstand its purpose

    Real example: Marcus had $8,000 emergency fund. Car needed $1,800 repair. Put it on credit card instead “to preserve emergency fund.”

    Result: Paid $2,340 total (with interest) instead of $1,800. Made emergency fund pointless.

    Solution:
    Use emergency fund for actual emergencies. That’s why it exists. Then rebuild it.

    Mistake #5: Treating Target as Finish Line

    The Problem:
    “I hit $10,000, I’m done forever!”

    Why it’s bad:

    • Income increases (need more in emergency fund)
    • Lifestyle expenses increase
    • Family situation changes
    • Job changes
    • Healthcare needs change

    Example: Built 6-month emergency fund in 2019: $12,000

    • 2024: Same $12,000, but expenses now $3,000/month instead of $2,000
    • Actually only has 4 months saved
    • Falsely secure

    Solution:
    Review emergency fund target annually. Adjust for:

    • Income changes
    • Expense changes
    • Life situation changes
    • Inflation

    Mistake #6: Keeping It All in One Account

    The Problem:
    All $30,000 in single savings account.

    Why it’s bad:

    • FDIC insurance only covers $250,000 per depositor per bank
    • Single point of failure (bank issues)
    • Less optimal returns (could ladder some)

    Better approach for large emergency funds ($50,000+):

    • Split across multiple banks (FDIC protection)
    • Consider short-term CD ladder for portion
    • Keep most liquid portion in high-yield savings

    Mistake #7: Not Telling Your Partner

    The Problem:
    One partner builds emergency fund without other’s knowledge.

    Why it’s bad:

    • Secrets damage relationships
    • Partner might have different emergency threshold
    • Causes conflict when discovered
    • Missed opportunity for teamwork

    Solution:
    Financial transparency. Build emergency fund together, discuss what constitutes emergency, agree on target amount.

    Mistake #8: Using It for Planned Expenses

    The Problem:
    “I’ll use my emergency fund for Christmas shopping and rebuild next year.”

    Why it’s bad:

    • Christmas happens every year (not emergency)
    • Creates cycle of depletion and rebuilding
    • Leaves you vulnerable during rebuilding
    • Misunderstands emergency fund purpose

    Solution:
    Create sinking funds for predictable irregular expenses:

    • Holiday fund: $100/month
    • Annual insurance: $150/month
    • Car registration: $30/month

    Mistake #9: Building It Last

    The Problem:
    “I’ll build emergency fund after I:

    • Pay off all debt
    • Max out retirement
    • Save for house
    • [other goals]”

    Why it’s bad:

    • Emergency doesn’t wait for your timeline
    • Without protection, debt happens
    • Creates vulnerability
    • Backwards priority order

    Correct priority order:

    1. $1,000-$2,000 starter emergency fund
    2. Employer 401(k) match (free money)
    3. Pay off high-interest debt
    4. Build full emergency fund (3-12 months)
    5. Other financial goals

    Mistake #10: Letting It Languish in Zero-Interest Checking

    The Problem:
    $15,000 emergency fund earning 0.01% in checking account.

    Opportunity cost:

    • 0.01% = $1.50/year
    • 5.00% = $750/year
    • Difference: $748.50 per year lost

    Over 10 years: $7,485 left on the table

    Solution:
    Move to high-yield savings account (takes 20 minutes, earns $750/year on $15,000).


    Emergency Fund for Different Life Situations {#life-situations}

    Your emergency fund needs change as your life situation changes. Here’s how to adjust:

    Single, Entry-Level Income ($30,000-$45,000/year)

    Recommended emergency fund: 3-6 months expenses

    Typical monthly expenses: $2,000-$2,500
    Target emergency fund: $6,000-$15,000

    Priorities:

    1. $1,000 starter fund (achievable quickly)
    2. Pay off credit card debt
    3. Build to 3 months ($6,000-$7,500)
    4. Increase to 6 months if job security uncertain

    Building strategy:

    • Start with $100-$150/month
    • Use tax refund for boost
    • Side gig income → emergency fund
    • Reach starter fund in 6-10 months

    Challenges:

    • Lower income makes saving harder
    • May have student loan debt
    • Building career (less job security)

    Advantages:

    • Lower expenses (fewer dependents)
    • Flexibility to increase income
    • Can live with roommates to reduce costs

    Married Dual Income, No Kids ($80,000-$120,000 combined)

    Recommended emergency fund: 3-4 months expenses

    Typical monthly expenses: $4,500-$6,000
    Target emergency fund: $13,500-$24,000

    Priorities:

    1. $2,000 starter fund
    2. Pay off high-interest debt
    3. Build to 3 months
    4. Consider 4-6 months if one income is variable

    Building strategy:

    • Each partner contributes $200-300/month
    • Allocate bonuses 50% to emergency fund
    • Can build relatively quickly with two incomes
    • Reach full fund in 12-18 months

    Advantages:

    • Two incomes (if one loses job, other continues)
    • Statistical redundancy
    • Higher combined income

    Risks:

    • Two people = two potential job losses
    • May be accumulating debt (home, cars)
    • Lifestyle inflation

    Special consideration: If planning to have children soon, build larger fund (6 months) to prepare for potential single-income period.


    Single Parent ($45,000-$65,000)

    Recommended emergency fund: 6-9 months expenses

    Typical monthly expenses: $3,000-$4,000
    Target emergency fund: $18,000-$36,000

    Why larger fund needed:

    • Single income (no backup)
    • Dependents relying on you
    • Childcare costs are significant
    • Less flexibility to increase hours or take second job
    • Medical needs for children

    Building strategy:

    • Start with $1,500 starter fund
    • Build slowly but consistently ($150-250/month)
    • Use child tax credit for major boost
    • Don’t feel discouraged by high target
    • Focus on $5,000 first, then $10,000, then full amount

    Challenges:

    • Childcare costs
    • Less income flexibility
    • Higher stress
    • Time constraints

    Support resources:

    • TANF (Temporary Assistance for Needy Families)
    • SNAP (food assistance)
    • Childcare subsidies
    • Tax credits (EITC, Child Tax Credit)
    • Every bit helps toward emergency fund

    Family with Children (2 parents, $100,000-$150,000)

    Recommended emergency fund: 4-6 months expenses

    Typical monthly expenses: $6,000-$8,500
    Target emergency fund: $24,000-$51,000

    Priorities:

    1. $2,000-$3,000 starter fund
    2. If debt-free, build aggressively
    3. Target middle range first (4 months)
    4. Expand to 6 months as income allows

    Building strategy:

    • $500-750/month allocation
    • Tax refund toward fund
    • One bonus per year → emergency fund
    • Reach starter fund in 3-4 months
    • Reach 4 months in 2-3 years
    • Reach 6 months in 3-5 years

    Unique considerations:

    • Kids’ medical needs
    • School expenses (not emergencies, but need separate fund)
    • Older home might need more repair money
    • Cars with higher mileage

    Risk factors:

    • Daycare costs (may decrease if job loss)
    • Higher fixed costs (larger home, multiple cars)
    • More people = more potential emergencies

    Self-Employed/Freelancer ($50,000-$100,000 variable)

    Recommended emergency fund: 9-12 months expenses

    Typical monthly expenses: $3,500-$6,000
    Target emergency fund: $31,500-$72,000

    Why much larger fund needed:

    • Highly variable income
    • No unemployment benefits
    • Client payment delays
    • Industry downturns
    • No employer benefits
    • Must cover own health insurance

    Building strategy:

    • Save 30-40% of good months
    • Don’t increase lifestyle with income increases
    • Build over 3-5 years
    • High-income months → emergency fund
    • Starter fund: $3,000 (one month)

    Additional considerations:

    • Separate “business emergency fund” for business expenses
    • “Tax fund” (30% of income set aside)
    • “Irregular income buffer” (smooths cash flow)
    • Health insurance emergency fund (if not included in regular expenses)

    Advantages:

    • Income upside potential
    • Tax deductions
    • Control over hours (can increase income)

    Challenges:

    • No safety net
    • Cash flow gaps
    • Difficult to predict income

    Timeline:

    • Year 1: Build to $10,000
    • Year 2: Build to $20,000
    • Year 3: Build to $30,000+
    • Year 4-5: Reach full 12 months

    Retiree (Pre-Medicare, 60-65 years old)

    Recommended emergency fund: 12-24 months expenses

    Typical monthly expenses: $4,000-$6,000
    Target emergency fund: $48,000-$144,000

    Why such large fund:

    • No employment income
    • Health insurance very expensive before Medicare
    • Medical emergencies more likely
    • Can’t easily “just get a job”
    • May be supporting adult children
    • Stock market volatility matters more

    Building strategy:

    • Build during working years
    • Don’t reduce when retiring (increase it)
    • Keep replenishing from Social Security/pension
    • Separate from retirement investments

    Additional considerations:

    • Medical emergency fund separate from general emergency
    • Long-term care considerations
    • Home maintenance fund (aging home)
    • Medicare gap coverage costs

    High-Income Earner ($200,000+)

    Recommended emergency fund: 6-12 months expenses OR $100,000, whichever is higher

    Typical monthly expenses: $10,000-$20,000+
    Target emergency fund: $60,000-$240,000

    Why larger absolute amount:

    • Lifestyle expenses are higher
    • Replacement job may be harder to find
    • May have expensive obligations
    • More to lose in emergency

    Building strategy:

    • Should be able to build quickly

    now 4


    claude-sonnet-4-5-20250929

    ARTICLE #3: Zero-Based Budgeting Explained

    Meta Information

    Meta Title: Zero-Based Budgeting: Complete Guide to Manage Every Dollar in 2024

    Meta Description: Master zero-based budgeting with our step-by-step guide. Learn how to allocate every dollar, eliminate waste, and build wealth faster with this powerful budgeting method.

    Primary Keyword: Zero-based budgeting

    Secondary Keywords:

    • Zero-based budget method
    • How to do zero-based budgeting
    • Zero-based budgeting for beginners
    • Monthly zero-based budget
    • Zero-sum budgeting
    • Every dollar budget method

    URL Slug: /zero-based-budgeting-guide-every-dollar

    Article Category: Savings & Budgeting (Cluster 4)


  • Zero-Based Budgeting Explained: Take Control of Every Dollar

    Zero-Based Budgeting Explained: Take Control of Every Dollar

    Table of Contents

    1. Introduction
    2. What is Zero-Based Budgeting?
    3. How Zero-Based Budgeting Works
    4. Zero-Based Budget vs Traditional Budgeting
    5. Benefits of Zero-Based Budgeting
    6. Step-by-Step Guide to Creating Your Zero-Based Budget
    7. Zero-Based Budgeting Categories to Include
    8. Common Challenges and How to Overcome Them
    9. Best Tools and Apps for Zero-Based Budgeting
    10. Real-Life Zero-Based Budget Examples
    11. Frequently Asked Questions
    12. Conclusion

    Introduction {#introduction}

    Do you ever reach the end of the month wondering where all your money went? You’re not alone. According to a 2024 survey by the National Foundation for Credit Counseling, 64% of Americans don’t know where their money goes each month. This financial fog can keep you stuck in a cycle of paycheck-to-paycheck living, preventing you from building the wealth you deserve.

    Enter zero-based budgeting—a powerful money management method that gives every single dollar a job before the month even begins.

    Unlike traditional budgeting methods that leave room for ambiguity, zero-based budgeting ensures that your income minus your expenses equals exactly zero. This doesn’t mean you spend everything—it means you’ve intentionally allocated every dollar to a specific purpose, including savings and investments.

    In this comprehensive guide, you’ll discover everything you need to know about zero-based budgeting, from the fundamental principles to practical implementation strategies. Whether you’re struggling to save money, trying to pay off debt, or simply want more control over your finances, this budgeting method could be the game-changer you’ve been looking for.

    By the end of this article, you’ll have the knowledge and tools to create your first zero-based budget and start your journey toward complete financial control.


    What is Zero-Based Budgeting?

    Zero-based budgeting (ZBB) is a budgeting method where you allocate every dollar of your income to specific expense categories, savings, or debt payments until you reach zero. The fundamental equation is simple:
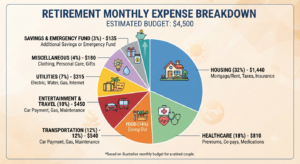
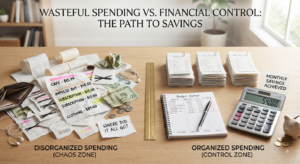
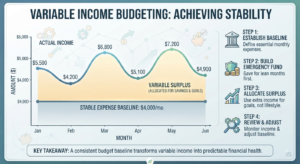
    Income – Expenses – Savings – Debt Payments = $0

    This doesn’t mean you have zero dollars left in your bank account. Instead, it means that before the month begins, you’ve given every dollar a specific assignment. Nothing is left unaccounted for or available for mindless spending.

    The Core Principle

    Traditional budgeting often follows this pattern:

    • Earn money
    • Pay bills
    • Spend what’s left
    • Maybe save something at the end

    Zero-based budgeting flips this model:

    • Know exactly how much you’ll earn
    • Assign every dollar to a specific purpose (including savings)
    • Execute your plan
    • Adjust as needed throughout the month

    Origins of Zero-Based Budgeting

    While popularized in personal finance circles by financial expert Dave Ramsey and the team at YNAB (You Need A Budget), zero-based budgeting actually originated in the corporate world. Texas Instruments developed this method in the 1970s, and it was later adopted by major corporations and government agencies to eliminate wasteful spending.

    The beauty of this system is that it works just as effectively for household finances as it does for billion-dollar corporations.

    Who Should Use Zero-Based Budgeting?

    This budgeting method is particularly effective for:

    Variable Income Earners

    • Freelancers
    • Commission-based salespeople
    • Small business owners
    • Gig economy workers

    People Struggling with Overspending
    If you constantly find yourself wondering where your money went, ZBB provides clarity and control.

    Aggressive Debt Payers
    When every dollar has a job, you can maximize debt payments while still covering all necessities.

    Wealth Builders
    People serious about building wealth use ZBB to ensure saving and investing happen first, not last.

    Financial Turnaround Seekers
    If you’re trying to get your finances back on track after a setback, ZBB gives you the structure you need.


    How Zero-Based Budgeting Works {#how-it-works}

    Let’s break down the mechanics of zero-based budgeting with a practical approach that anyone can follow.

    The Basic Formula

    Here’s a simplified example:

    Monthly Income: $4,500

    Allocations:

    • Housing: $1,200
    • Utilities: $200
    • Groceries: $500
    • Transportation: $400
    • Insurance: $300
    • Debt Payments: $600
    • Savings: $450
    • Personal Spending: $300
    • Entertainment: $150
    • Miscellaneous: $200
    • Emergency Fund: $200

    Total Allocated: $4,500

    Income – Allocations = $4,500 – $4,500 = $0 ✓

    Notice that the equation reaches zero, but you’ve allocated $650 toward savings and building wealth ($450 + $200 emergency fund).

    The Monthly Cycle

    Zero-based budgeting operates on a monthly cycle:

    Before Month Starts (Days 25-30 of Previous Month):

    1. Project your income for the upcoming month
    2. List all known expenses
    3. Allocate remaining dollars to variable categories
    4. Ensure total allocations equal total income
    5. Review and finalize budget

    During the Month (Days 1-28/30/31):

    1. Track all spending against budgeted amounts
    2. Adjust categories as needed (staying at zero)
    3. Make spending decisions based on remaining category funds
    4. Document any unexpected expenses

    End of Month (Last 2-3 Days):

    1. Review actual vs. budgeted spending
    2. Identify areas of overspending or underspending
    3. Learn from patterns
    4. Prepare for next month’s budget with insights gained

    Key Principles That Make It Work

    1. Intentionality
    Every dollar is assigned a purpose before you spend it. This prevents impulse purchases and mindless spending.

    2. Flexibility Within Structure
    While you plan before the month, you can adjust categories mid-month—as long as the total still equals zero.

    3. Prioritization
    You must decide what’s most important because you can’t allocate more than you earn.

    4. Accountability
    The system forces you to confront exactly how you’re using your money.

    5. Proactive Planning
    You make spending decisions in advance when you’re thinking clearly, not in the moment when emotions might override logic.


    Zero-Based Budget vs Traditional Budgeting {#comparison}

    Understanding how zero-based budgeting differs from other popular methods helps you appreciate its unique advantages.

    Zero-Based Budget vs. Traditional Budget

    Traditional Budgeting Approach:

    • Set spending limits for categories
    • Track expenses throughout month
    • Whatever’s left over gets saved (maybe)
    • Often leaves “unassigned” money
    • Focuses on not overspending

    Zero-Based Budgeting Approach:

    • Assign every dollar before month begins
    • Savings happens first (not last)
    • No unassigned money exists
    • Zero balance by design
    • Focuses on intentional allocation

    Key Difference: Traditional budgeting asks “How much can I spend?” Zero-based budgeting asks “What job should every dollar perform?”

    Zero-Based Budget vs. 50/30/20 Budget

    The 50/30/20 rule suggests:

    • 50% for needs
    • 30% for wants
    • 20% for savings and debt

    Comparison:

    Aspect Zero-Based 50/30/20
    Specificity Exact dollar assignments Percentage ranges
    Flexibility High (adjust categories) Moderate
    Complexity Medium Low
    Effectiveness for debt payoff Excellent Good
    Best for Detail-oriented people Budgeting beginners

    Internal Link: Want to compare budgeting methods? Read our “Complete Guide to Budgeting: Build Wealth on Any Income”

    Zero-Based Budget vs. Envelope System

    The envelope system involves putting cash for each category into physical envelopes.

    Similarities:

    • Both assign specific amounts to categories
    • Both prevent overspending
    • Both require planning ahead

    Differences:

    • Zero-based budgeting can be digital or paper
    • Envelope system requires using cash
    • ZBB handles all transactions; envelopes typically only for variable expenses

    Internal Link: Learn more about cash-based systems in our article “Envelope Budgeting System: Cash-Based Money Management That Works”

    Which Method is Best?

    There’s no universal “best” budgeting method—only the best method for YOU. Zero-based budgeting excels when:

    ✓ You want maximum control over your money
    ✓ You’re paying off debt aggressively
    ✓ You have variable income that changes monthly
    ✓ You’ve struggled with traditional budgeting
    ✓ You’re detail-oriented and enjoy tracking
    ✓ You want to maximize savings and investing


    Benefits of Zero-Based Budgeting {#benefits}

    The zero-based budgeting method offers numerous advantages that can transform your financial life.

    1. Complete Financial Awareness

    Before Zero-Based Budgeting:
    “I think we spend about $600 on groceries… maybe $700? I’m not really sure.”

    After Zero-Based Budgeting:
    “We budgeted $550 for groceries this month and have $127 remaining with one week to go.”

    This level of awareness is powerful. A 2023 study published in the Journal of Consumer Research found that people who knew exactly how much remained in specific budget categories were 67% less likely to overspend.

    2. Eliminates Wasteful Spending

    When you must justify every dollar’s purpose before the month begins, wasteful spending becomes obvious. Common areas where people discover waste include:

    • Unused subscriptions ($20-$200/month average)
    • Duplicate services
    • Convenience purchases
    • Forgotten automatic charges
    • “Just because” shopping

    According to research by West Monroe Partners, the average American wastes $348 per month on unused subscriptions and services. Zero-based budgeting helps you identify and eliminate these money drains.

    3. Accelerates Debt Payoff

    Zero-based budgeting is incredibly effective for debt elimination because:

    Maximizes Debt Payments
    After covering necessities, you can see exactly how much extra money you can direct toward debt.

    Prevents New Debt
    You can’t spend money you’ve already assigned to another category.

    Creates Motivation
    Watching your debt allocation shrink month by month provides psychological wins.

    Real Example:
    Sarah, a teacher from Ohio, used zero-based budgeting to pay off $43,000 in student loans in 33 months instead of the planned 10 years. By allocating every dollar intentionally, she found an extra $1,100 per month for debt payments—money that had previously “disappeared” into untracked spending.

    4. Increases Savings Rate

    Statistical Impact:

    • Traditional budgeters save an average of 3-5% of income
    • Zero-based budgeters save an average of 15-25% of income
    • The difference: intentionality and pre-allocation

    When you pay yourself first by allocating to savings before you assign spending money, saving becomes automatic rather than aspirational.

    5. Reduces Financial Stress and Anxiety

    Financial psychologist Dr. Brad Klontz notes: “Financial stress often stems from uncertainty, not from actual lack of money. When people know exactly where they stand financially, anxiety decreases significantly.”

    Zero-based budgeting provides:

    • Clear spending boundaries
    • Predictable financial outcomes
    • Confidence in financial decisions
    • Reduced money-related arguments in relationships

    6. Enables Better Financial Goal Achievement

    Whether your goal is:

    • Building a 6-month emergency fund
    • Saving for a home down payment
    • Funding a dream vacation
    • Starting a business
    • Retiring early

    Zero-based budgeting lets you assign specific dollar amounts toward these goals each month, turning vague wishes into concrete progress.

    7. Works with Variable Income

    This is where zero-based budgeting truly shines. If your income varies month to month:

    Month 1 Income: $3,500

    • Cover necessities first
    • Allocate rest to priorities
    • Total allocated: $3,500

    Month 2 Income: $5,200

    • Cover same necessities
    • Allocate extra to savings/debt/goals
    • Total allocated: $5,200

    You create a new budget each month based on actual income, ensuring you never spend more than you earn while maximizing high-income months.

    8. Prevents “Lifestyle Creep”

    Lifestyle creep (or lifestyle inflation) happens when your spending rises proportionally with your income, preventing wealth building.

    Zero-based budgeting combats this by forcing you to intentionally decide what to do with extra income rather than automatically spending it.

    Example:
    You get a $500/month raise. With ZBB, you must decide: Will this $500 go to retirement, debt payoff, vacation fund, or lifestyle upgrades? The decision is conscious, not automatic.


    Step-by-Step Guide to Creating Your Zero-Based Budget {#step-by-step}

    Ready to create your first zero-based budget? Follow this detailed, actionable process.

    Step 1: Determine Your Monthly Income

    For Fixed Income Earners:
    Simply use your consistent monthly take-home pay (after taxes and deductions).

    Example: $4,200/month after taxes

    For Variable Income Earners:

    Option A: Conservative Estimate
    Use your lowest monthly income from the past 6 months. Any extra becomes “extra money” to allocate.

    Option B: Average Method
    Calculate average income from previous 3-6 months.

    Option C: Last Month’s Actual
    Budget based on what you actually earned last month.

    Multiple Income Sources:
    Add together:

    • Primary job(s)
    • Side hustles
    • Investment income
    • Any other regular income

    Important: Only include income you’re certain you’ll receive. Don’t budget money you hope to make.

    Step 2: List All Fixed Expenses

    Fixed expenses are the same amount each month and include:

    Housing:

    • Rent or mortgage
    • HOA fees
    • Property taxes (if not in mortgage)

    Utilities:

    • Some utilities are fixed (internet, phone)
    • Others vary but you can use averages

    Insurance:

    • Health insurance
    • Auto insurance
    • Life insurance
    • Renters/homeowners insurance

    Debt Payments:

    • Minimum credit card payments
    • Student loan payments
    • Car payments
    • Personal loan payments

    Subscriptions:

    • Streaming services
    • Software subscriptions
    • Gym memberships
    • Other monthly subscriptions

    Pro Tip: Review bank statements from the past 2-3 months to ensure you don’t miss any automatic payments.

    Step 3: Budget for Variable Expenses

    Variable expenses change from month to month:

    Food:

    • Groceries
    • Dining out
    • Coffee shops
    • Work lunches

    Transportation:

    • Gas
    • Public transportation
    • Parking
    • Vehicle maintenance
    • Rideshares

    Personal Care:

    • Haircuts
    • Toiletries
    • Clothing
    • Dry cleaning

    Healthcare:

    • Copays
    • Medications
    • Medical appointments

    Entertainment:

    • Movies
    • Concerts
    • Hobbies
    • Events

    Household:

    • Cleaning supplies
    • Home maintenance
    • Household items

    For variable categories:

    1. Check spending from last 2-3 months
    2. Calculate average
    3. Budget that amount
    4. Adjust up or down based on this month’s specific needs

    Step 4: Include Periodic Expenses

    Periodic expenses don’t occur monthly but you should budget for them monthly:

    Common periodic expenses:

    • Annual insurance premiums
    • Car registration
    • Holiday gifts
    • Birthday gifts
    • Annual subscriptions
    • Property taxes
    • HOA fees (if not monthly)
    • Vehicle maintenance
    • Medical deductibles
    • Vacation

    How to budget for periodic expenses:

    Example: Car Insurance

    • Annual premium: $1,200
    • Monthly allocation: $1,200 ÷ 12 = $100

    Set aside $100 each month in a separate savings category. When the bill comes due, the money is already there.

    Gift Budget Example:

    • Estimate annual gift spending: $1,500
    • Monthly allocation: $1,500 ÷ 12 = $125

    This prevents the December budget panic when holiday shopping hits.

    Internal Link: For more ways to save on common expenses, check out “How to Save Money Fast: 50+ Proven Ways to Cut Expenses”

    Step 5: Allocate to Savings Goals

    Now comes the exciting part—allocating money toward your financial goals:

    Emergency Fund
    If you don’t have 3-6 months of expenses saved, this should be a top priority.

    Internal Link: Learn exactly how much you need in our “Emergency Fund Guide: How Much to Save and Where to Keep It”

    Retirement

    • 401(k) contributions (often deducted pre-budget)
    • IRA contributions
    • Other retirement savings

    Short-term Goals (0-2 years):

    • Vacation fund
    • Vehicle down payment
    • Wedding
    • Home improvements

    Medium-term Goals (2-5 years):

    • Home down payment
    • Start a business
    • Career transition fund

    Long-term Goals (5+ years):

    • Children’s education
    • Early retirement
    • Rental property

    Recommended minimum allocation: 20% of income to savings/goals, but adjust based on your situation.

    Step 6: Assign Remaining Dollars

    After covering expenses and savings, assign any remaining money to:

    Option 1: Extra Debt Payment
    Accelerate your debt-free journey.

    Option 2: Additional Savings
    Boost emergency fund or other savings goals.

    Option 3: Specific Purpose
    Create a category for something specific you want or need.

    Option 4: Fun Money
    Personal spending without guilt.

    The key is that every dollar gets assigned. Nothing remains “unallocated.”

    Step 7: Review and Balance to Zero

    Your budget equation should look like this:

    text


    Total Income:                    $4,500
    
    Fixed Expenses:                  $2,100
    Variable Expenses:               $1,200
    Periodic Expenses (monthly):       $300
    Savings/Goals:                     $600
    Debt Extra Payment:                $300
                                    -------
    Total Allocated:                 $4,500
    
    Income - Allocated = $4,500 - $4,500 = $0 ✓

    If your number doesn’t equal zero:

    Positive number (money left over):
    Assign it to a category until you reach zero.

    Negative number (allocated more than income):
    Cut expenses or adjust allocations until you reach zero.

    Step 8: Track Throughout the Month

    Your budget is only effective if you track actual spending against it:
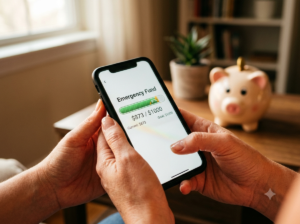
    Daily or Weekly:

    • Record all transactions
    • Update category balances
    • Check remaining amounts before purchases

    Best Tracking Methods:

    • Budgeting apps (YNAB, EveryDollar, Mint)
    • Spreadsheets (Google Sheets, Excel)
    • Paper budget planner
    • Hybrid (app + weekly paper review)

    Important Rule: Before making a purchase, check if money remains in that category. If not, you either:

    1. Don’t make the purchase
    2. Move money from another category (keeping total at zero)

    Step 9: Adjust as Needed

    Life doesn’t always follow your budget perfectly. Unexpected expenses happen:

    How to handle budget-busters:

    Option 1: Use buffer category
    Create a “Miscellaneous” or “Buffer” category with $100-200 for small unexpected items.

    Option 2: Move money between categories
    If car repair costs $300 and you budgeted $100:

    • Take $200 from another category (dining out, entertainment, etc.)
    • Keep total at zero

    Option 3: Use emergency fund
    For true emergencies only (job loss, medical emergency, urgent home/car repair).

    The golden rule: You can adjust categories mid-month, but income minus all allocations must still equal zero.

    Step 10: Review and Improve for Next Month

    Last few days of the month:

    Review questions:

    1. Which categories were spot-on?
    2. Where did we overspend?
    3. Where did we underspend?
    4. What unexpected expenses occurred?
    5. What can we do better next month?

    Use insights to improve:

    • Adjust category amounts for next month
    • Add new categories if needed
    • Remove unused categories
    • Refine your budget based on reality

    The first month won’t be perfect—and that’s okay. Most people need 3-4 months to dial in their zero-based budget. Each month gets easier and more accurate.


    Zero-Based Budgeting Categories to Include {#categories}

    A comprehensive zero-based budget includes all areas where money flows out. Here’s a detailed category structure:

    Housing & Utilities

    • Rent/Mortgage
    • Property tax (if not in mortgage)
    • HOA fees
    • Home insurance (if not in mortgage)
    • Electricity
    • Gas/Heating
    • Water/Sewer
    • Trash service
    • Internet
    • Cable/Streaming
    • Home phone (if applicable)
    • Home maintenance/repairs
    • Lawn care/Snow removal

    Transportation

    • Car payment(s)
    • Auto insurance
    • Gas/Fuel
    • Oil changes
    • Car maintenance/repairs
    • Car registration
    • Public transportation
    • Parking fees
    • Tolls
    • Rideshare (Uber/Lyft)

    Food

    • Groceries
    • Restaurants/Dining out
    • Coffee shops
    • Work lunches
    • Food delivery
    • Meal kit services

    Personal & Healthcare

    • Health insurance (if not payroll deducted)
    • Medical copays
    • Prescriptions
    • Dental care
    • Vision care
    • Gym membership
    • Haircuts/Salon
    • Toiletries
    • Cosmetics
    • Clothing
    • Shoes
    • Dry cleaning/Laundry

    Insurance

    • Life insurance
    • Disability insurance
    • Umbrella policy
    • Pet insurance
    • Any other insurance

    Debt Payments

    • Credit card minimums
    • Student loan payments
    • Personal loan payments
    • Medical debt payments
    • Any other debt
    • Extra debt payment (snowball/avalanche)

    Children/Pets (if applicable)

    • Childcare/Daycare
    • School tuition
    • School supplies
    • Children’s activities
    • Child support/Alimony
    • Pet food
    • Vet visits
    • Pet grooming
    • Pet supplies

    Entertainment & Recreation

    • Subscriptions (Netflix, Spotify, etc.)
    • Movies/Concerts
    • Hobbies
    • Sports/Activities
    • Books/Magazines
    • Gaming
    • Events/Experiences

    Giving & Donations

    • Charitable giving
    • Tithing/Religious offerings
    • Gifts (birthday, holiday)
    • Cards

    Savings & Investments

    • Emergency fund
    • Retirement (401k, IRA)
    • General savings
    • House down payment
    • Vacation fund
    • Vehicle replacement fund
    • Wedding fund
    • Education savings
    • Investment account contributions

    Miscellaneous/Buffer

    • Personal spending money (his)
    • Personal spending money (hers)
    • Miscellaneous/Buffer
    • Bank fees
    • Postage
    • Professional dues
    • Computer/Technology

    Periodic Expenses (Monthly Allocation)

    • Annual subscriptions
    • Amazon Prime
    • Costco membership
    • Professional licenses
    • Vehicle registration
    • Property taxes
    • Homeowner’s insurance
    • Vacation/Travel
    • Holiday gifts
    • Home repairs
    • Vehicle maintenance

    Customization is Key: Not every category applies to everyone. Create categories that reflect YOUR actual spending patterns.


    Common Challenges and How to Overcome Them {#challenges}

    Even the best budgeting method comes with challenges. Here’s how to overcome the most common obstacles.

    Challenge #1: The First Month is Overwhelming

    The Problem:
    Creating your first zero-based budget takes time and mental energy. You might feel overwhelmed by all the categories, calculations, and decisions.

    The Solution:

    Start Simple:

    • Week 1: Just track spending without budgeting
    • Week 2: Create basic categories (housing, food, transportation, savings)
    • Week 3: Add more detailed categories
    • Week 4: Refine and adjust

    Use Templates:
    Download zero-based budget templates to start with pre-made categories.

    Give Yourself Grace:
    Your first budget won’t be perfect. Expect to adjust significantly in months 2 and 3.

    Time Investment:

    • First budget: 2-4 hours
    • Second month: 1-2 hours
    • Third month onward: 30-60 minutes

    Challenge #2: Variable Income Makes Planning Difficult

    The Problem:
    If your income varies significantly month to month, creating a budget before the month begins feels impossible.

    The Solution:

    Strategy 1: Budget to Your Minimum
    Use your lowest monthly income from the past 6 months as your budget baseline. Anything above that becomes “extra” to allocate to priorities.

    Strategy 2: Priority-Based Budgeting
    Create a prioritized list:

    1. Housing
    2. Utilities
    3. Food
    4. Transportation
    5. Insurance
    6. Minimum debt payments
    7. Basic necessities
    8. Emergency fund
    9. Extra debt payment
    10. Savings goals
    11. Discretionary spending

    Budget in priority order. If you earn less than expected, you know exactly what to cut (from the bottom up).

    Strategy 3: Two-Budget System

    • Create a “minimum budget” for low-income months
    • Create a “full budget” for normal months
    • Use whichever applies based on actual income

    Challenge #3: Unexpected Expenses Break the Budget

    The Problem:
    The car needs a $600 repair, but you only budgeted $100 for car maintenance this month.

    The Solution:

    Prevention:
    Build a realistic “Miscellaneous” or “Buffer” category ($100-300/month) for smaller unexpected items.

    Create sinking funds for predictable irregular expenses:

    • Car maintenance: $100/month
    • Medical expenses: $75/month
    • Home repairs: $100/month

    When Unexpected Expenses Hit:

    Option 1: Adjust Other Categories
    Move money from flexible categories (entertainment, dining out, personal spending) to cover the emergency.

    Example:

    • Car repair needed: $600
    • Budgeted: $100
    • Need: $500 more
    • Take $200 from dining out
    • Take $150 from entertainment
    • Take $100 from clothing
    • Take $50 from miscellaneous

    Option 2: Use Emergency Fund
    For true emergencies, this is exactly what your emergency fund is for. Use it, then rebuild it.

    Option 3: Split Across Months
    If possible, pay part now and part next month (though be cautious with this approach).

    Challenge #4: Budget Doesn’t Match Reality

    The Problem:
    You keep going over in certain categories no matter how carefully you plan.

    The Solution:

    Track First, Then Budget:
    If your grocery budget never works:

    1. Track actual spending for 2-3 months
    2. Calculate real average
    3. Budget that amount (not wishful thinking)

    Face Reality:
    Your budget should reflect reality, not punishment. If you realistically spend $600 on groceries, budget $600 (then look for ways to reduce if desired).

    Adjust Other Areas:
    If groceries need more, reduce in areas that matter less to you.

    One Category at a Time:
    Don’t try to cut spending in every category simultaneously. Focus on one area per month.

    Challenge #5: Partner Doesn’t Want to Budget

    The Problem:
    You’re excited about zero-based budgeting, but your partner sees it as restrictive or controlling.

    The Solution:

    Reframe the Conversation:

    • Don’t present it as restriction—present it as achieving shared goals faster
    • Focus on what you both WANT (vacation, new car, financial security)
    • Show how budgeting helps you get there

    Include Personal Spending:
    Budget “fun money” for each partner—no questions asked about how it’s spent. This preserves autonomy within the structure.

    Start with Small Wins:
    Begin with one or two categories you both agree need work, not a complete financial overhaul.

    Make It Collaborative:

    • Schedule monthly “budget dates” (with wine/coffee)
    • Ask for input on categories and amounts
    • Share decision-making equally
    • Celebrate progress together

    Lead by Example:
    If your partner isn’t ready, start budgeting your portion of shared expenses. Results often speak louder than words.

    Challenge #6: Keeping Up with Tracking

    The Problem:
    You start strong but lose steam mid-month. Transactions pile up unrecorded.

    The Solution:

    Daily Micro-Habits:

    • Record transactions immediately (in line at store, in car after shopping)
    • Set phone reminder: “Log spending” at 8 PM daily
    • Make it take less than 2 minutes

    Automate What You Can:

    • Link bank accounts to budgeting app
    • Use apps that auto-categorize transactions
    • Review and adjust rather than manual entry

    Weekly Money Dates:
    Set a recurring 15-minute appointment with yourself to review the week’s spending.

    Simplify Categories:
    If you have too many categories, consolidate. Better to track 10 categories consistently than 30 sporadically.

    Accountability Partner:
    Share weekly updates with a friend also budgeting, or join online budgeting communities.

    Challenge #7: Feeling Restricted or Deprived

    The Problem:
    The budget feels like a financial diet—restrictive and joyless.

    The Solution:

    Mindset Shift:
    A budget isn’t a restriction—it’s permission to spend on what you’ve deemed important.

    Build in Fun:

    • Always include entertainment category
    • Budget for small luxuries that matter to you
    • Don’t cut everything you enjoy

    Focus on Values:
    You’re not restricting spending—you’re aligning spending with what you truly value.

    Example:
    Instead of “I can’t afford to eat out,” try “I’m choosing to allocate this money to my vacation fund because travel matters more to me than restaurant meals.”

    Celebrate Wins:
    When you reach a savings milestone or pay off a debt, celebrate (within budget)!

    Freedom Through Boundaries:
    Paradoxically, having spending boundaries creates freedom because you know exactly what you can spend guilt-free.


    Best Tools and Apps for Zero-Based Budgeting {#tools}

    The right tool makes zero-based budgeting significantly easier. Here are the top options:

    Digital Apps

    1. YNAB (You Need A Budget)

    Best for: Serious budgeters committed to the zero-based method

    Features:

    • Built specifically for zero-based budgeting
    • “Give every dollar a job” philosophy
    • Real-time syncing across devices
    • Goal tracking
    • Detailed reports
    • Educational resources

    Pros:

    • Gold standard for zero-based budgeting
    • Excellent mobile app
    • Strong community support
    • Regular updates and improvements

    Cons:

    • Subscription cost: $14.99/month or $99/year
    • Steeper learning curve
    • May be overkill for simple budgets

    Best for: People serious about budgeting who want sophisticated features


    2. EveryDollar

    Best for: Dave Ramsey followers and budgeting beginners

    Features:

    • Clean, simple interface
    • Free version available
    • Zero-based budgeting methodology
    • Bank connection (paid version)
    • Debt payoff tracking

    Pros:

    • Very intuitive and easy to learn
    • Free version is functional
    • Great for beginners
    • Aligns with Baby Steps method

    Cons:

    • Free version requires manual entry
    • Paid version needed for bank syncing ($79.99/year)
    • Fewer features than YNAB

    Best for: Budgeting newcomers or those following Dave Ramsey’s plan


    3. Goodbudget

    Best for: Envelope budgeting fans who want digital version

    Features:

    • Digital envelope system
    • Zero-based approach
    • Syncs across devices
    • Debt tracking
    • Free version available

    Pros:

    • Free version includes 10 envelopes
    • No bank connection required (privacy benefit)
    • Great for couples (syncs across devices)
    • Simple envelope concept

    Cons:

    • Manual transaction entry
    • Limited envelopes on free version
    • Less sophisticated than YNAB

    Best for: People who like the envelope concept but want digital convenience


    4. Mint

    Best for: People wanting free automatic tracking (can be adapted for ZBB)

    Features:

    • Completely free
    • Automatic transaction import
    • Budget creation
    • Bill tracking
    • Credit score monitoring

    Pros:

    • Free forever
    • Easy setup
    • Automatic categorization
    • Comprehensive financial overview

    Cons:

    • Not specifically designed for zero-based budgeting
    • Ads and product recommendations
    • Less control than dedicated ZBB apps

    Best for: Budget-conscious users who want free, automated tracking


    Spreadsheet Templates

    Google Sheets/Excel Options:

    Pros:

    • Completely customizable
    • Free (if using Google Sheets)
    • Full control over categories and format
    • Can create your perfect system

    Cons:

    • Requires setup time
    • Manual entry and calculation
    • No automatic bank sync
    • No mobile app (unless using Google Sheets)

    Where to find templates:

    • Vertex42.com (free Excel templates)
    • Google Sheets template gallery
    • Personal finance blogs
    • Create your own from scratch

    Paper-Based Systems

    Best for: Tactile learners who process better with pen and paper

    Options:

    • Budget Mom’s Budget By Paycheck workbook
    • Clever Fox Budget Planner
    • DIY bullet journal budget
    • Printable templates

    Pros:

    • No screen time required
    • Concrete, tangible tracking
    • Customizable to your style
    • Studies show writing aids retention

    Cons:

    • No automatic calculations
    • Can’t sync across devices
    • Must keep paper secure
    • Risk of loss

    Best for: People who prefer analog systems or want to reduce screen time


    Real-Life Zero-Based Budget Examples {#examples}

    Seeing real budgets helps clarify how zero-based budgeting works in practice. Here are three detailed examples:

    Example 1: Single Person, Entry-Level Income

    Monthly Take-Home Income: $2,800

    HOUSING & UTILITIES

    • Rent: $800
    • Renters insurance: $15
    • Electricity: $60
    • Internet: $50
      Subtotal: $925

    TRANSPORTATION

    • Car payment: $250
    • Auto insurance: $120
    • Gas: $150
    • Car maintenance fund: $50
      Subtotal: $570

    FOOD

    • Groceries: $280
    • Restaurants/Eating out: $100
      Subtotal: $380

    PERSONAL & HEALTH

    • Health insurance: $150 (after employer contribution)
    • Gym membership: $30
    • Haircuts: $25
    • Toiletries/Personal care: $40
    • Clothing: $50
      Subtotal: $295

    DEBT PAYMENTS

    • Student loan minimum: $180
    • Credit card minimum: $50
    • Extra debt payment: $100
      Subtotal: $330

    SAVINGS

    • Emergency fund: $100
    • Retirement (Roth IRA): $100
      Subtotal: $200

    ENTERTAINMENT & MISC

    • Subscriptions (Netflix, Spotify): $25
    • Entertainment/Fun: $50
    • Personal spending money: $40
    • Miscellaneous/Buffer: $35
      Subtotal: $150

    PERIODIC EXPENSES (Monthly Allocation)

    • Annual expenses fund: $50
      Subtotal: $50

    TOTAL ALLOCATED: $2,900

    Wait—that’s $100 over budget!

    Adjustments needed:

    • Reduce eating out to $75 (-$25)
    • Reduce entertainment to $35 (-$15)
    • Reduce clothing to $30 (-$20)
    • Reduce personal spending to $25 (-$15)
    • Reduce extra debt payment to $65 (-$35)

    ADJUSTED TOTAL: $2,800
    Income – Expenses = $2,800 – $2,800 = $0 ✓


    Example 2: Married Couple with Children

    Monthly Combined Take-Home Income: $6,500

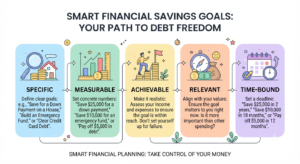
    HOUSING & UTILITIES

    • Mortgage: $1,400
    • Property tax: $250
    • Homeowners insurance: $100
    • HOA fees: $75
    • Electricity: $140
    • Gas/Heating: $80
    • Water/Sewer: $60
    • Trash: $25
    • Internet: $70
    • Streaming services: $35
      Subtotal: $2,235

    TRANSPORTATION

    • Car payment 1: $320
    • Car payment 2: $0 (paid off)
    • Auto insurance (2 cars): $180
    • Gas (combined): $300
    • Car maintenance fund: $150
      Subtotal: $950

    FOOD

    • Groceries: $750
    • Restaurants/Date nights: $150
      Subtotal: $900

    CHILDREN

    • Daycare: $800
    • Kids’ activities: $100
    • School supplies/fees: $40
    • Children’s clothing: $80
      Subtotal: $1,020

    PERSONAL & HEALTH

    • Health insurance: $300 (family plan, after employer)
    • Medical copays/prescriptions: $100
    • Gym membership: $45
    • Haircuts (family): $60
    • Toiletries/Personal care: $80
    • Adult clothing: $70
      Subtotal: $655

    DEBT PAYMENTS

    • Credit card minimum: $75
    • Student loan payment: $250
    • Extra debt payment: $200
      Subtotal: $525

    SAVINGS & INVESTMENTS

    • Emergency fund: $200
    • Retirement (401k already deducted from paycheck)
    • Kids’ college fund: $150
    • House repair fund: $100
    • Vacation fund: $150
      Subtotal: $600

    INSURANCE

    • Life insurance (2 policies): $80
      Subtotal: $80

    ENTERTAINMENT & MISC

    • Entertainment/Family fun: $100
    • Hobbies: $50
    • His personal spending: $75
    • Her personal spending: $75
    • Miscellaneous/Buffer: $100
      Subtotal: $400

    GIVING

    • Charitable giving/Tithing: $100
    • Gifts (birthdays, holidays): $35
      Subtotal: $135

    TOTAL ALLOCATED: $6,500
    Income – Expenses = $6,500 – $6,500 = $0 ✓

    Notes on this budget:

    • 401(k) contributions already deducted from paycheck (additional $500/month)
    • Effective savings rate: 23% ($600 + $500 retirement + $200 debt extra = $1,300)
    • Emergency fund target: $20,000 (reached in Month 3, now contributing to other goals)

    Example 3: Freelancer with Variable Income

    This Month’s Projected Income: $4,200
    (Last month was $5,800; month before was $3,400)

    Strategy: Budget based on lowest recent income ($3,400), then allocate extra.

    ESSENTIAL BUDGET (Based on $3,400 minimum)

    HOUSING & UTILITIES

    • Rent: $950
    • Renters insurance: $18
    • Electricity: $70
    • Internet (business expense): $80
      Subtotal: $1,118

    TRANSPORTATION

    • Car payment: $0 (paid off)
    • Auto insurance: $110
    • Gas: $120
    • Car maintenance fund: $80
      Subtotal: $310

    FOOD

    • Groceries: $350
    • Eating out: $80
      Subtotal: $430

    BUSINESS EXPENSES

    • Software subscriptions: $85
    • Professional development: $50
    • Business supplies: $40
    • Quarterly tax savings (1/3 of income): $1,133
      Subtotal: $1,308

    PERSONAL & HEALTH

    • Health insurance: $320 (self-employed)
    • Medical/Dental: $75
    • Gym: $35
    • Personal care: $60
      Subtotal: $490

    DEBT PAYMENTS

    • Credit card minimum: $45
      Subtotal: $45

    SAVINGS (Minimum)

    • Emergency fund: $50
    • Irregular income buffer: $100
      Subtotal: $150

    ENTERTAINMENT & MISC

    • Entertainment: $40
    • Personal spending: $50
    • Miscellaneous: $59
      Subtotal: $149

    MINIMUM BUDGET TOTAL: $3,400


    ADDITIONAL INCOME ALLOCATION ($4,200 – $3,400 = $800)

    Priority 1: Extra quarterly tax savings = $267
    Priority 2: Boost emergency fund = $200
    Priority 3: Extra debt payment = $150
    Priority 4: Retirement (IRA) = $100
    Priority 5: Vacation fund = $50
    Priority 6: Extra fun money = $33

    TOTAL ALLOCATED: $4,200
    Income – Expenses = $4,200 – $4,200 = $0 ✓

    Notes on variable income approach:

    • Essential budget covers all needs even in lowest-income month
    • Extra income gets allocated by priority
    • Irregular income buffer smooths cash flow between payments
    • Quarterly tax savings critical for self-employed (roughly 30% of gross)

    Frequently Asked Questions {#faq}

    Q: What if I can’t get to zero—I’m always in the negative?

    A: If your income minus necessary expenses equals a negative number, you have three options:

    1. Increase income (side hustle, second job, freelancing)
    2. Decrease expenses (find roommate, downsize housing, reduce discretionary spending)
    3. Both (most effective approach)

    This situation means you’re spending more than you earn—unsustainable long-term. Zero-based budgeting reveals this reality so you can address it.


    Q: How do I budget for irregular income like freelance work?

    A: Three strategies:

    1. Budget to your minimum: Use lowest monthly income from past 6 months as your baseline.

    2. Average method: Calculate 3-6 month average and budget to that.

    3. Priority-based: Create prioritized expense list and fund in order based on actual income.

    Also maintain an “irregular income buffer” category—extra savings to smooth cash flow gaps.


    Q: Can I use zero-based budgeting if I’m paid biweekly?

    A: Absolutely! Two approaches:

    Method 1: Monthly budget, track by paycheck

    • Create monthly budget totaling all income
    • Track which expenses come from which paycheck
    • Some months you’ll have 3 paychecks—allocate extra to priorities

    Method 2: Budget by paycheck

    • Create separate budget for each paycheck
    • Assign expenses to specific paycheck
    • Requires more planning but provides clarity

    Q: What’s the difference between zero-based budgeting and zero-sum budgeting?

    A: These terms are essentially synonymous. Both mean:

    • Every dollar is assigned a purpose
    • Income minus all allocations equals zero
    • Nothing is left unassigned

    Different personal finance educators use different terminology, but the concept is identical.


    Q: Do I need to use an app, or can I do this with paper and pen?

    A: You absolutely can use paper! Zero-based budgeting existed long before apps. Paper budgeting works well if you:

    • Prefer tangible tracking
    • Want to avoid screen time
    • Enjoy the act of writing
    • Process information better on paper

    The key is consistency, not the medium.


    Q: How do I handle months where income is higher than normal (bonuses, tax refunds, etc.)?

    A: Create a budget specifically for that extra money, just like you would regular income:

    Example: $2,000 bonus

    • Extra debt payment: $800
    • Emergency fund boost: $600
    • Vacation fund: $300
    • Home improvement: $200
    • Fun/Celebration: $100
      Total: $2,000 (equals zero)

    Don’t let “extra” money disappear into regular spending without a plan.


    Q: Should I include my retirement contributions in my zero-based budget?

    A: Yes! Include all money movement:

    If deducted from paycheck before you receive it:

    • Note it at top of budget
    • Budget with take-home amount
    • Example: “$5,000 gross – $500 401k – $800 taxes = $3,700 to budget”

    If you contribute from take-home pay:

    • Include as regular budget category
    • Allocate specific amount monthly
    • Treat like any other “expense”

    Q: How often should I update my budget?

    A:
    Before each month: Create next month’s budget
    Throughout month: Track spending daily or weekly
    End of month: Review and learn for next month

    Your budget is a living document. Adjust categories mid-month as needed while keeping total at zero.


    Q: What if my partner/spouse doesn’t want to budget?

    A:

    • Start by budgeting your personal portion
    • Show results over 2-3 months
    • Frame as “spending plan” not “budget”
    • Emphasize what you CAN do, not restrictions
    • Include generous “fun money” category for each person
    • Make budget meetings short and positive
    • Focus on shared goals you both want

    Often, seeing results converts skeptics better than conversations.


    Conclusion {#conclusion}

    Zero-based budgeting is more than just a financial technique—it’s a complete mindset shift about how you relate to money. By giving every single dollar a specific job before the month begins, you transform from passive money manager to intentional wealth builder.

    The core principles that make zero-based budgeting so effective:

    ✓ Complete visibility into where every dollar goes
    ✓ Intentional allocation rather than reactionary spending
    ✓ Flexibility to adjust while maintaining control
    ✓ Accountability that prevents money from “disappearing”
    ✓ Goal achievement through specific, regular allocations

    Yes, zero-based budgeting requires more effort than simply hoping things work out. The first month takes time. You’ll need to track diligently. You’ll make mistakes and adjustments.

    But the payoff is extraordinary:

    • Financial stress decreases dramatically
    • Savings increase without feeling restrictive
    • Debt disappears faster
    • Financial goals become achievable rather than aspirational
    • You gain complete confidence about your financial situation

    Remember these key implementation points:

    1. Your first budget won’t be perfect—give yourself 3-4 months to dial it in
    2. Track actual spending against your plan—the budget is only effective if you follow it
    3. Adjust as needed mid-month, but always keep the total at zero
    4. Include fun money—budgeting isn’t punishment, it’s permission
    5. Review and improve each month based on what you learn

    The difference between your current financial reality and the financial future you dream about isn’t complicated—it’s simply giving every dollar a job and following through.

    Your action steps for this week:

    1. Calculate your exact monthly take-home income
    2. List all your fixed expenses
    3. Review last month’s bank statements to identify variable spending
    4. Choose your tracking method (app, spreadsheet, or paper)
    5. Create your first zero-based budget for next month

    The journey to complete financial control begins with a single month, a single budget, and a single commitment: that every dollar you earn will have a purpose.

    You now have the knowledge. You have the tools. You have real-life examples.

    The only thing left is to take action.

    Your financial transformation starts the moment you give your first dollar a job. Make that moment now.

  • How to Save Money Fast: 50+ Proven Ways to Cut Expenses

    How to Save Money Fast: 50+ Proven Ways to Cut Expenses

    📋 Table of Contents

    1. Why Most People Struggle to Save Money
    2. Set a Clear Savings Goal First
    3. Save Money on Housing
    4. Save Money on Food & Groceries
    5. Save Money on Transportation
    6. Cut Your Monthly Bills & Subscriptions
    7. Save Money on Shopping & Clothing
    8. Save Money on Entertainment
    9. Save Money on Health & Wellness
    10. Smart Habits That Supercharge Your Savings
    11. Quick Wins — Save Money This Week
    12. Frequently Asked Questions
    13. Final Thoughts


    Why Most People Struggle to Save Money {#why-struggle}

    Let’s be honest for a second.

    Most people know they should be saving money. They’ve heard the advice a hundred times. But when Friday comes around and the paycheck lands — somehow it disappears before Sunday.

    Sound familiar?

    You’re not alone. According to a recent survey, nearly 57% of Americans can’t cover a $1,000 emergency expense from savings alone. The problem isn’t always income. Often, it’s the lack of a clear system and not knowing where the money is actually going.

    The good news? Saving money doesn’t require a massive salary, extreme sacrifice, or a finance degree. It requires awareness, a simple plan, and the right strategies — all of which you’ll find in this guide.

    Whether you want to save $500 this month or $10,000 this year, these 50+ tips are your starting point.

    💡 Before you dive in: Make sure you’ve read our Complete Guide to Budgeting: Build Wealth on Any Income — it pairs perfectly with this article and helps you put every dollar you save to work.


    Step 1 — Set a Clear Savings Goal First {#set-goal}

    Before you cut a single expense, you need to know what you’re saving for. Vague goals produce vague results. “I want to save more money” is not a plan. A plan sounds like this:

    “I want to save $3,000 in 6 months for an emergency fund by cutting $500/month from my budget.”

    How to Set a SMART Savings Goal

    Use the SMART framework:

    • Specific — Exactly how much do you want to save?
    • Measurable — How will you track it?
    • Achievable — Is it realistic given your income?
    • Relevant — Why does this goal matter to you?
    • Time-bound — What’s your deadline?

    Examples of SMART Savings Goals:

    Goal Amount Timeline Monthly Savings Needed
    Emergency Fund $2,000 4 months $500/month
    Vacation Fund $1,500 6 months $250/month
    Down Payment $20,000 2 years $833/month
    Debt Payoff $5,000 10 months $500/month

    🔗 Related: Emergency Fund Guide: How Much to Save and Where to Keep It — Learn exactly how to build your financial safety net.


    Save Money on Housing {#housing}

    Housing is the single biggest expense for most households — typically 25–35% of take-home pay. Even small changes here can free up hundreds of dollars every month.

    1. Negotiate Your Rent

    Many renters don’t realize rent is negotiable — especially if you’re a reliable, long-term tenant. Call your landlord before your lease renews and ask for a rate freeze or a small reduction. The worst they can say is no.

    2. Get a Roommate

    Splitting rent with even one roommate can cut your housing costs by 30–50%. On a $1,500/month rent, that’s $750 back in your pocket every single month — $9,000 per year.

    3. Downsize Your Living Space

    If you’re in a 3-bedroom apartment alone, do you really need all that space? Downsizing to a smaller unit can save $200–$600 per month depending on your market.

    4. House Hack

    If you own a home, consider renting out a spare room on Airbnb or to a long-term tenant. This strategy — called house hacking — can offset your entire mortgage payment.

    5. Refinance Your Mortgage

    If you’re a homeowner with a high interest rate, refinancing when rates drop can save you tens of thousands of dollars over the life of your loan. Even a 1% rate reduction on a $250,000 mortgage saves over $150 per month.

    6. Move to a Lower Cost-of-Living Area

    If remote work is an option for you, consider relocating to a city or state where the cost of living is significantly lower. Your savings rate could double without changing your income at all.


    Save Money on Food & Groceries {#food}

    Food is the second most flexible expense in most budgets — and one of the easiest places to find savings without feeling deprived.

    7. Meal Plan Every Week

    Planning your meals before grocery shopping is one of the most effective money-saving habits you can build. People who meal plan spend an average of $40–$60 less per week on groceries than those who don’t.

    Simple Meal Planning System:

    • Sunday: Plan 5–7 dinners for the week
    • Write your grocery list based ONLY on what you need
    • Never shop hungry (impulse purchases skyrocket)

    8. Buy Generic/Store Brand Products

    Store-brand products are manufactured by the same factories as name brands — they just cost 20–40% less. Switch to store brands for staples like rice, pasta, canned goods, cleaning products, and over-the-counter medications.

    9. Use Cashback & Coupon Apps

    Apps like Ibotta, Rakuten, Fetch Rewards, and Honey automatically apply coupons and give you cashback on groceries and online shopping. Some users report saving $50–$150 per month just using these apps consistently.

    10. Cook at Home More Often

    The average restaurant meal costs 5–10x more than cooking the same dish at home. If you eat out just 3 times per week at an average of $18 per meal, that’s $216/month — over $2,500/year. Cooking at home even 4 of those meals saves you around $130/month.

    11. Embrace Batch Cooking and Freezing

    Cook large quantities on weekends and freeze individual portions. This eliminates “I have nothing to eat” moments that lead to expensive takeout orders.

    12. Reduce Food Waste

    The average American household throws away $1,500 worth of food per year. Use the “first in, first out” system in your fridge, freeze items before they expire, and plan meals around what’s already in your pantry.

    13. Buy Meat in Bulk and Freeze It

    Buying family-sized packs of chicken, ground beef, or fish is almost always cheaper per pound than buying small portions. Divide and freeze immediately.

    14. Shop at Discount Grocery Stores

    Stores like Aldi, Lidl, Trader Joe’s, and local ethnic grocery markets often offer the same quality products at 20–40% lower prices than traditional supermarkets.

    15. Cancel Meal Kit Subscriptions

    Meal kit services like HelloFresh or Blue Apron cost $10–$15 per serving — far more than cooking from scratch. Cancel and use their free recipe cards online instead.

    16. Grow Your Own Herbs

    A small windowsill herb garden (basil, cilantro, mint, parsley) costs about $5 upfront and saves $3–$5 per bunch every time you’d otherwise buy fresh herbs at the store.


    Save Money on Transportation {#transport}

    After housing and food, transportation is typically the third-largest household expense. Here’s where to find savings:

    17. Refinance Your Car Loan

    If you took out a car loan at a high interest rate, refinancing could save you $50–$150 per month. Check rates at your credit union before calling your current lender.

    18. Shop Around for Car Insurance Every Year

    Loyalty rarely pays in car insurance. Rates vary wildly between companies. Use comparison tools to shop your rate every year at renewal time. Most people save $200–$600 per year just by switching.

    19. Carpool or Use Public Transportation

    Carpooling with one coworker cuts your commuting fuel costs in half. Public transit passes typically cost a fraction of what you’d pay in gas, parking, and vehicle wear-and-tear combined.

    20. Maintain Your Vehicle Properly

    Regular oil changes, tire rotations, and keeping tires properly inflated improve fuel efficiency and prevent expensive repairs down the road. A $50 oil change can prevent a $2,000 engine problem.

    21. Drive Less Aggressively

    Aggressive driving — rapid acceleration, hard braking, speeding — reduces fuel efficiency by up to 30%. Calmer driving habits directly translate to fewer trips to the gas station.

    22. Sell Your Second Car

    If your household has two cars and one rarely gets used, consider selling it. Eliminating a second car removes insurance costs, registration fees, maintenance, and gas — potentially saving $3,000–$6,000 per year.

    23. Work From Home When Possible

    Even working from home 2–3 days per week significantly reduces fuel, parking, and vehicle maintenance costs over the course of a year.


    Cut Your Monthly Bills & Subscriptions {#bills}

    This category is a goldmine for savings — especially in the age of subscription services.

    24. Audit Every Single Subscription You Pay For

    Pull up your bank and credit card statements and highlight every recurring charge. Most people find 2–5 subscriptions they forgot about or barely use. Cancel them immediately.

    Common forgotten subscriptions:

    • Streaming services (Netflix, Hulu, HBO Max, Disney+, Spotify, Apple Music)
    • Gym memberships
    • App subscriptions
    • Cloud storage plans
    • Magazine or news site subscriptions
    • Software tools

    25. Rotate Streaming Services

    You don’t need all streaming services simultaneously. Subscribe to one for 2–3 months, binge what you want, then cancel and switch to another. This alone can save $30–$60 per month.

    26. Call Your Internet Provider and Negotiate

    Internet companies routinely charge loyal customers more than new customers. Call and say you’re considering switching. They’ll often match competitor rates or offer discounts — saving $20–$40 per month without changing providers.

    27. Switch to a Budget Phone Plan

    Major carriers like Verizon and AT&T charge $60–$100+ per line. Budget carriers like Mint Mobile, Visible, and Cricket Wireless use the same towers for $15–$35 per month. Same coverage, fraction of the price.

    28. Lower Your Electricity Bill

    • Switch to LED bulbs (use 75% less energy)
    • Unplug electronics when not in use (“vampire energy” costs the average household $100–$200 per year)
    • Wash clothes in cold water
    • Use a programmable thermostat (Nest or Ecobee can save 10–15% on heating/cooling)
    • Air dry dishes instead of using the heated drying cycle

    29. Bundle Home Services

    Many providers offer discounts for bundling internet, cable, and home phone together. However, always compare bundles vs. individual services from competing providers before assuming the bundle is the best deal.

    30. Lower Your Water Bill

    • Fix leaky faucets immediately (a dripping faucet wastes ~3,000 gallons per year)
    • Take shorter showers
    • Install low-flow showerheads and faucet aerators
    • Only run dishwashers and washing machines with full loads

    Save Money on Shopping & Clothing {#shopping}

    31. Implement the 24-Hour Rule for Non-Essential Purchases

    Before buying anything that isn’t a necessity, wait 24 hours. Most impulse purchases are forgotten by the next day. This single habit can save hundreds of dollars per month.

    32. Shop Secondhand First

    ThredUp, Poshmark, Facebook Marketplace, eBay, and local thrift stores offer brand-name clothing and household items at 50–90% off retail. Many items are brand new with tags still on.

    33. Never Buy at Full Retail Price

    Almost everything goes on sale eventually. Use tools like CamelCamelCamel (tracks Amazon price history) or Honey (auto-applies coupon codes) to make sure you never overpay.

    34. Unsubscribe From Retail Email Lists

    Every promotional email is designed to trigger a purchase. Unsubscribe from stores you shop at impulsively. “Out of sight, out of mind” genuinely works for spending.

    35. Build a Capsule Wardrobe

    Instead of chasing trends, invest in 20–30 high-quality, versatile pieces that work together. This eliminates the “I have nothing to wear” cycle that drives unnecessary clothing purchases.

    36. Use Buy Nothing Groups

    Facebook “Buy Nothing” community groups are local groups where neighbors give away items they no longer need — completely free. You can furnish an entire apartment through these groups.


    Save Money on Entertainment {#entertainment}

    37. Use Your Library Card (It’s Free)

    Your local library gives you free access to:

    • Physical books, DVDs, and audiobooks
    • Libby app — free e-books and audiobooks
    • Kanopy — free movie streaming
    • Magazines, newspapers, and research databases
    • Free community events and classes

    38. Find Free Local Events

    Most cities offer free concerts, outdoor movies, festivals, museum days, and park events year-round. Check local Facebook groups, Eventbrite (filter by “free”), and your city’s official events calendar.

    39. Host a Potluck Instead of Going Out

    Instead of a $50-per-person dinner at a restaurant, organize a potluck with friends. You get the social connection for a fraction of the cost and often have more fun.

    40. Cancel the Gym and Work Out at Home

    YouTube channels like FitnessBlender, Yoga with Adriene, and Juice & Toya offer free, professional workout videos. A $30 set of resistance bands and a yoga mat can replace a $50/month gym membership.


    Save Money on Health & Wellness {#health}

    41. Use GoodRx for Prescription Medications

    GoodRx compares prescription drug prices at pharmacies near you. Many people save 60–80% on medications — sometimes more than with their own insurance co-pay.

    42. Use Telehealth Services

    For non-emergency medical consultations, telehealth apps like Teladoc or MDLive cost $0–$75 per visit — far less than an in-person urgent care visit.

    43. Review Your Health Insurance Plan Annually

    During open enrollment, compare your current plan against alternatives. Most people auto-renew without comparing — and overpay by hundreds of dollars per year.

    44. Prioritize Preventive Care

    Annual check-ups, dental cleanings, and routine screenings are typically free or low-cost with insurance — and catching problems early saves thousands in future medical bills.


    Smart Habits That Supercharge Your Savings {#habits}

    45. Automate Your Savings

    Set up an automatic transfer from your checking account to your savings account on payday. Even $50 or $100 per paycheck adds up to $1,200–$2,600 per year without any willpower required. Pay yourself first before you can spend the money.

    46. Use the 1% Challenge

    Increase your savings rate by just 1% every month. If you save 5% of your income today, save 6% next month, 7% the month after. Most people don’t even notice the difference in their lifestyle, but the compound effect over years is dramatic.

    47. Do a No-Spend Week Every Month

    Pick one week per month where you spend money on nothing except true necessities (rent, utilities, food from what’s already at home). Most people save $100–$300 during a no-spend week.

    48. Track Every Dollar You Spend

    You cannot improve what you don’t measure. Use a free budgeting app, a spreadsheet, or even a simple notebook. The act of tracking spending alone reduces it by 15–20% for most people.

    🔗 Related: Want to track every dollar perfectly? Read our Zero-Based Budgeting Explained: Take Control of Every Dollar guide to learn the most powerful budgeting method for savers.

    49. Create a “Fun Money” Budget

    Complete deprivation leads to binging. Give yourself guilt-free spending money — $50 to $100 per month — that you can spend on anything, no questions asked. This makes your budget sustainable long-term.

    50. Avoid Lifestyle Inflation

    Every time you get a raise, the temptation is to upgrade your lifestyle immediately. Instead, direct at least 50% of every raise directly into savings or investments before adjusting your spending habits.


    Quick Wins — Save Money Starting This Week {#quick-wins}

    These are things you can do right now that will put money back in your pocket within days:

    # Action Estimated Savings
    51 Cancel 2–3 unused subscriptions $20–$60/month
    52 Switch to a budget phone plan $30–$70/month
    53 Install GoodRx and check your prescriptions Up to 80% on meds
    54 Call your internet provider and negotiate $20–$40/month
    55 Meal plan and grocery shop with a list $40–$80/month
    56 Turn off lights and unplug electronics $10–$20/month
    57 Sell 5 items you don’t use on Facebook Marketplace $50–$200 one-time
    58 Move savings to a high-yield account Earn 4–5% APY
    59 Set up $100 automatic savings transfer $1,200/year
    60 Download Ibotta and Fetch Rewards $20–$60/month

    🔗 Pro Tip: Once you start saving, make sure you’re keeping that money in the right place. Read our Emergency Fund Guide: How Much to Save and Where to Keep It to learn the best accounts for your savings.


    How Much Can You Actually Save?

    Let’s put it all together with a realistic example:

    📊 Sample Monthly Savings Potential

    Category Monthly Savings
    Food & Groceries (meal plan + cook at home) $150
    Subscriptions (cancel unused, rotate streaming) $45
    Phone plan (switch to budget carrier) $50
    Internet (negotiate) $30
    Electricity (LED + habit changes) $25
    Shopping (24-hour rule + secondhand) $75
    Entertainment (library + free events) $40
    Gym (cancel + home workouts) $50
    Total Monthly Savings $465/month
    Annual Savings $5,580/year

    That’s over $5,500 per year without changing your income by a single dollar. Put that into an investment account earning 7% annually, and in 10 years you’d have over $76,000.


    Frequently Asked Questions {#faqs}

    ❓ How much money should I try to save each month?

    Financial experts recommend saving at least 20% of your take-home pay (based on the 50/30/20 rule). However, if you’re starting from zero, even saving $50 to $100 per month is a great beginning. The key is consistency — not the amount.

    ❓ What’s the fastest way to save money?

    The fastest ways to save money are: (1) audit and cancel unused subscriptions, (2) switch to a budget phone carrier, (3) negotiate your rent or cable/internet bills, and (4) meal plan and cook at home. These four steps alone can free up $200–$400 per month within days.

    ❓ How can I save money when I’m living paycheck to paycheck?

    Start small and automate. Even setting aside $25 per paycheck into a separate savings account is a meaningful step. Then focus on cutting your biggest expenses first — housing, food, and transportation. As your savings buffer grows, the paycheck-to-paycheck cycle naturally breaks.

    ❓ Should I save money or pay off debt first?

    This depends on the interest rate of your debt. A common approach: first save a small emergency fund ($500–$1,000), then aggressively pay off high-interest debt (credit cards), then return to building your full emergency fund. Check out our guide on Zero-Based Budgeting for a full strategy.

    ❓ Where should I keep money I’m saving?

    For short-term savings goals and emergency funds, keep money in a High-Yield Savings Account (HYSA) — these currently pay 4–5% APY compared to 0.01% at most traditional banks. For long-term goals (retirement, wealth building), invest in index funds. Read our Emergency Fund Guide for account recommendations.

    ❓ Is it worth saving small amounts like $5 or $10 at a time?

    Absolutely. Small, consistent savings habits build the discipline and systems that eventually allow you to save larger amounts. The habit matters more than the amount at the beginning.

    ❓ What is the 30-day savings rule?

    The 30-day rule means waiting 30 days before making any non-essential purchase. If you still want it after 30 days, you can buy it guilt-free. Most impulse buys are forgotten long before the 30 days are up, saving you significant money.


    Final Thoughts {#conclusion}

    Saving money doesn’t have to be about suffering, sacrifice, or giving up everything you enjoy. It’s about being intentional with where your money goes so that you have more control over your future.

    Here’s what to do right now:

    Your 3-Step Action Plan:

    1. ✅ This week — Audit your subscriptions, cancel 2–3 unused ones, and call your internet or phone provider to negotiate a lower rate
    2. ✅ This month — Implement meal planning, set up a $100 automatic savings transfer, and download Ibotta or Rakuten
    3. ✅ This quarter — Apply the 50/30/20 budget rule, open a high-yield savings account, and work toward your first $1,000 emergency fund

    Remember: Every dollar you save today is a dollar working for your future. Start with one or two tips from this list. Then add more as those become habits. Over time, the cumulative effect will transform your financial life.

  • Complete Guide to Budgeting: Build Wealth on Any Income

    Complete Guide to Budgeting: Build Wealth on Any Income

    A budget is the foundation of all financial success. It’s the difference between wondering where your money went and telling your money where to go. Yet despite its critical importance, over 60% of Americans don’t use a budget, operating their financial lives without a clear plan—like trying to build a house without blueprints or navigate to a destination without a map.

    The consequences of living without a budget are costly. Americans who don’t budget are three times more likely to carry credit card debt, twice as likely to have insufficient emergency savings, and significantly less likely to achieve major financial goals like homeownership or comfortable retirement. The lack of a budget creates financial stress, missed opportunities, and a perpetual feeling of being behind financially regardless of income level.

    Here’s the powerful truth: budgeting isn’t about restriction—it’s about permission and freedom. A well-designed budget doesn’t tell you what you can’t do; it shows you what you can do. It gives you permission to spend on things that matter while eliminating waste on things that don’t. It transforms vague financial anxiety into concrete action plans. Most importantly, budgeting creates wealth regardless of your income level.

    You don’t need a six-figure salary to build wealth through budgeting. People earning $40,000 with disciplined budgets often accumulate more wealth than people earning $120,000 who let money slip through their fingers. The key isn’t how much you earn—it’s how intentionally you manage what you earn.

    This comprehensive guide provides everything you need to create, implement, and maintain a budget that works for your unique life. You’ll learn why budgets fail and how to avoid those pitfalls, explore multiple budgeting methods to find your perfect fit, discover how to budget on any income level, master the psychology of spending, and build wealth-creating habits that compound over time.

    Whether you’re living paycheck to paycheck and need immediate cash flow relief, earning comfortably but wondering where it all goes, or already financially stable but want to optimize and accelerate wealth building, this guide provides the roadmap to transform your relationship with money through intentional budgeting.

    Why Most Budgets Fail (And How to Succeed)

    Understanding why budgets typically fail is the first step to creating one that actually works.

    The Seven Deadly Budget Sins

    Sin 1: Making It Too Complicated

    The mistake:

    • Tracking every penny across 40+ categories
    • Complex spreadsheets requiring hours monthly
    • Micromanaging insignificant expenses
    • Analysis paralysis preventing action

    Why it fails:
    Complexity creates friction. The more complicated your budget, the less likely you’ll maintain it. Life gets busy, and the 2-hour monthly budget review gets skipped, then the whole system collapses.

    The solution:
    Start simple with 5-10 major categories. You can always add detail later, but simplicity ensures consistency.

    Sin 2: Being Unrealistically Restrictive

    The mistake:

    • Cutting all enjoyment spending to $0
    • Allowing no margin for life’s pleasures
    • Creating punishment-based budget
    • Expecting perfection from day one

    Why it fails:
    Extreme restriction triggers rebellion. Just like crash diets, overly restrictive budgets lead to “budget binges” where you give up and overspend dramatically.

    The solution:
    Include guilt-free spending money. Budget for entertainment, hobbies, dining out—the things that make life enjoyable. Sustainable budgets balance today’s quality of life with tomorrow’s financial goals.

    Sin 3: Forgetting Irregular Expenses

    The mistake:

    • Only budgeting monthly recurring bills
    • Forgetting annual or quarterly expenses
    • Being surprised by predictable costs
    • Using credit cards for “unexpected” regular expenses

    Why it fails:
    Car insurance due twice yearly, holiday gifts, annual subscriptions, and car maintenance are predictable but irregular. When these aren’t budgeted, they feel like emergencies and derail your budget.

    The solution:
    Create sinking funds—monthly savings for irregular expenses. Divide annual costs by 12 and save that amount monthly.

    Example:

    • Car insurance: $1,200/year ÷ 12 = $100/month
    • Holiday gifts: $600/year ÷ 12 = $50/month
    • Car maintenance: $1,200/year ÷ 12 = $100/month

    Sin 4: Not Involving Your Partner

    The mistake:

    • Creating budget alone in dual-income household
    • Imposing budget on partner without input
    • Not communicating about money regularly
    • Having different financial priorities

    Why it fails:
    Budgets require household alignment. One person budgeting while the other spends freely creates resentment and failure.

    The solution:
    Monthly budget meetings with your partner. Both contribute to creating the budget. Both understand and agree to the plan. Both share the goal of financial success.

    Sin 5: Setting It and Forgetting It

    The mistake:

    • Creating budget in January, never reviewing
    • Not tracking actual spending against budget
    • Failing to adjust when life changes
    • No accountability or monitoring

    Why it fails:
    Life is dynamic—income changes, expenses shift, goals evolve. Static budgets become irrelevant quickly.

    The solution:
    Weekly quick-checks (15 minutes) and monthly detailed reviews (30-60 minutes). Adjust categories as needed. Budget is living document, not one-time exercise.

    Sin 6: Not Planning for Fun

    The mistake:

    • All savings, no spending
    • Depriving present self completely for future self
    • Making budget feel like punishment
    • No rewards for budget wins

    Why it fails:
    Humans need positive reinforcement. All delayed gratification and no immediate reward leads to abandonment.

    The solution:
    Budget for fun, entertainment, hobbies, and rewards. Celebrate budget milestones. Balance is key—some now, some later.

    Sin 7: Giving Up After First Slip-Up

    The mistake:

    • Perfect execution expected
    • Single overspending “ruins” entire budget
    • All-or-nothing mentality
    • Starting over constantly instead of adjusting

    Why it fails:
    Perfectionism is the enemy of progress. No one executes perfectly, especially early on.

    The solution:
    Expect imperfection. Overspent dining out this month? Adjust next month. Missed tracking for a week? Resume where you are. Progress beats perfection.

    The Psychology of Successful Budgeting

    Mindset shift required:

    From: “Budget restricts my freedom”
    To: “Budget creates my freedom by aligning spending with values”

    From: “Budget is punishment for past mistakes”
    To: “Budget is plan for future success”

    From: “Budget means I can’t have what I want”
    To: “Budget shows me how to get what I truly want”

    From: “Budgeting is deprivation”
    To: “Budgeting is optimization”

    The truth about budgets and freedom:

    Without budget: Money controls you (react to bills, stress about spending, wonder where it went)

    With budget: You control money (proactive decisions, confidence in spending, direct money toward goals)

    Paradox: The more structured your budget, the more freedom you actually have. When every dollar has a purpose, you can spend guilt-free within those purposes.

    Understanding Your Money: Income and Expenses Audit

    Before creating a budget, you need clear understanding of your current financial reality.

    Calculating Your True Income

    Gross vs Net Income:

    Gross income: Total earnings before deductions
    Net income (take-home): What actually hits your bank account after taxes and deductions

    Budget with net income only. You can’t spend money that never reaches you.

    All income sources:

    Primary employment:

    • Salary/wages (use net after-tax amount)
    • Bonuses and commissions (average if irregular)
    • Overtime (only if consistent and reliable)

    Side income:

    • Freelance work
    • Gig economy earnings (Uber, DoorDash, etc.)
    • Side business revenue (minus expenses)

    Passive income:

    • Rental property (net after expenses)
    • Dividends and interest
    • Royalties or residual income

    Other income:

    • Alimony or child support
    • Social Security or pension
    • Regular gifts or family support

    Irregular income:

    • Tax refunds (average over year)
    • Annual bonuses (average if history exists)
    • Quarterly commissions

    Calculate monthly average:

    For salaried workers: Simple—divide annual salary by 12

    For variable income:

    • Add last 12 months total income
    • Divide by 12 for monthly average
    • Use conservative estimate (better to underestimate than overestimate)

    Example variable income calculation:

    Last 12 months freelance income:
    Jan: $3,200, Feb: $2,800, Mar: $4,100, Apr: $3,600, May: $2,900, Jun: $3,800, Jul: $4,200, Aug: $3,400, Sep: $3,100, Oct: $4,500, Nov: $3,800, Dec: $5,200

    Total: $44,600
    Monthly average: $3,717
    Conservative budget amount: $3,500 (slightly under average for safety)

    Tracking Current Spending: The 30-Day Challenge

    You can’t manage what you don’t measure. Before creating a budget, track every dollar for 30 days.

    How to track:

    Manual method:

    • Notebook or notes app
    • Write down every expense immediately
    • Categorize weekly
    • Total monthly

    App method:

    • Mint, YNAB, EveryDollar, Personal Capital
    • Connect bank accounts for automatic tracking
    • Review and categorize regularly
    • Analyze patterns monthly

    Hybrid method:

    • Apps for regular bills and card purchases
    • Manual logging for cash spending
    • Weekly reconciliation

    What to track:

    Fixed expenses (same every month):

    • Rent/mortgage
    • Car payment
    • Insurance premiums
    • Subscriptions and memberships
    • Loan payments

    Variable expenses (change monthly):

    • Utilities
    • Groceries
    • Gas/transportation
    • Dining out
    • Entertainment
    • Shopping/personal care

    Irregular expenses (not every month):

    • Car maintenance
    • Medical expenses
    • Gifts
    • Travel
    • Home repairs

    During 30-day tracking period:

    Don’t change spending behavior yet—track normal patterns
    Categorize everything—even small purchases
    Include cash spending—often the invisible money
    Note emotional spending—what triggered purchases

    Analyzing Spending Patterns

    After 30 days, analyze your data:

    Calculate totals by category:

    Housing: $______
    Transportation: $______
    Food (groceries + dining): $______
    Utilities: $______
    Insurance: $______
    Debt payments: $______
    Entertainment: $______
    Personal care: $______
    Shopping: $______
    Subscriptions: $______
    Miscellaneous: $______

    Total monthly spending: $______

    Critical questions to ask:

    Where is money going that surprises you?
    Most people discover “invisible” spending—$300/month on coffee, $200 on subscriptions they don’t use, $400 on impulse Amazon purchases.

    What percentage goes to needs vs wants?
    Needs: Housing, food, utilities, transportation, insurance, debt minimums
    Wants: Entertainment, dining out, hobbies, luxuries

    Which expenses align with your values and which don’t?
    You might spend $200/month on streaming services you rarely watch but only $50/month on hobbies you love. Budgeting realigns spending with actual values.

    Which expenses could be reduced or eliminated without impacting quality of life?
    Often you’ll find spending that provides little satisfaction but significant cost—prime candidates for cutting.

    Example analysis revelation:

    Sarah tracked spending for 30 days and discovered:

    • $340/month dining out (mostly fast food from exhaustion)
    • $180/month on subscriptions (gym she never uses, streaming services overlapping)
    • $120/month on convenience store purchases
    • Total waste: $640/month = $7,680/year

    These weren’t conscious choices—just money slipping away. Awareness created opportunity to redirect $640/month toward goals that actually mattered to her.

    Creating Spending Categories That Work

    Major categories (most budgets need 8-15 total):

    Housing:

    • Rent/mortgage
    • Property taxes
    • HOA fees
    • Home maintenance
    • Renter’s/homeowner’s insurance

    Transportation:

    • Car payment
    • Auto insurance
    • Gas
    • Maintenance and repairs
    • Public transit
    • Parking

    Food:

    • Groceries
    • Dining out
    • Coffee shops
    • Work lunches

    Utilities:

    • Electric
    • Gas/heat
    • Water/sewer
    • Internet
    • Phone
    • Trash

    Insurance:

    • Health insurance
    • Life insurance
    • Disability insurance
    • Other insurance

    Debt Payments:

    • Credit cards
    • Student loans
    • Personal loans
    • Other debt

    Savings:

    • Emergency fund
    • Retirement contributions
    • Other savings goals

    Personal:

    • Clothing
    • Personal care (haircuts, etc.)
    • Medical copays and medications
    • Gym/fitness

    Entertainment:

    • Subscriptions (streaming, etc.)
    • Hobbies
    • Movies, concerts, events
    • Books, games

    Giving:

    • Charitable donations
    • Gifts for others
    • Religious contributions

    Miscellaneous:

    • Everything else
    • Buffer category
    • Unexpected expenses

    Customize for your life:

    Parents add: Childcare, kids’ activities, school expenses
    Pet owners add: Pet food, vet, grooming
    Students add: Tuition, books, supplies
    Business owners add: Business expenses (separate from personal)

    Category granularity decision:

    Too broad: “Spending” = $3,000 (not useful)
    Too granular: 40+ categories including “fast food,” “sit-down restaurants,” “coffee,” “work lunches” separately (too complex)
    Just right: “Food” with subcategories “Groceries” and “Dining Out” (manageable and informative)

    The 50/30/20 Budget Method: Simple and Effective

    Perfect for beginners and those who want straightforward approach without complexity.

    How 50/30/20 Works

    Divide after-tax income into three buckets:

    50% to Needs (Essential Expenses)

    Required for basic living. If you stopped paying, you’d face serious consequences.

    Includes:

    • Housing (rent/mortgage, utilities, insurance)
    • Transportation (car payment, insurance, gas, maintenance)
    • Groceries
    • Minimum debt payments
    • Essential insurance (health, auto, life)
    • Basic clothing
    • Essential personal care

    Does NOT include:

    • Premium cable/streaming packages
    • Dining out
    • New clothes beyond essentials
    • Luxury transportation

    30% to Wants (Discretionary Spending)

    Things that enhance life but aren’t required for basic functioning.

    Includes:

    • Dining out and entertainment
    • Hobbies and recreation
    • Subscriptions (streaming, gym, etc.)
    • Vacations and travel
    • Shopping beyond essentials
    • Upgraded phone or tech
    • Premium versions of necessities

    Key distinction: Groceries = need. Dining out = want. Basic phone = need. Latest iPhone = want.

    20% to Savings and Extra Debt Payments

    Building financial security and eliminating debt beyond minimums.

    Includes:

    • Emergency fund contributions
    • Retirement savings (beyond employer match)
    • Other savings goals
    • Extra principal payments on debt
    • Investments

    Example 50/30/20 budget:

    Monthly net income: $5,000

    Needs (50% = $2,500):

    • Rent: $1,200
    • Utilities: $150
    • Car payment: $300
    • Car insurance: $100
    • Gas: $150
    • Groceries: $400
    • Health insurance: $200
      Total: $2,500

    Wants (30% = $1,500):

    • Dining out: $400
    • Entertainment: $200
    • Gym membership: $50
    • Streaming services: $45
    • Shopping/personal: $300
    • Hobbies: $200
    • Fun/miscellaneous: $305
      Total: $1,500

    Savings/Debt (20% = $1,000):

    • Emergency fund: $400
    • Retirement (401k): $300
    • Extra credit card payment: $200
    • Savings for vacation: $100
      Total: $1,000

    Advantages of 50/30/20

    Simplicity:
    Only three categories to manage
    Easy to calculate and implement
    No complex spreadsheets required
    Can start immediately

    Flexibility within structure:
    Provides guardrails without micromanaging
    Discretion within each bucket
    Adaptable to different life situations
    Scales to any income level

    Automatic balance:
    Forces mindful spending on wants
    Ensures sufficient savings
    Prevents need-creep (needs expanding to fill income)
    Maintains quality of life while building wealth

    Easy to communicate:
    Partners quickly understand
    No arguments about details
    Clear agreed-upon framework
    Objective spending limits

    Adjusting 50/30/20 for Your Situation

    50/30/20 is guideline, not law. Adjust based on reality:

    High cost-of-living areas:

    Housing alone might be 35-40% of income in expensive cities
    Adjust to 60/20/20 or 55/25/20
    Maintain 20% savings minimum if possible

    Example: San Francisco on $6,000/month:

    • 60% needs ($3,600): Rent $2,400, other $1,200
    • 20% wants ($1,200): Scaled back but present
    • 20% savings ($1,200): Maintained

    Aggressive debt payoff mode:

    Temporarily shift to 50/20/30
    30% to debt elimination instead of savings
    Reduce wants to accelerate debt freedom

    Example: Focused debt elimination:

    • 50% needs ($2,500)
    • 20% wants ($1,000): Reduced temporarily
    • 30% savings/debt ($1,500): Extra $500 to debt

    High earners:

    Often needs are well under 50%
    Shift to 40/30/30 or even 35/25/40
    More to savings accelerates wealth building

    Example: $10,000/month income:

    • 35% needs ($3,500): Housing and essentials
    • 25% wants ($2,500): Comfortable lifestyle
    • 40% savings ($4,000): Aggressive wealth building

    Very low income:

    May need 60-70% for needs
    Reduce wants temporarily
    Maintain minimum savings (even 10%)

    Example: $2,500/month income:

    • 65% needs ($1,625): Tight but covers essentials
    • 25% wants ($625): Modest but present
    • 10% savings ($250): Foundation for future

    The key: Adjust percentages to fit reality while maintaining the principle of balanced allocation between present needs, present enjoyment, and future security.

    Implementing 50/30/20

    Step 1: Calculate your three bucket amounts

    Monthly net income: $______
    50% (Needs): $______ × 0.50 = $______
    30% (Wants): $______ × 0.30 = $______
    20% (Savings/Debt): $______ × 0.20 = $______

    Step 2: Categorize your current expenses

    Review your 30-day tracking
    Assign each expense to Need, Want, or Savings/Debt
    Calculate totals in each category
    Compare to your target percentages

    Step 3: Identify gaps and adjustments

    If needs exceed 50%:

    • Can you reduce housing (roommate, smaller place)?
    • Can you reduce transportation (cheaper car, public transit)?
    • Can you reduce utilities (conservation, cheaper plans)?
    • If truly unavoidable, adjust percentages proportionally

    If wants exceed 30%:

    • Which wants provide least satisfaction? (Cut these)
    • Which wants could be reduced without elimination?
    • Which wants are actually mis-categorized needs?
    • Be honest about true necessities vs luxuries

    If savings below 20%:

    • This is the most important bucket to protect
    • Cut wants before cutting savings
    • Increase income if expenses truly can’t be reduced
    • Even 10% is better than 0% while working toward 20%

    Step 4: Set up tracking system

    Simple approach:
    Three separate bank accounts or tracking categories
    Manually allocate each paycheck into three buckets
    Spend only from designated bucket

    Advanced approach:
    Budgeting app with 50/30/20 categories
    Automatic categorization of transactions
    Real-time tracking of bucket spending
    Alerts when approaching limits

    Step 5: Review and adjust monthly

    First week of month: Review previous month spending
    Categorize any uncategorized expenses
    Calculate actual percentages achieved
    Adjust current month if needed
    Celebrate successes, learn from overspending

    Zero-Based Budgeting: Every Dollar Has a Job

    Most detailed budgeting method—every dollar of income assigned to specific category before the month begins.

    How Zero-Based Budgeting Works

    The core principle:

    Income – Expenses – Savings = Zero

    Not “spend everything to zero” but rather “assign everything to a category” (including savings categories).

    The process:

    Before the month begins:

    1. List expected income for upcoming month
    2. List all expenses and savings goals
    3. Assign every dollar to specific category
    4. Ensure total assignments equal total income
    5. Result: Zero dollars “unassigned”

    Example zero-based budget:

    Income for March:

    • Salary (after-tax): $4,500
    • Freelance income: $800
    • Total income: $5,300

    Assignments:

    Housing ($1,450):

    • Rent: $1,200
    • Renter’s insurance: $25
    • Utilities: $150
    • Internet: $75

    Transportation ($525):

    • Car payment: $275
    • Car insurance: $95
    • Gas: $120
    • Parking: $35

    Food ($650):

    • Groceries: $450
    • Dining out: $200

    Personal ($280):

    • Phone: $80
    • Gym: $45
    • Haircut: $40
    • Clothing: $65
    • Personal care: $50

    Debt ($600):

    • Student loan minimum: $250
    • Credit card minimum: $150
    • Extra credit card payment: $200

    Savings ($800):

    • Emergency fund: $400
    • Vacation fund: $150
    • Car replacement fund: $100
    • Retirement (Roth IRA): $150

    Entertainment ($350):

    • Streaming services: $35
    • Hobbies: $100
    • Social activities: $150
    • Books/media: $65

    Giving ($150):

    • Charitable donation: $100
    • Friend’s birthday gift: $50

    Irregular expenses ($245):

    • Car maintenance fund: $100
    • Medical copay fund: $75
    • Annual subscription (divided by 12): $70

    Miscellaneous/Buffer ($250):

    • Unplanned expenses: $250

    Total assigned: $5,300
    Income: $5,300
    Remaining: $0 ✓

    Advantages of Zero-Based Budgeting

    Maximum intentionality:

    Every dollar has specific purpose
    No money “leftover” to slip away
    Conscious decisions about all spending
    Forces prioritization

    Proactive planning:

    Budget created before month begins
    Prepared for upcoming expenses
    No reactive scrambling when bills due
    Aligns spending with priorities in advance

    Flexibility within structure:

    Can adjust categories mid-month
    Money can be moved between categories as needed
    Not rigid if properly implemented
    Responds to life’s changes

    Goal acceleration:

    Clear visibility into savings and goals
    Easy to see impact of spending trade-offs
    “If I reduce dining out $100, I can increase vacation fund $100”
    Motivates conscious choices

    Debt elimination power:

    Every extra dollar assigned to purpose
    Debt payoff is budgeted line item, not afterthought
    Clear tracking of debt reduction progress
    Snowball/avalanche methods easily implemented

    Zero-Based Budget Challenges

    Time intensive initially:

    First budget takes 2-3 hours to create
    Requires detail orientation
    Learning curve with tools
    May feel overwhelming at first

    Requires monthly planning:

    Can’t set-and-forget
    Must budget each month before it begins
    Income or expense changes require adjustments
    Ongoing time commitment (1 hour monthly after initial setup)

    Can be too rigid:

    Some people feel micromanaged
    Category perfectionism creates stress
    May miss forest for trees
    Potential for analysis paralysis

    Variable income complexity:

    Harder to assign every dollar when income fluctuates
    May need to budget in waves as income arrives
    Requires conservative income estimates
    More complexity than steady-salary situations

    Making Zero-Based Budgeting Work

    Start simple:

    Begin with 10-12 major categories
    Add detail as you become comfortable
    Don’t try to track every tiny category initially
    Master the basics before advancing

    Use the right tool:

    YNAB (You Need A Budget):

    • Designed specifically for zero-based budgeting
    • “Give every dollar a job” philosophy
    • Real-time tracking and adjustments
    • Mobile app for on-the-go budgeting
    • Cost: $14.99/month or $99/year

    EveryDollar:

    • Dave Ramsey’s zero-based budget app
    • Free basic version available
    • Premium version with bank connection: $79.99/year
    • Simple, user-friendly interface
    • Ramsey Baby Steps integration

    Spreadsheet (free):

    • Google Sheets or Excel templates
    • Complete customization
    • No ongoing cost
    • Requires more manual work
    • Many free templates available online

    Build buffer into budget:

    Always include “miscellaneous” or “buffer” category:

    • 3-5% of income for truly unexpected items
    • Prevents budget failure from small surprises
    • Reduces stress about perfect categorization

    Example:
    $5,000 income
    Buffer category: $200 (4%)
    Provides cushion for imperfect predictions

    Review and adjust weekly:

    Weekly 15-minute check-in:

    • Review spending so far this month
    • Adjust remaining budget if needed
    • Move money between categories as necessary
    • Stay on track before end of month

    Monthly 60-minute planning session:

    • Create next month’s budget
    • Review previous month’s results
    • Analyze patterns and trends
    • Adjust categories based on learning

    Accept imperfection:

    First 3 months are learning period
    You will mis-estimate categories
    You will need to adjust mid-month
    This is normal and expected

    The goal is progress, not perfection.

    Who Zero-Based Budgeting Suits Best

    Ideal for:

    Detail-oriented people who enjoy tracking and analysis
    Aggressive debt payers who want maximum debt elimination
    Variable income earners who need tight control
    Those who love their budgeting tool (YNAB enthusiasts, spreadsheet lovers)
    People recovering from financial crisis who need intensive structure
    Savers building toward specific goals who want clear goal tracking

    Not ideal for:

    People who hate detail and find it overwhelming
    Those wanting simple approach (50/30/20 better)
    Extremely busy individuals without time for weekly check-ins
    Casual budgeters wanting basic guidelines only
    Those triggered by “restriction” (may need different framing)

    Success story:

    Michael and Jennifer had $78,000 in debt and felt out of control.

    Implemented zero-based budgeting:

    • Spent 3 hours creating first budget together
    • Weekly 15-minute check-ins
    • Monthly planning dates
    • Used YNAB app
    • Every dollar assigned including “fun money”

    Results after 18 months:

    • Paid off $42,000 debt
    • Built $8,000 emergency fund
    • Stopped arguing about money
    • Felt in control for first time in marriage
    • “The weekly check-ins transformed our communication and our finances”

    The Envelope Budgeting System: Cash-Based Control

    Tactile, cash-based method providing physical and psychological control over spending.

    How Envelope Budgeting Works

    The classic system:

    Step 1: Determine budget categories (usually 8-15)

    Common envelope categories:

    • Groceries
    • Dining out
    • Gas
    • Entertainment
    • Personal spending
    • Clothing
    • Gifts
    • Miscellaneous

    Step 2: Calculate monthly amount for each category

    Based on your budget and tracking:

    • Groceries: $400
    • Dining out: $200
    • Gas: $120
    • Entertainment: $150
    • Personal (each spouse): $100
    • Clothing: $75
    • Gifts: $60
    • Miscellaneous: $95

    Step 3: Get cash for the month

    Total envelope spending: $1,200
    Visit bank and withdraw $1,200 cash
    Get mix of bills (twenties, tens, fives, ones)

    Step 4: Stuff envelopes

    Physical envelopes or envelope wallet
    Label each envelope with category
    Put designated cash in each envelope
    Store securely at home

    Step 5: Spend only from envelopes

    Going to grocery store? Take groceries envelope
    At restaurant? Use dining out envelope
    Getting gas? Take gas envelope
    Buying gift? Use gifts envelope

    Step 6: When envelope is empty, stop spending in that category

    Out of dining out money? Cook at home rest of month
    Groceries running low? Shop carefully, use pantry items
    Entertainment spent? Find free activities

    Step 7: Anything left over rolls to next month or goes to goals

    Groceries left $40? Add to next month or move to savings
    Consistent overfunding? Reduce category next month
    Consistent underfunding? Increase category next month

    Modern Digital Envelope Systems

    Digital envelope apps provide envelope concept without cash:

    Goodbudget:

    • Digital envelope budgeting app
    • Sync across devices with partner
    • Free version (10 envelopes)
    • Plus version ($8/month or $70/year for unlimited)
    • Visual envelope representation

    Mvelopes:

    • Comprehensive digital envelope system
    • Connects to bank accounts
    • Automatic transaction categorization
    • Premier version $6/month
    • More expensive but full-featured

    YNAB (You Need A Budget):

    • While zero-based, functions similarly to envelopes
    • “Categories” are essentially digital envelopes
    • Most popular digital envelope-style app
    • $14.99/month or $99/year

    Qube Money:

    • Digital debit card with envelope system
    • Create “qubes” (envelopes) for each category
    • Activate specific qube for each purchase
    • Real-time envelope tracking
    • Free basic version, premium $8/month

    Hybrid approach:

    Use cash envelopes for categories where you overspend:

    • Dining out (common overspending category)
    • Entertainment
    • Personal shopping

    Use digital/automatic for fixed bills:

    • Rent/mortgage
    • Utilities
    • Insurance
    • Subscriptions

    Best of both worlds—control where needed, convenience where possible.

    Why Envelope Budgeting Works (The Psychology)

    Psychological principle: Tangibility increases consciousness

    Cash is physically real:
    Watching cash leave wallet creates awareness
    Seeing envelope empty provides concrete limit
    Cannot overspend (unlike credit card)
    Physical act of handing over money makes spending “real”

    Study findings:

    People spend 12-18% less when using cash vs cards
    Cash creates psychological “pain of paying”
    Digital payments abstract spending, reducing awareness
    Envelopes make abstract budget concept tangible

    Visual progress tracking:

    See envelope fill up at month start (satisfying)
    Watch it decrease with spending (awareness)
    See what’s left at a glance (no calculation needed)
    Full envelopes at month-end feel like winning

    Natural spending limits:

    Credit cards have artificial limits ($10,000+)
    Envelopes have real limits (what’s physically there)
    Cannot overspend without conscious decision to rob another envelope
    Creates accountability partner (the empty envelope)

    Gamification element:

    Challenge: Make it to month end with money left
    Reward: Leftover money goes to goal or rolls over
    Competition: Couples can compare who stayed in budget
    Achievement: Mastering a category feels like leveling up

    Envelope System Challenges and Solutions

    Challenge 1: Requires using cash

    Modern problem:
    Many people rarely use cash
    Online shopping impossible with cash
    Some vendors don’t accept cash
    Carrying large amounts feels unsafe

    Solutions:

    • Hybrid approach (cash for temptation categories, digital for others)
    • Digital envelope apps
    • Envelope budgeting concept with debit card categories
    • Cash for in-person, card for online with manual envelope deduction

    Challenge 2: Inconvenient

    Reality:
    Must remember to bring correct envelope
    May need to go home if brought wrong envelope
    Cannot spontaneously spend if envelope is home
    Requires planning ahead

    Solutions:

    • Small envelope wallet carried always
    • Keep car envelope in car, grocery envelope in purse
    • Partner carries different envelopes (division of responsibility)
    • Relaxed enforcement (emergency borrowing from another envelope allowed occasionally)

    Challenge 3: Safety and security

    Concern:
    Carrying significant cash feels risky
    Loss or theft means lost budget
    Not all neighborhoods/situations safe for cash

    Solutions:

    • Don’t carry all envelopes at once (only take what you need)
    • Keep main envelope storage secure at home
    • Use digital for unsafe situations
    • Smaller amounts in each envelope

    Challenge 4: Doesn’t work for all categories

    Fixed bills paid automatically:
    Mortgage/rent, insurance, subscriptions
    These aren’t envelope-appropriate
    Must be handled separately

    Solutions:

    • Envelopes only for variable, discretionary spending
    • Pay fixed bills automatically
    • Hybrid system (envelopes + auto-payments)
    • Envelopes for areas needing most control

    Challenge 5: Hard to buy gifts or split purchases

    Scenarios:
    Buying $100 gift but gifts envelope only has $60
    Splitting restaurant bill with friend
    Buying both groceries and household items at same store

    Solutions:

    • “Borrow” from another envelope and note it
    • Plan gift purchases across months
    • Split transaction into correct envelopes at home
    • Miscellaneous envelope as overflow category

    Who Envelope Budgeting Suits Best

    Ideal for:

    Chronic overspeenders in specific categories (dining out, shopping, entertainment)
    Visual, tactile learners who need to see and touch
    Cash-preferring individuals comfortable with bills and coins
    Couples wanting clear, visible accountability
    Those who struggled with abstract digital budgets
    People seeking tight control in problematic spending areas
    Debt payers who need spending guardrails

    Success story:

    Amanda struggled with $400-600/month dining out despite $200 budget.

    Switched to envelope system:

    • $200 cash in dining out envelope at month start
    • When envelope empty, no more restaurants
    • First month: Envelope empty on day 18
    • Had to cook for 12 days
    • Difficult but empowering

    After 6 months:

    • Consistently stayed in $200 budget
    • Actually had money left over several months
    • Saved $2,400+ vs previous habits
    • Redirected to debt payoff
    • “Physical cash made it real. I finally had control.”

    For detailed explanation of [envelope budgeting implementation]( Envelope Budgeting System), including specific category recommendations and troubleshooting, our comprehensive guide provides step-by-step instructions.